Last update: 2025-08-03
201: Interactive Music
Lesson 6: Interactive Re-sequencing
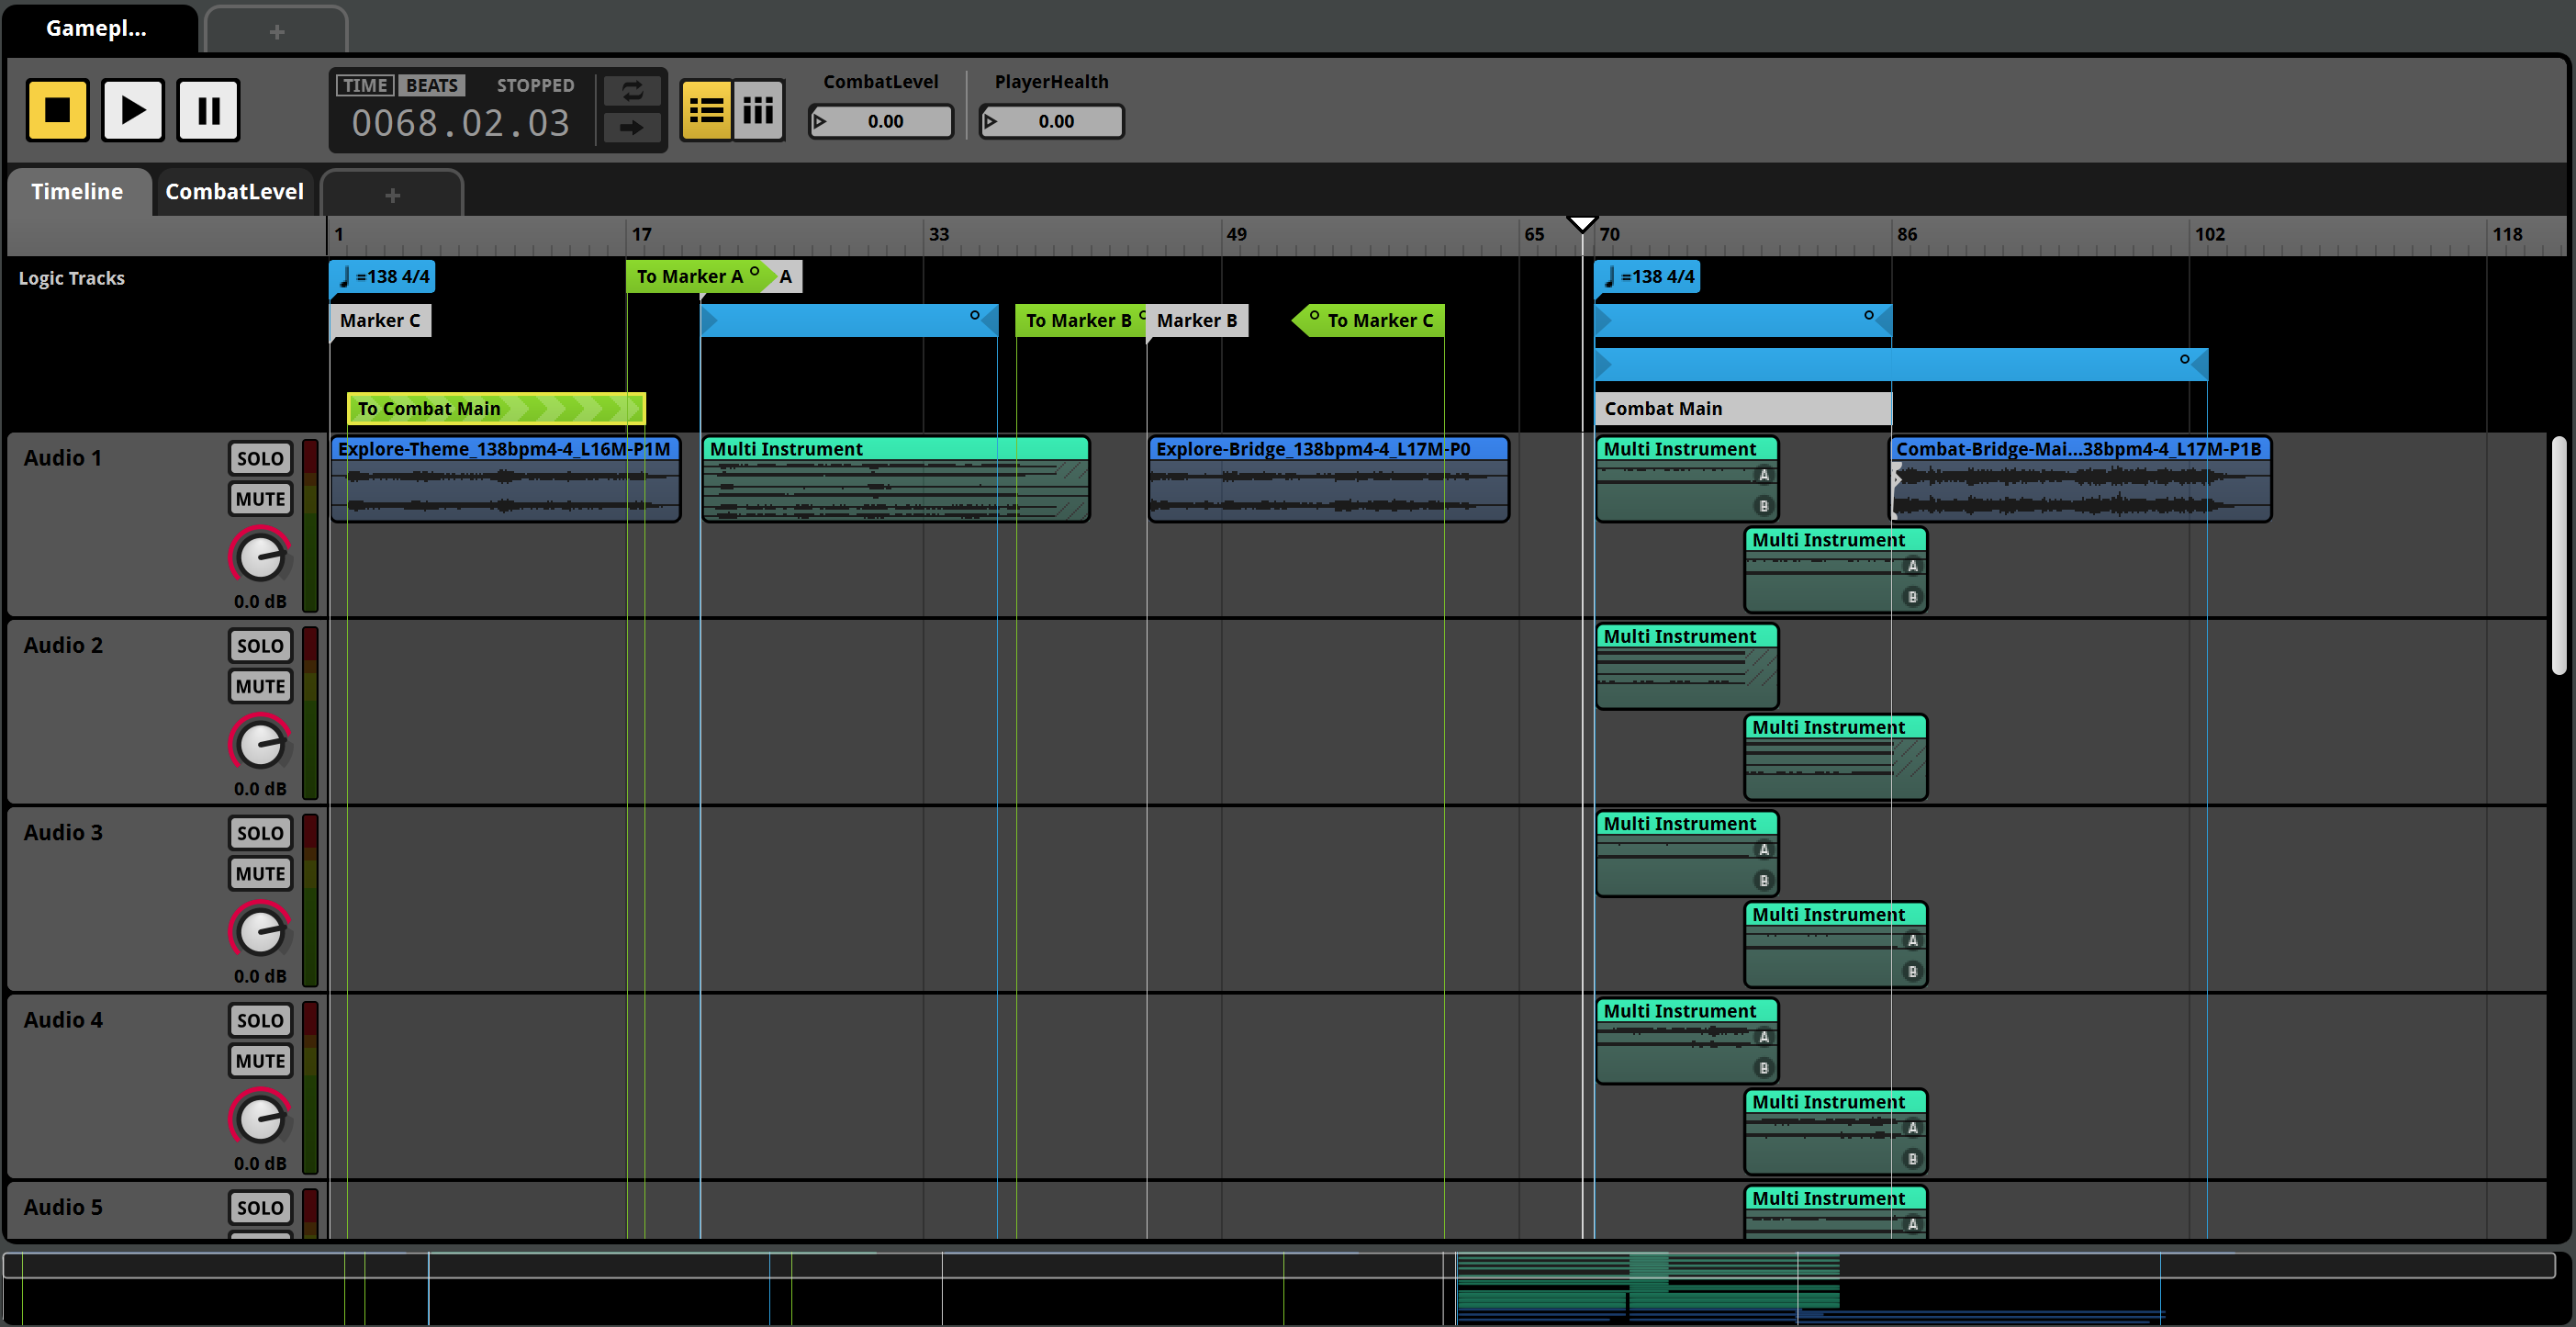
Finally we're going to handle the transition between Explore and Combat! Also we'll also introduce a Defeated segment to be played when our character is defeated, so our music will be finally complete for this tutorial.
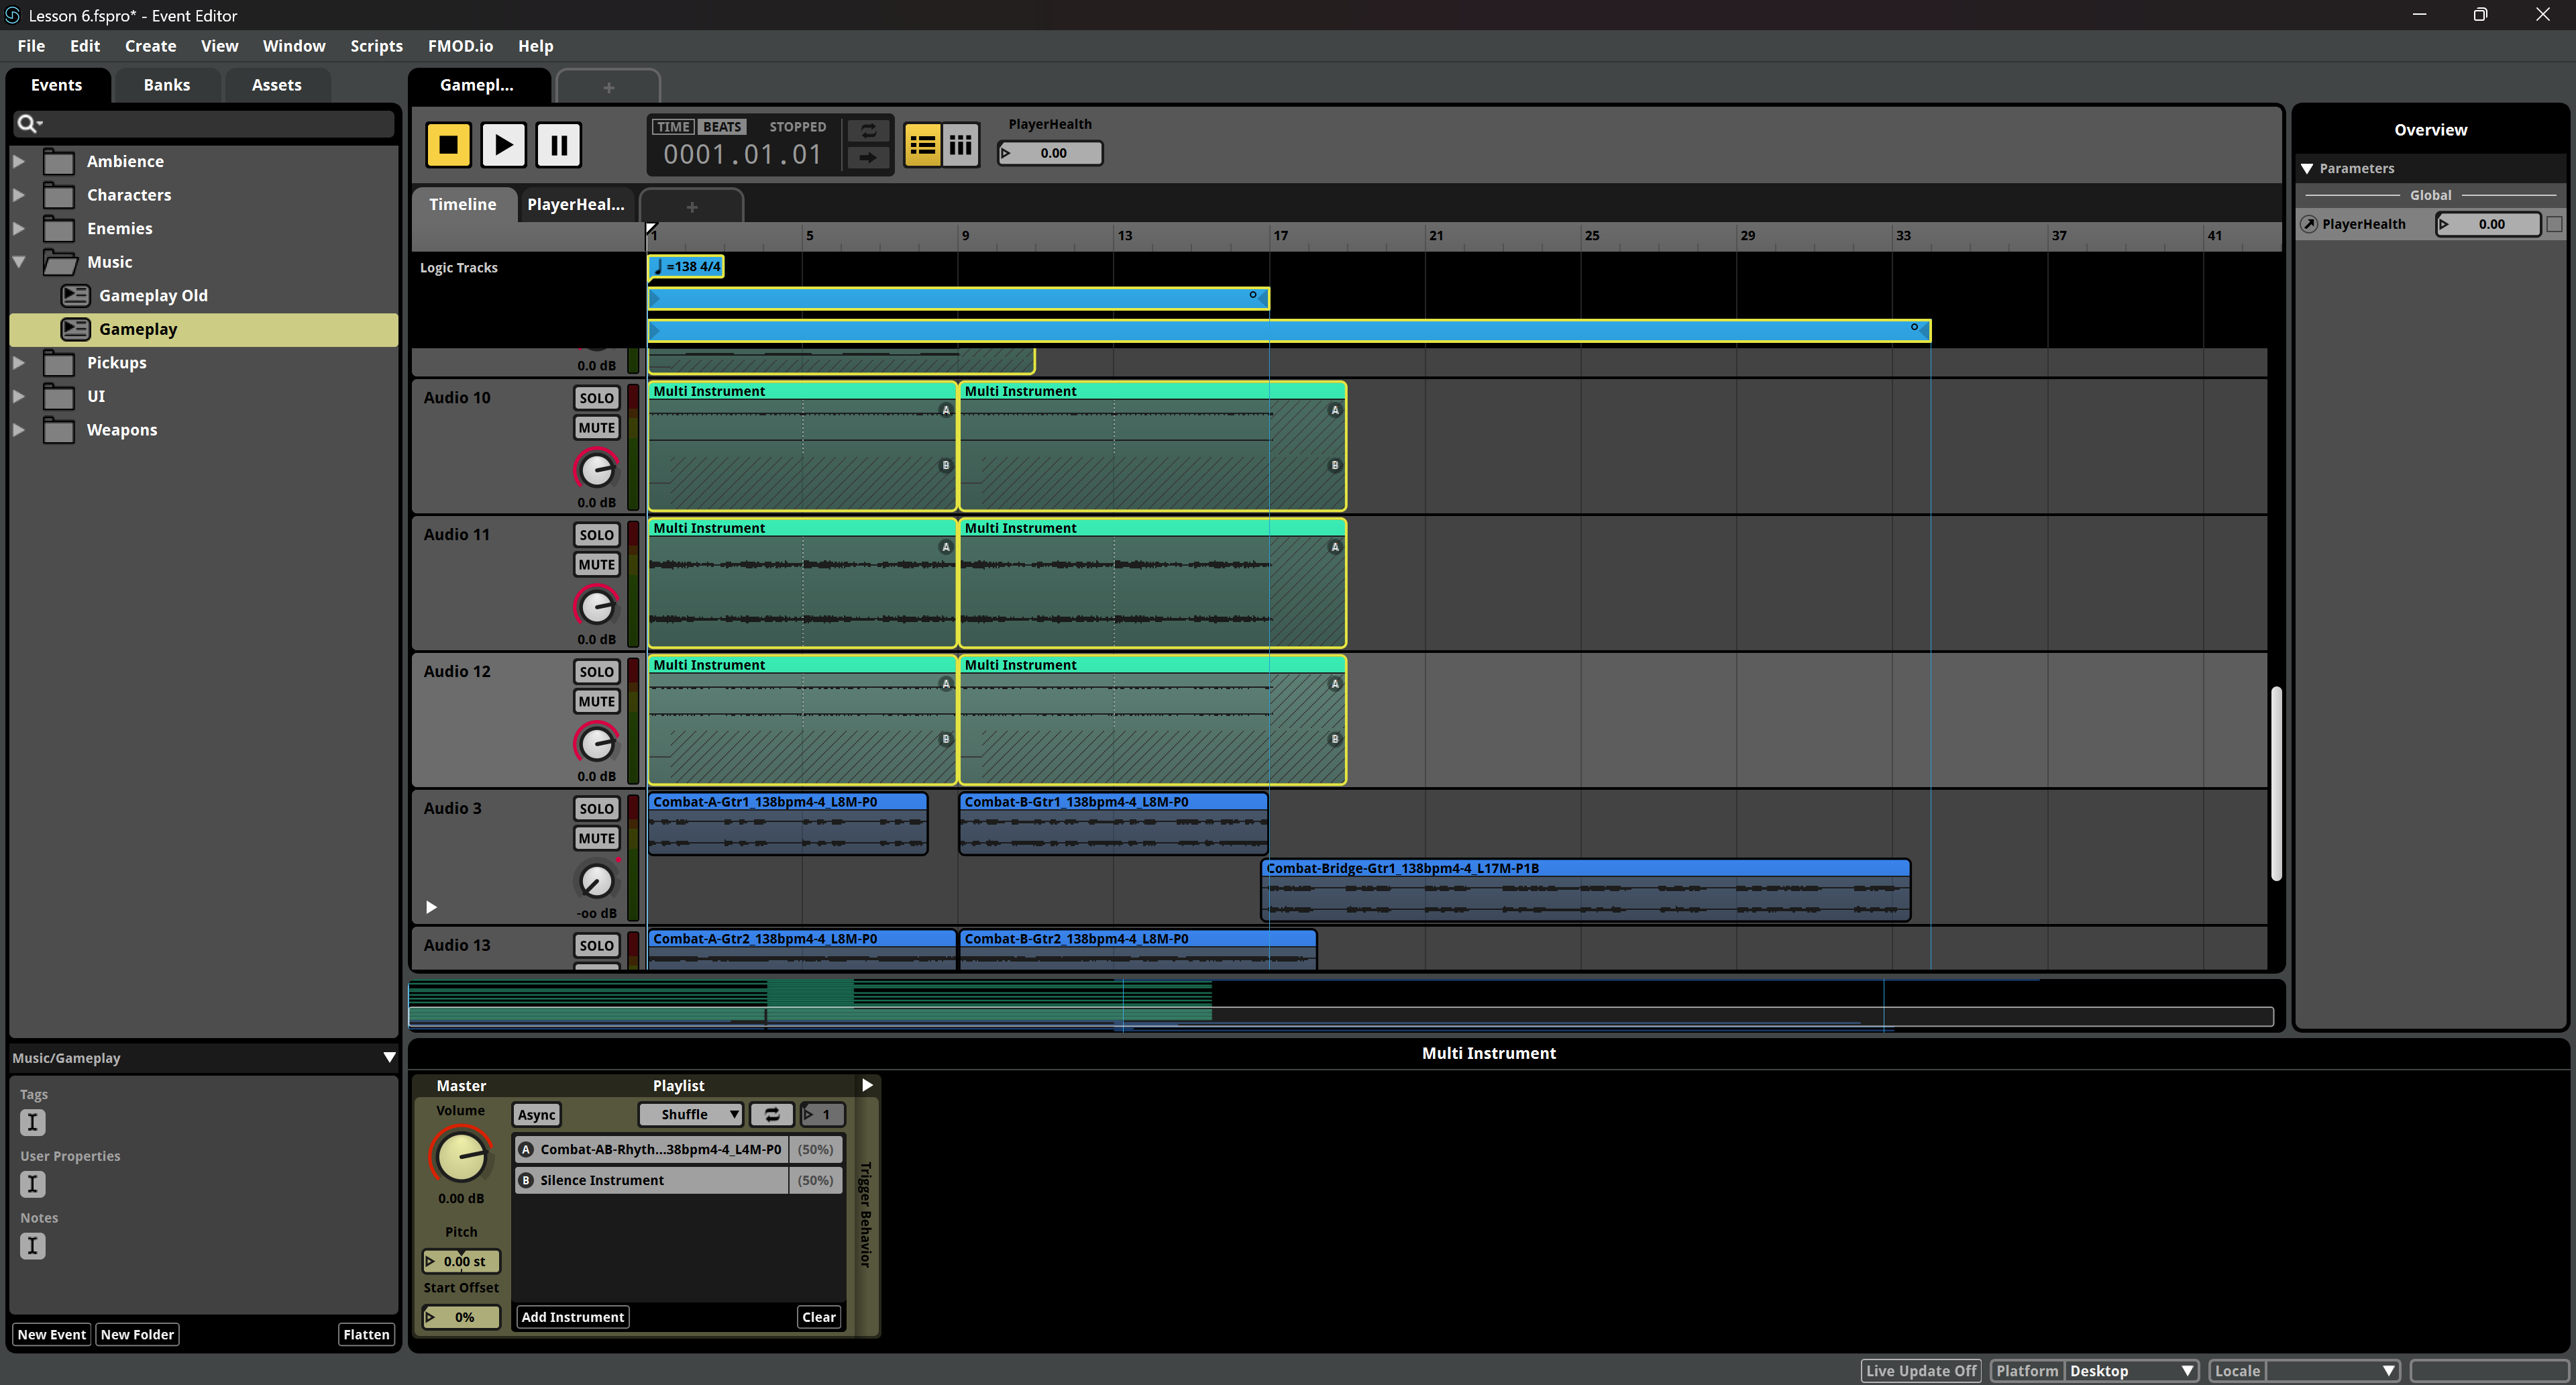
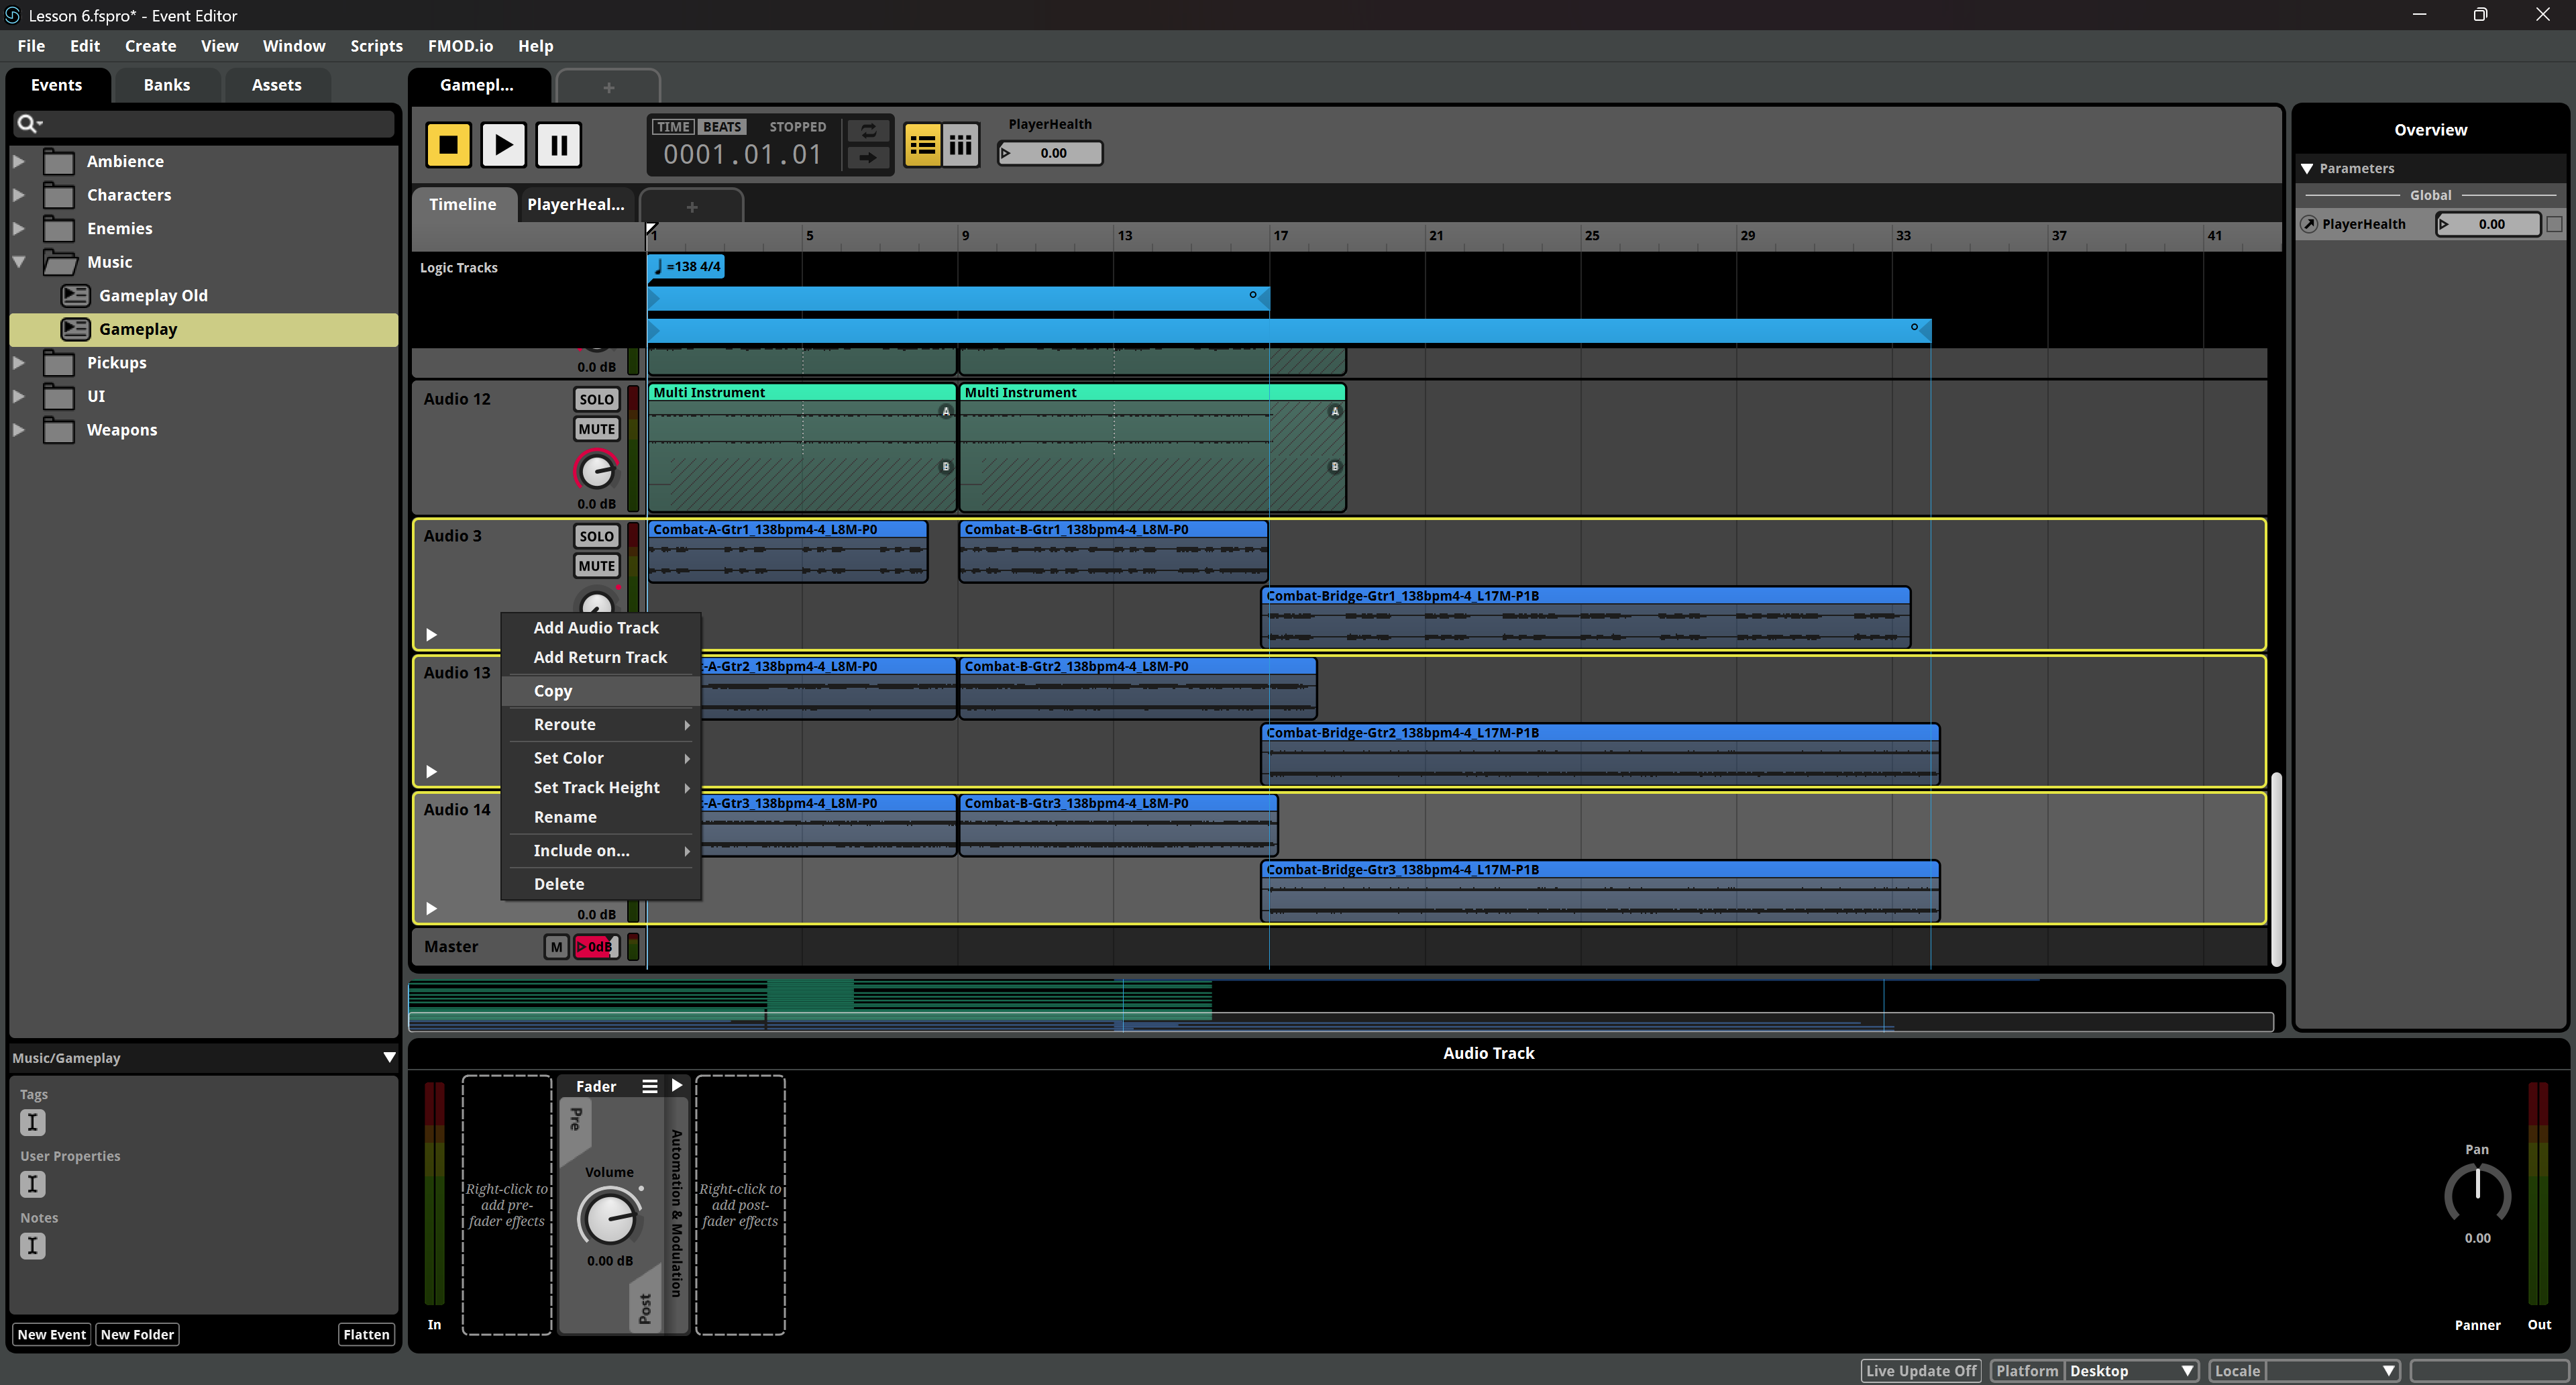
- First we'll copy & paste all the current Gameplay sequence back into the Gameplay Old event used by the Explore music. Select all tracks, including the Logic Tracks, expect the 3 guitar tracks.
- Switch to the Gameplay Old event and copy all the tracks after the current tracks.
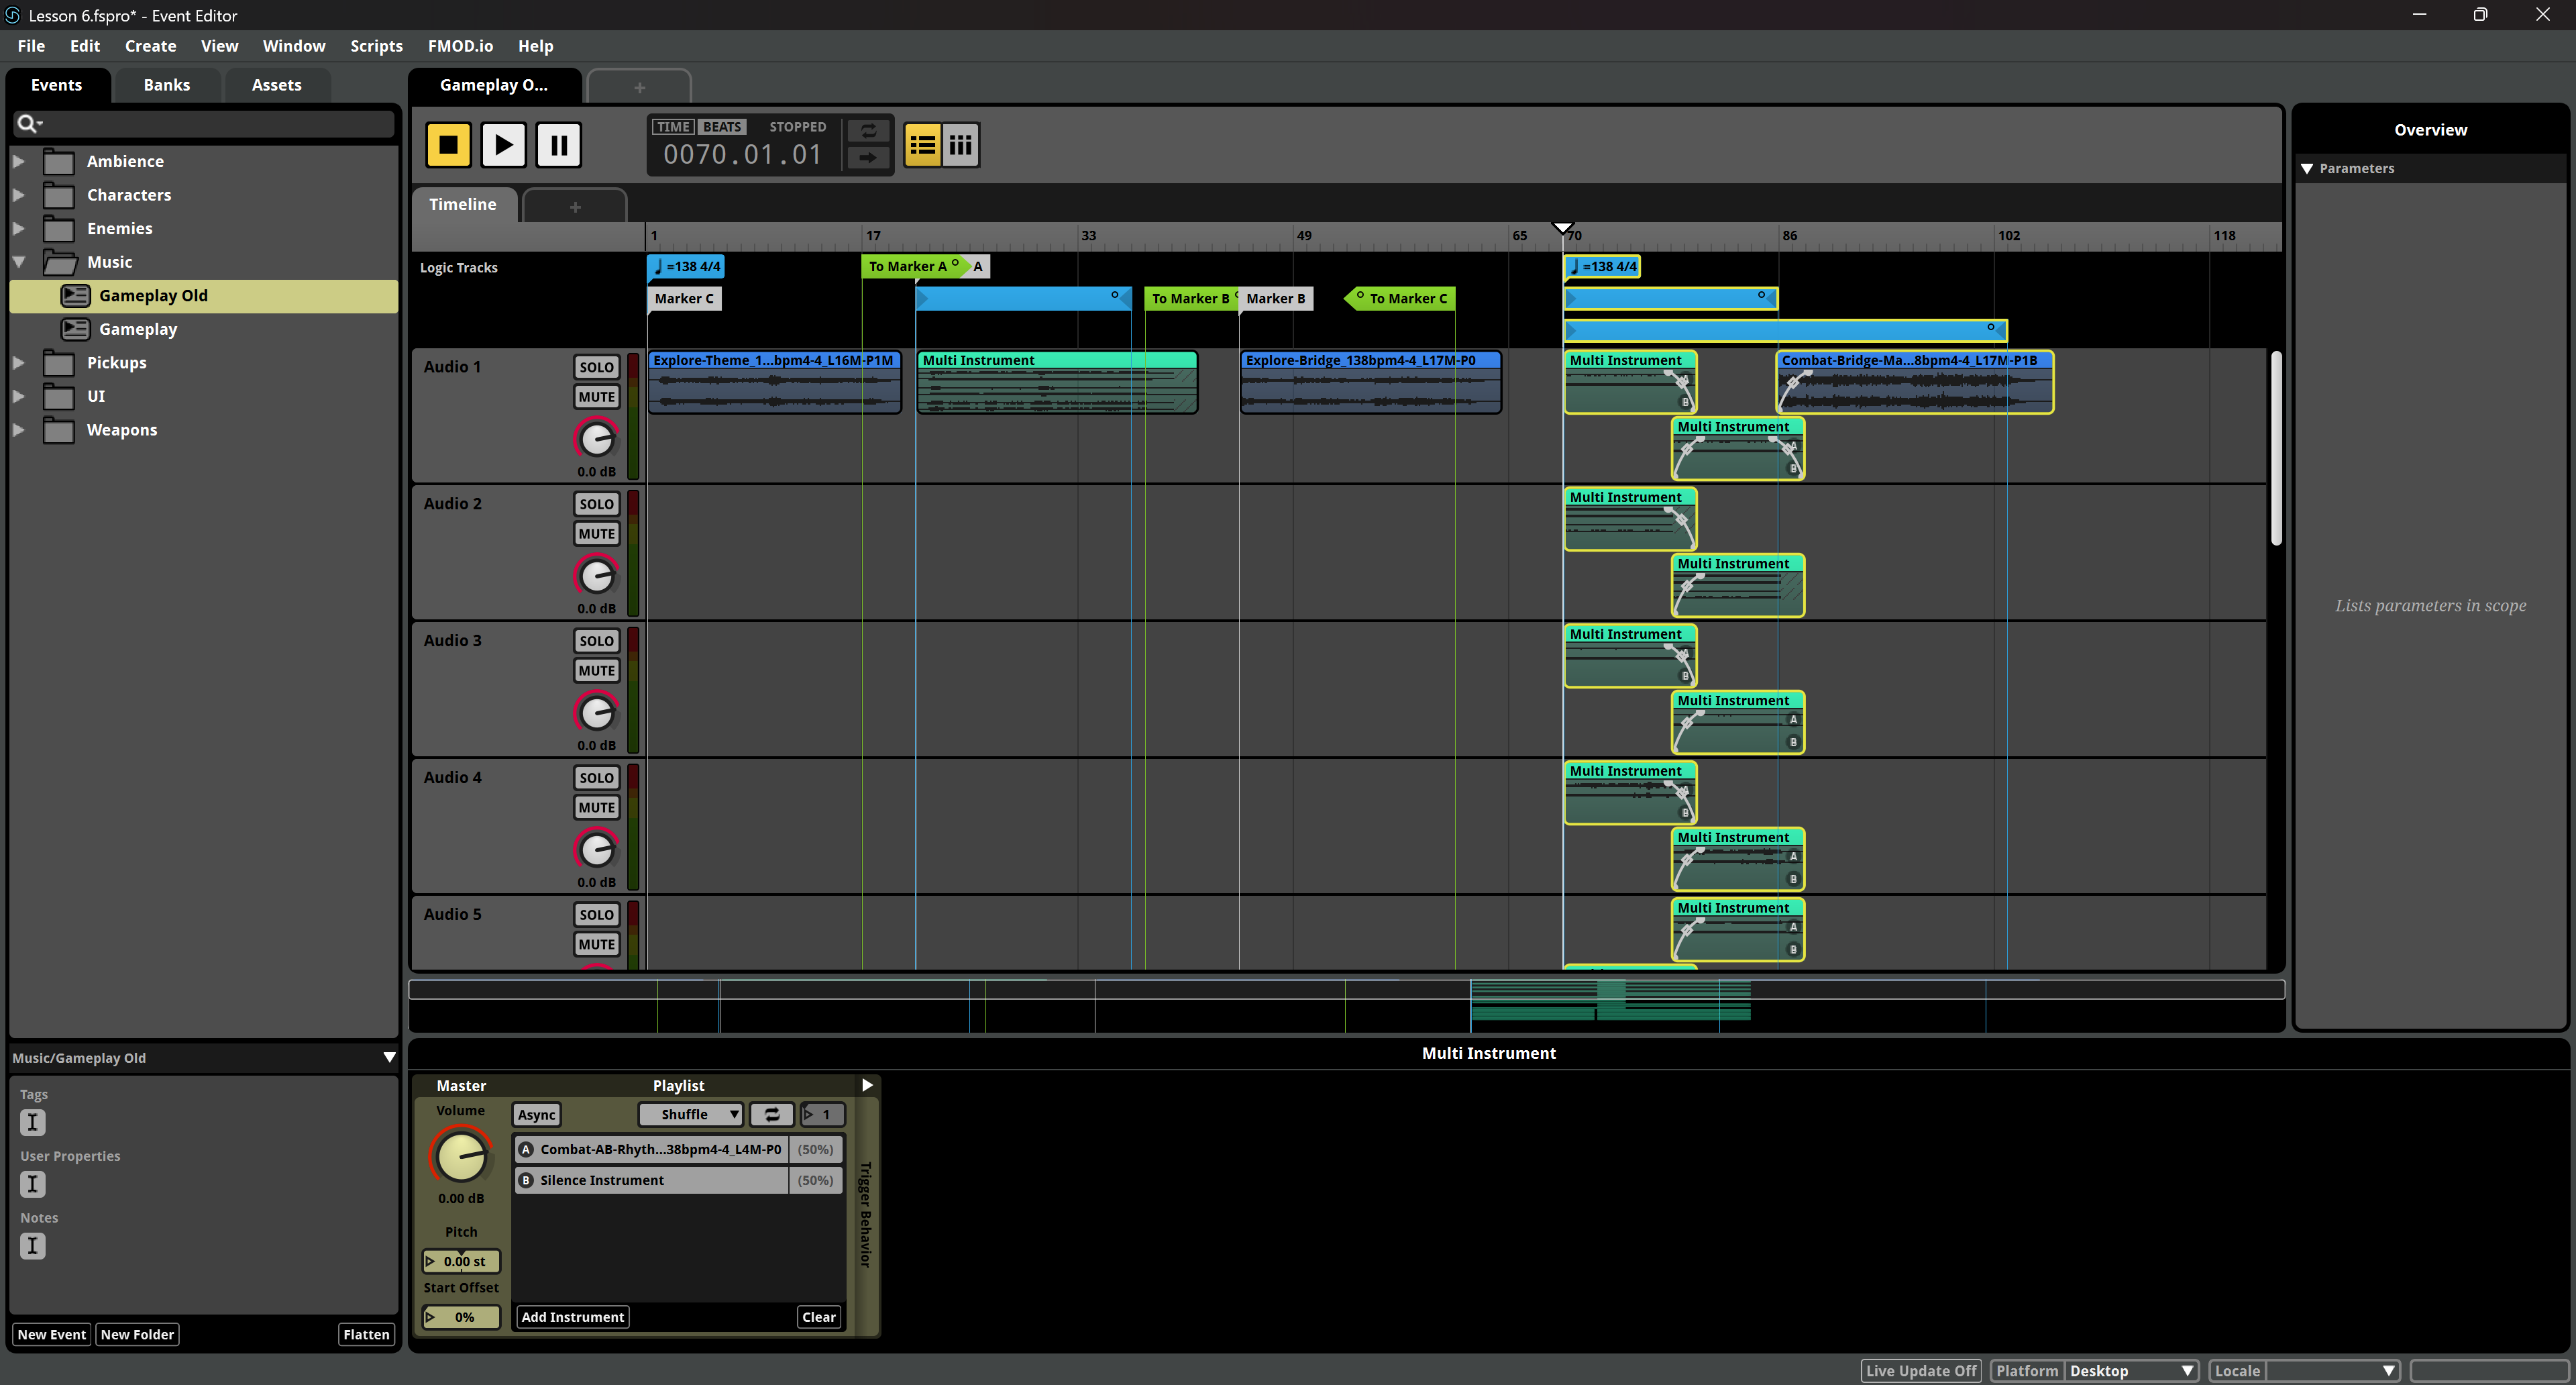
- Undo the automatic crossfades.
- Delete the last 3 tracks at t he bottom of the Gameplay Old timeline.
- Copy the last 3 guitar tracks in the Gameplay event.
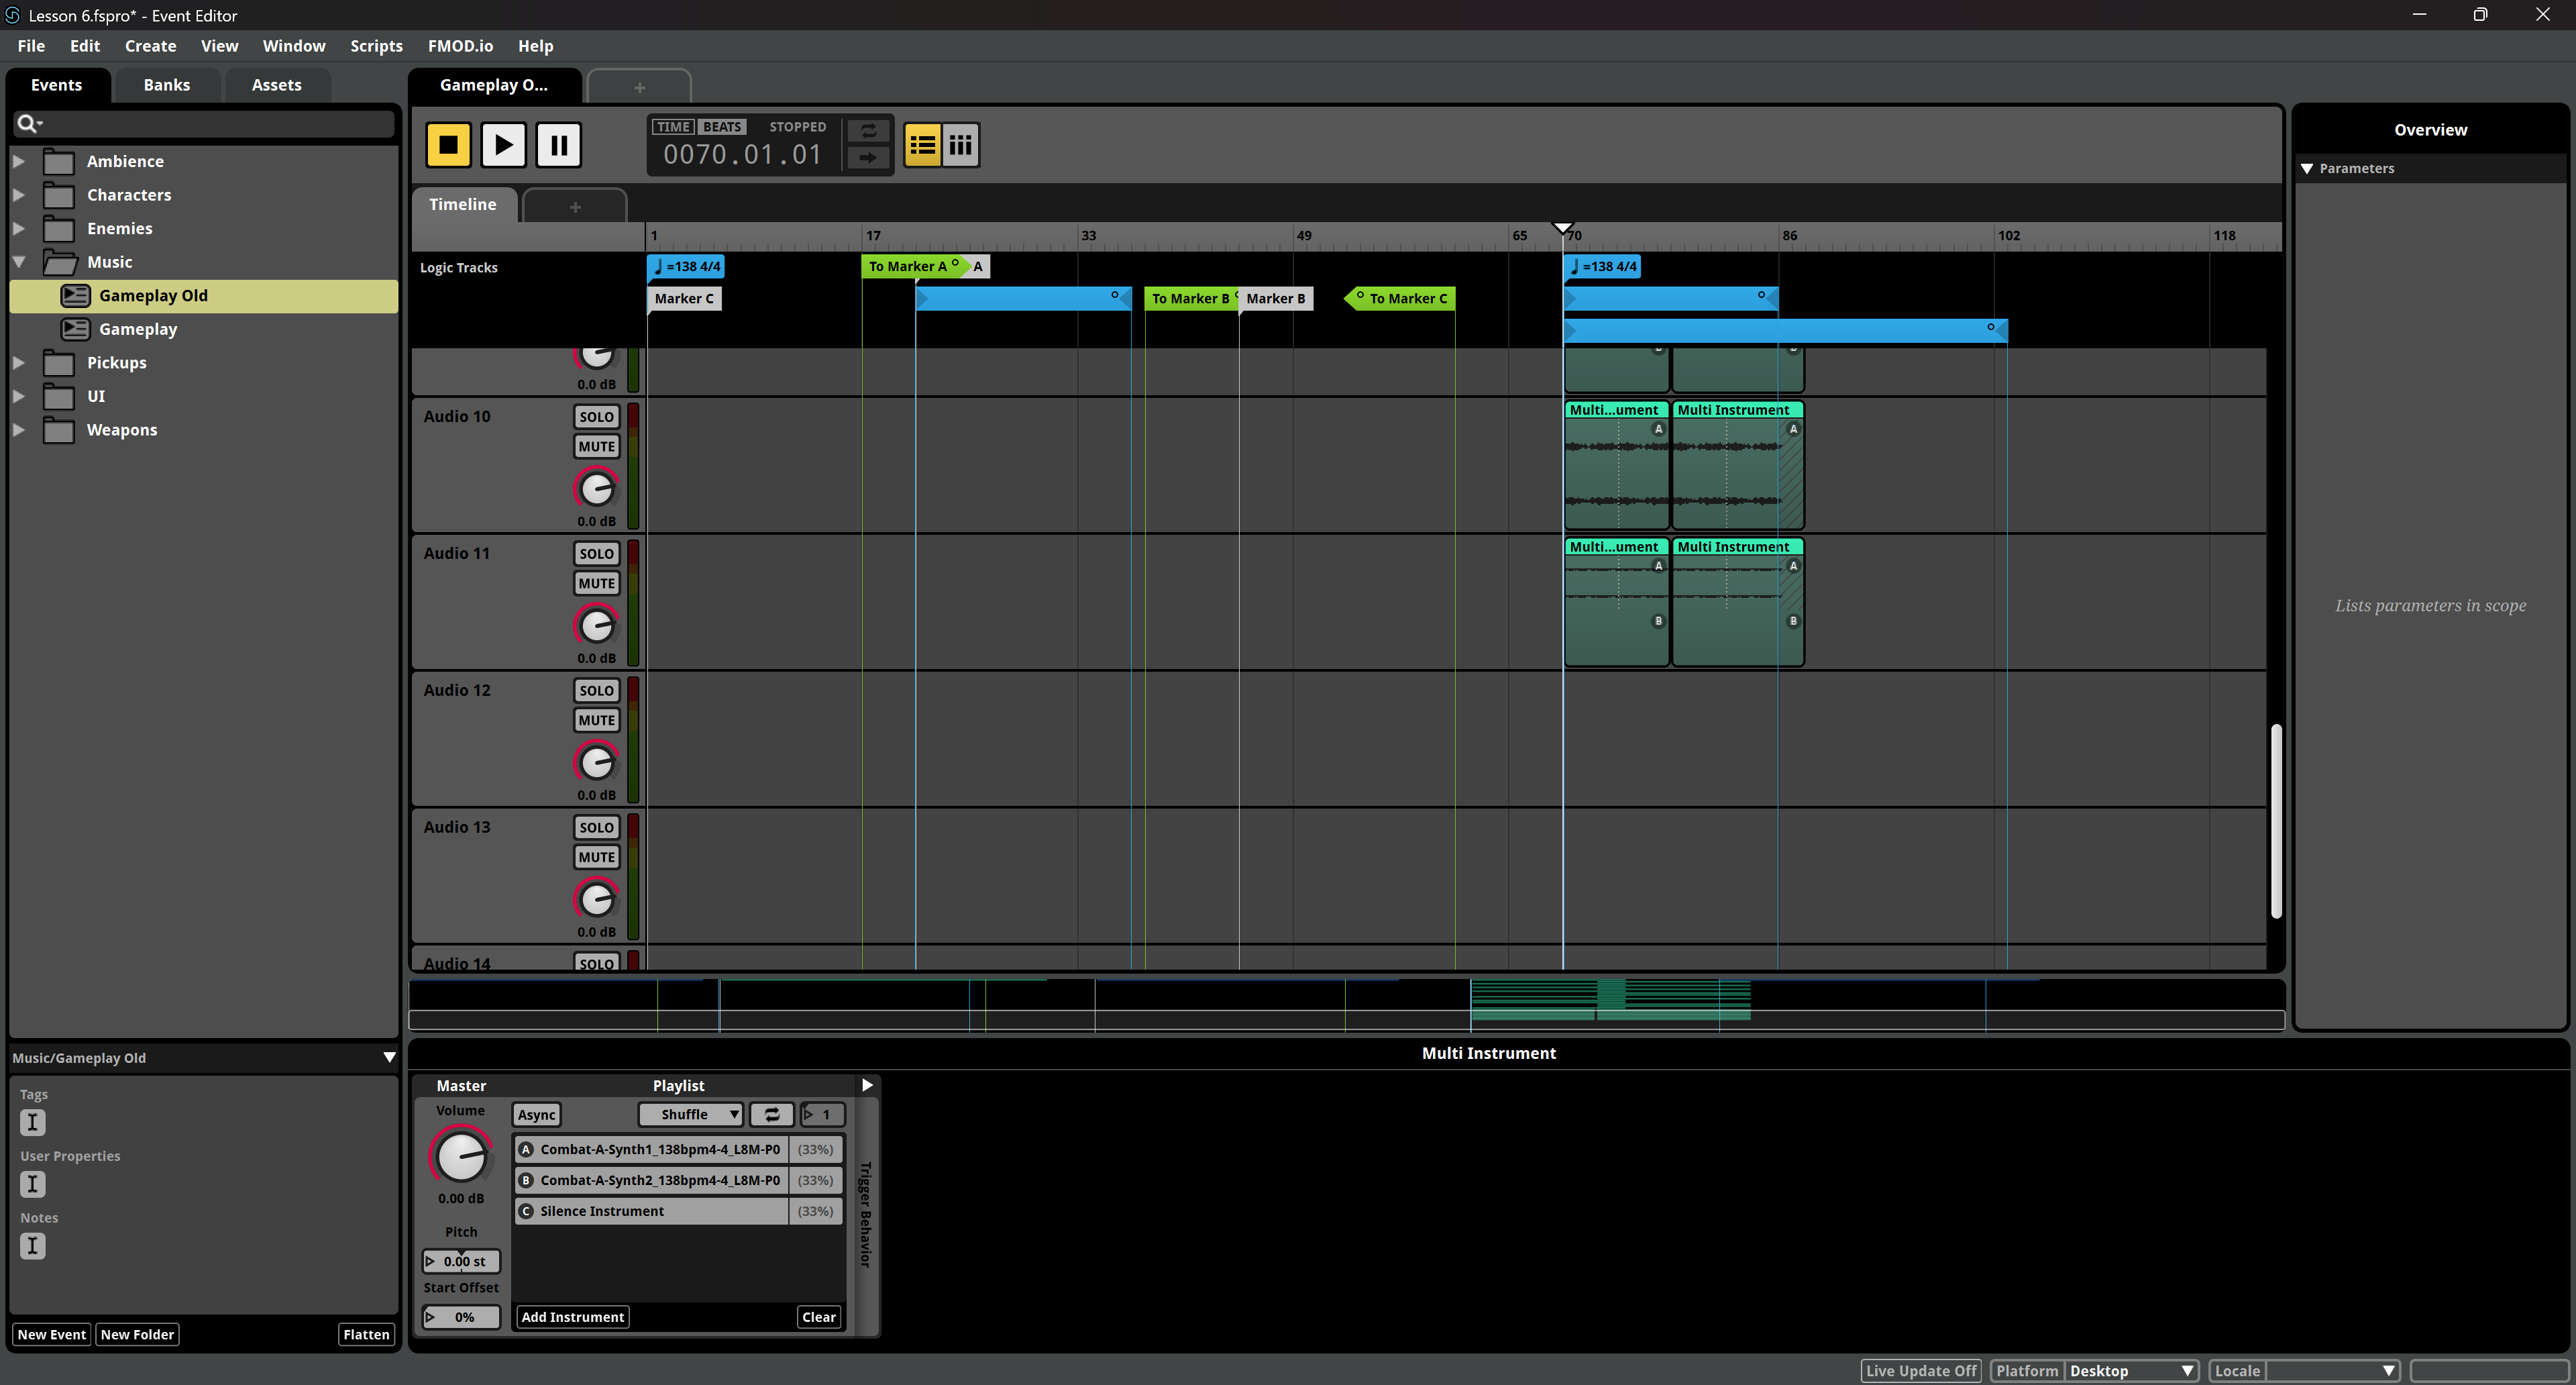
- Paste them over the last audio track. This way we'll copy the tracks with their Automation.
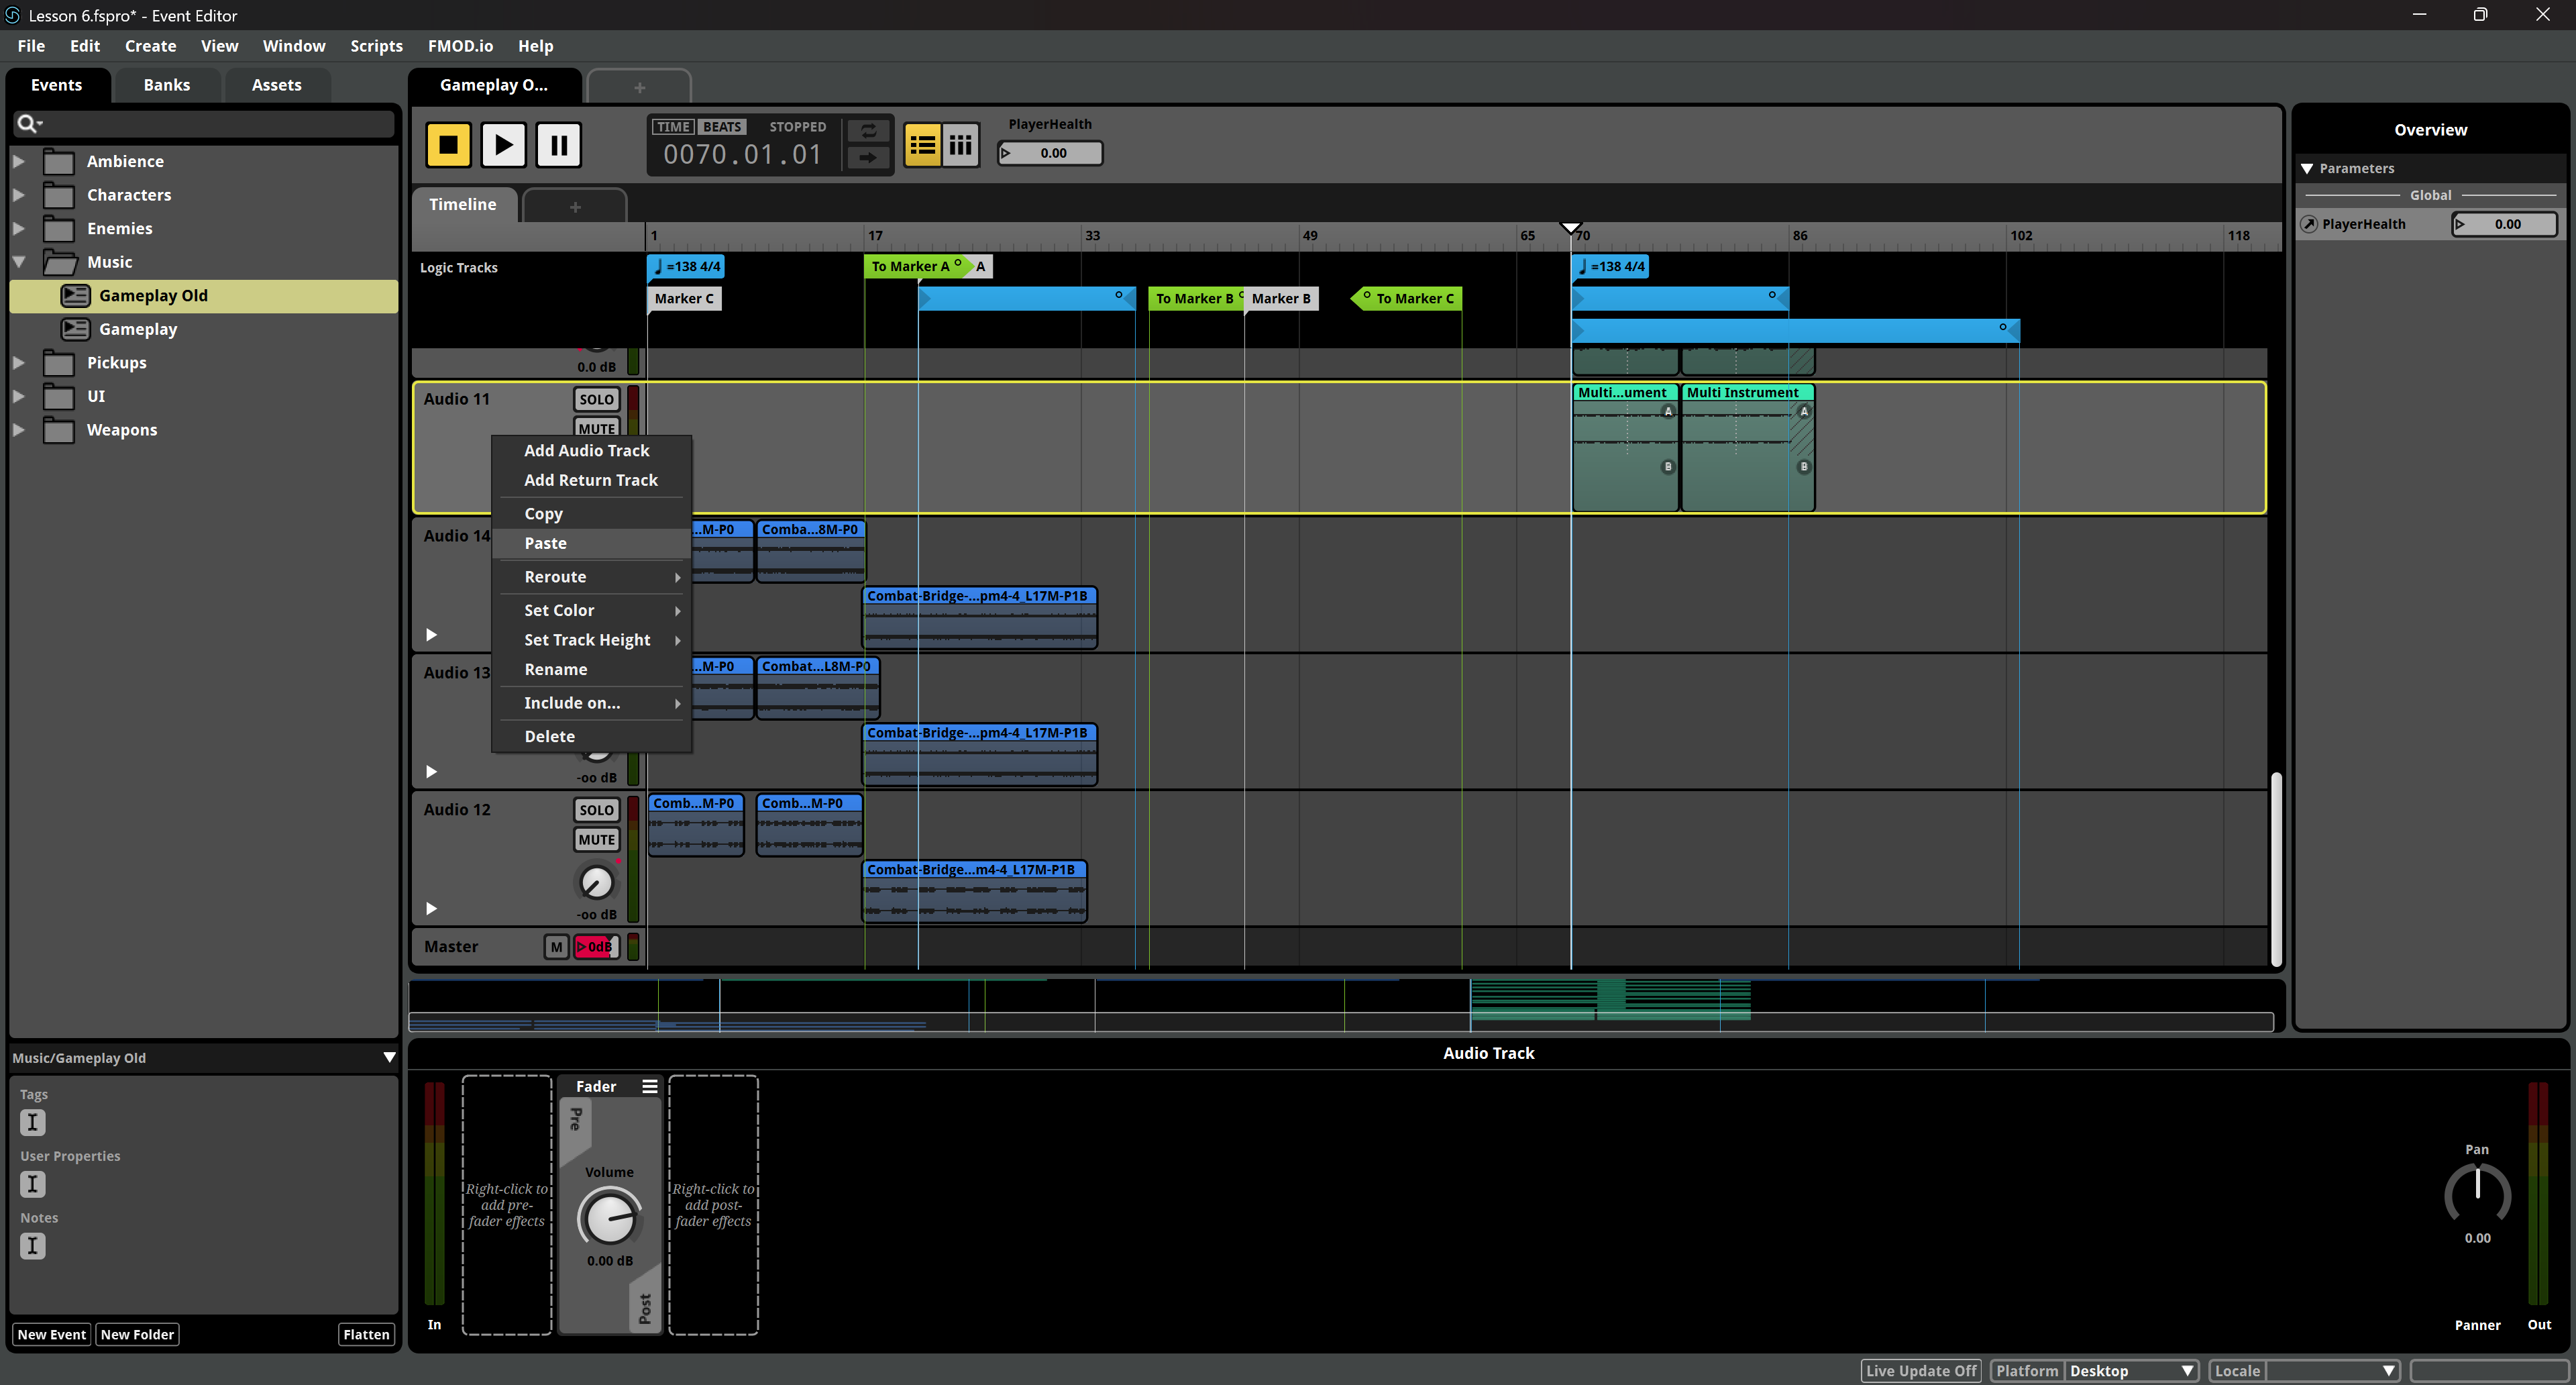
- Shift them to the right to match the start point of the Combat tracks and undo the automatic crossfades.
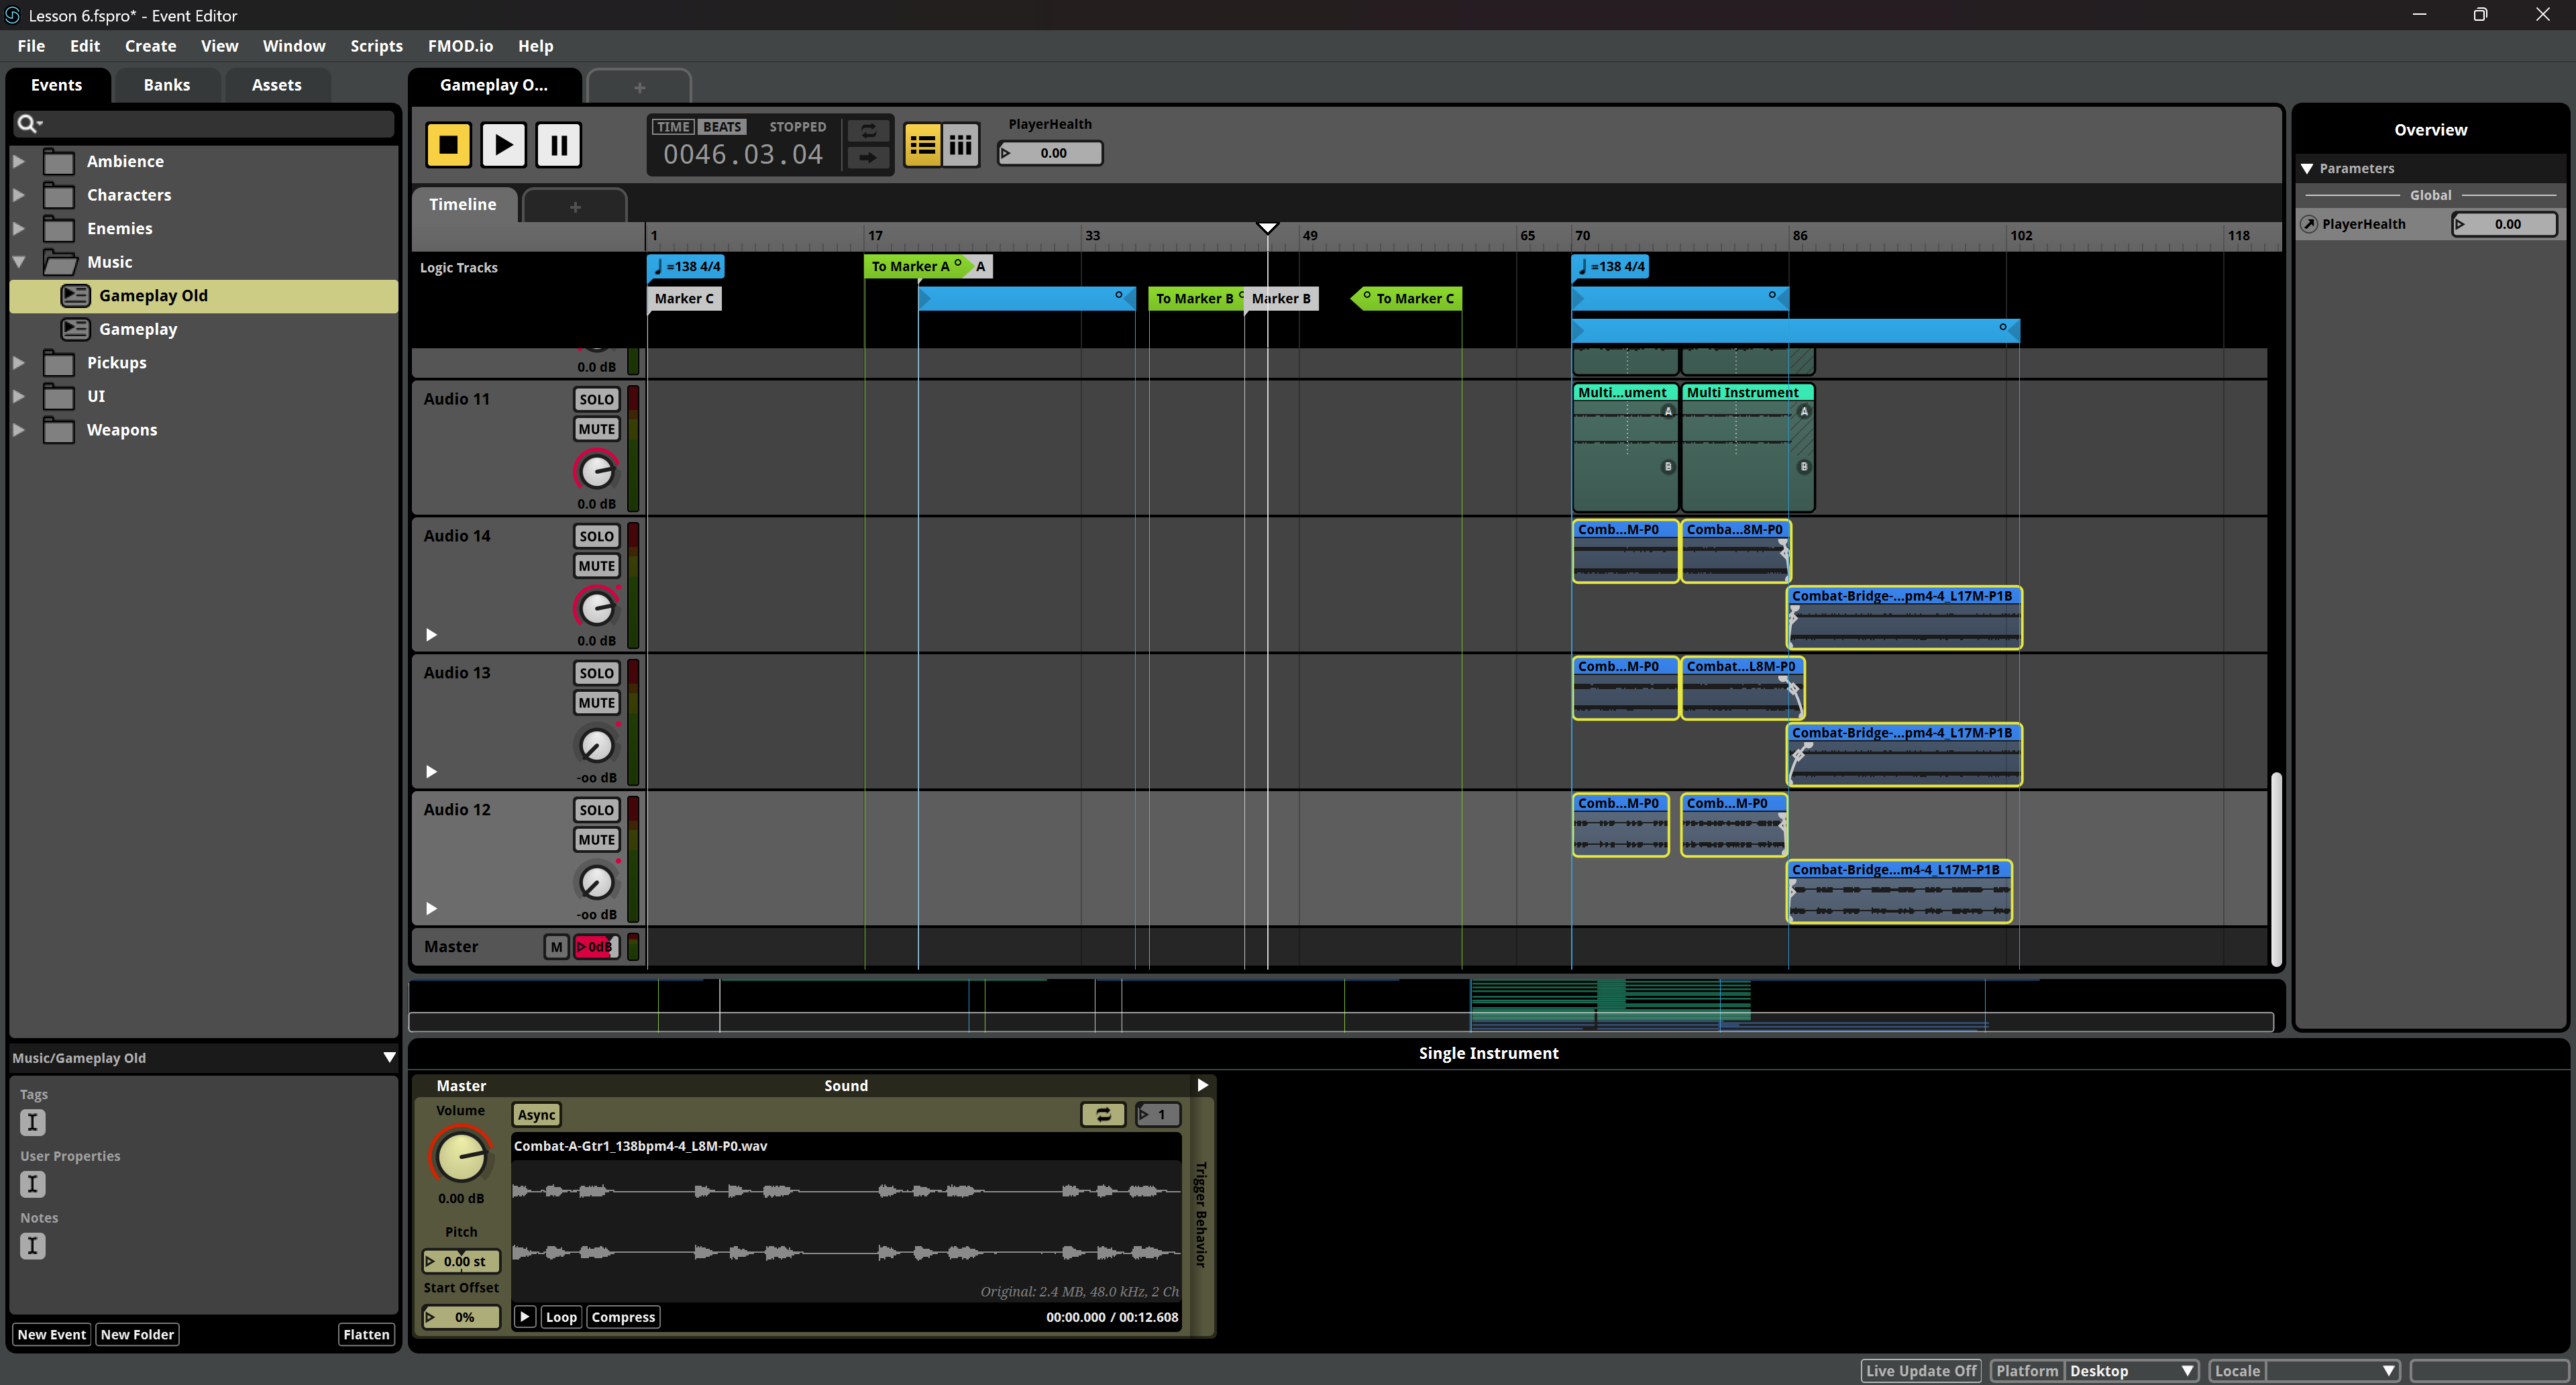
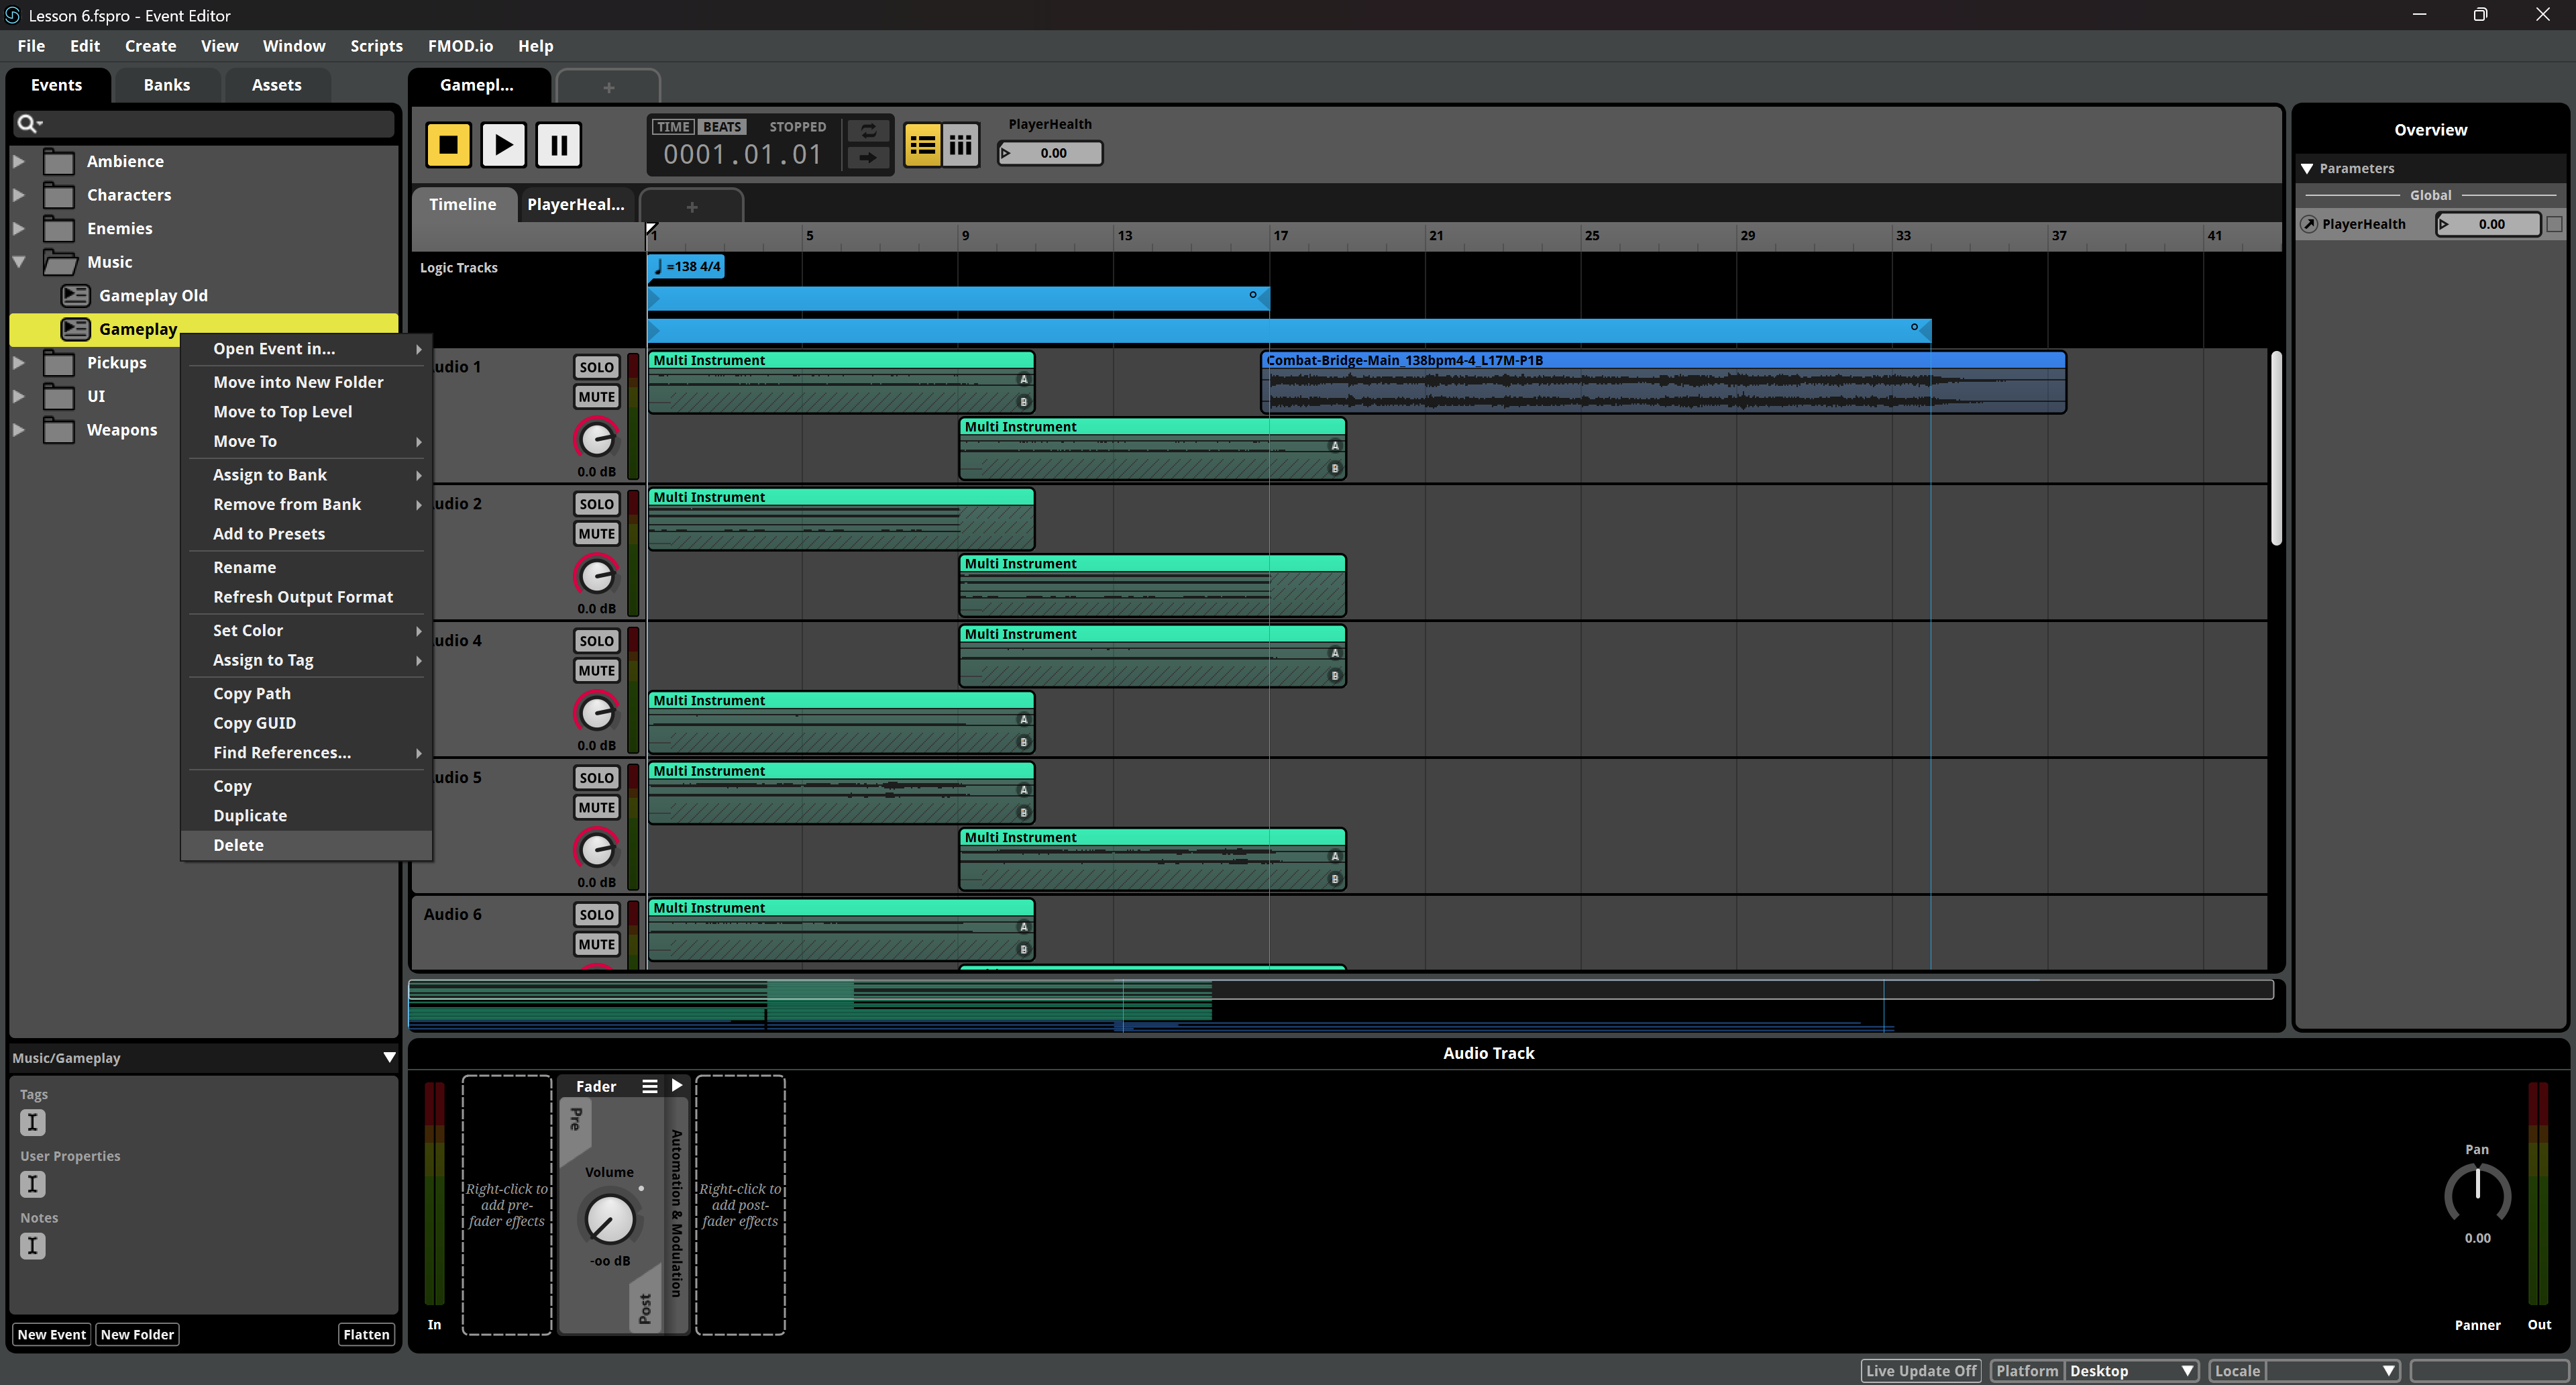
- We can now get rid of the Gameplay Event.
- And rename the Gameplay Old event back as Gameplay.

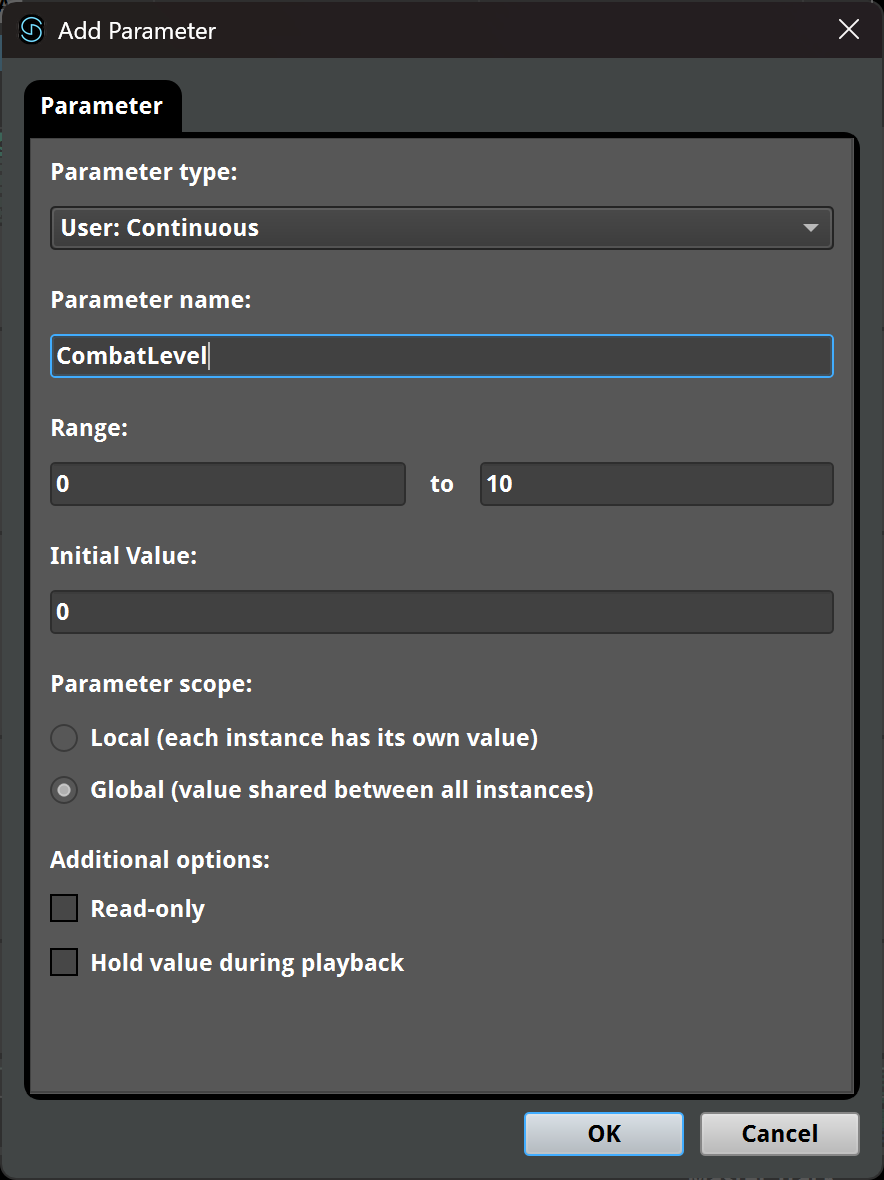
- In order to transition between Combat and Explore music we'll use the CombatLevel parameter. Let's create if by clicking on Create > Add Parameter on the main menu or pressing Ctrl+P.
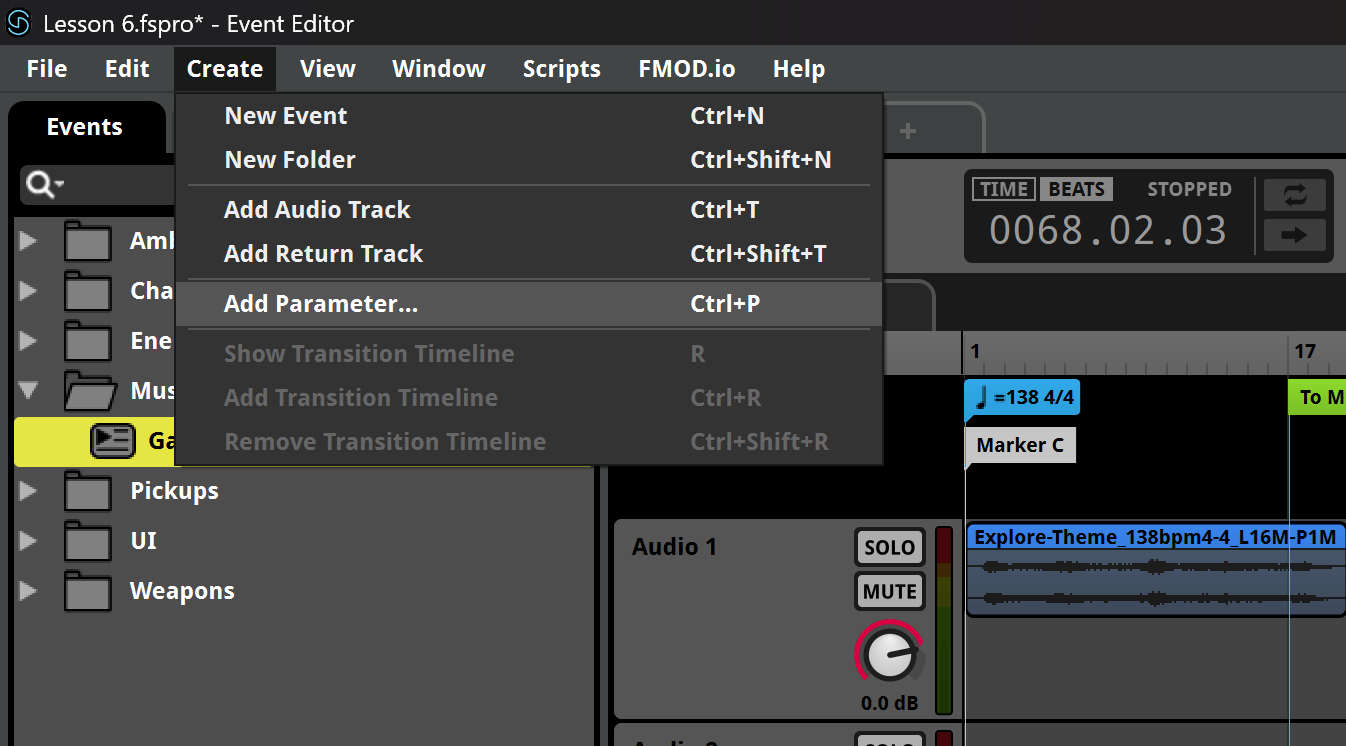
- Type the parameter name, CombatLevel, set its range from 0 to 10 and set the paramater scope as global.
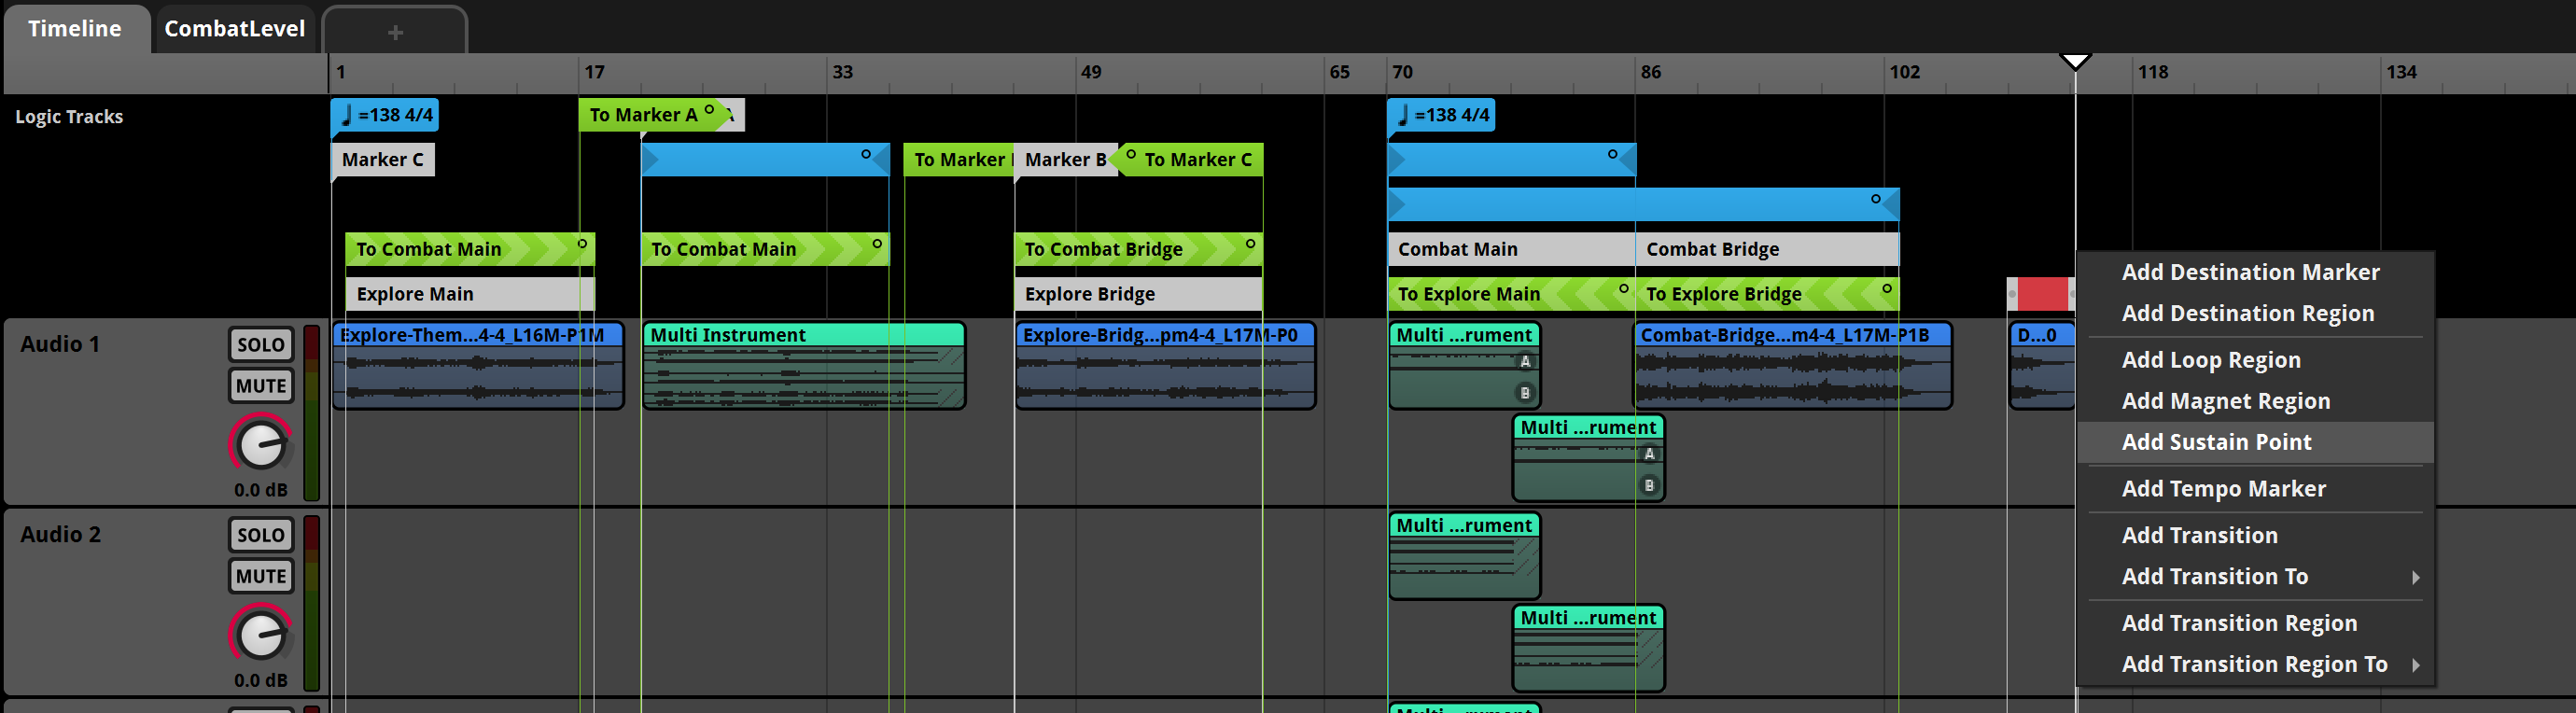
- We'll start by creating a Destination Region for the Combat music. Right-click on an empty space in the Logic Tracks and choose Add Destination Region.
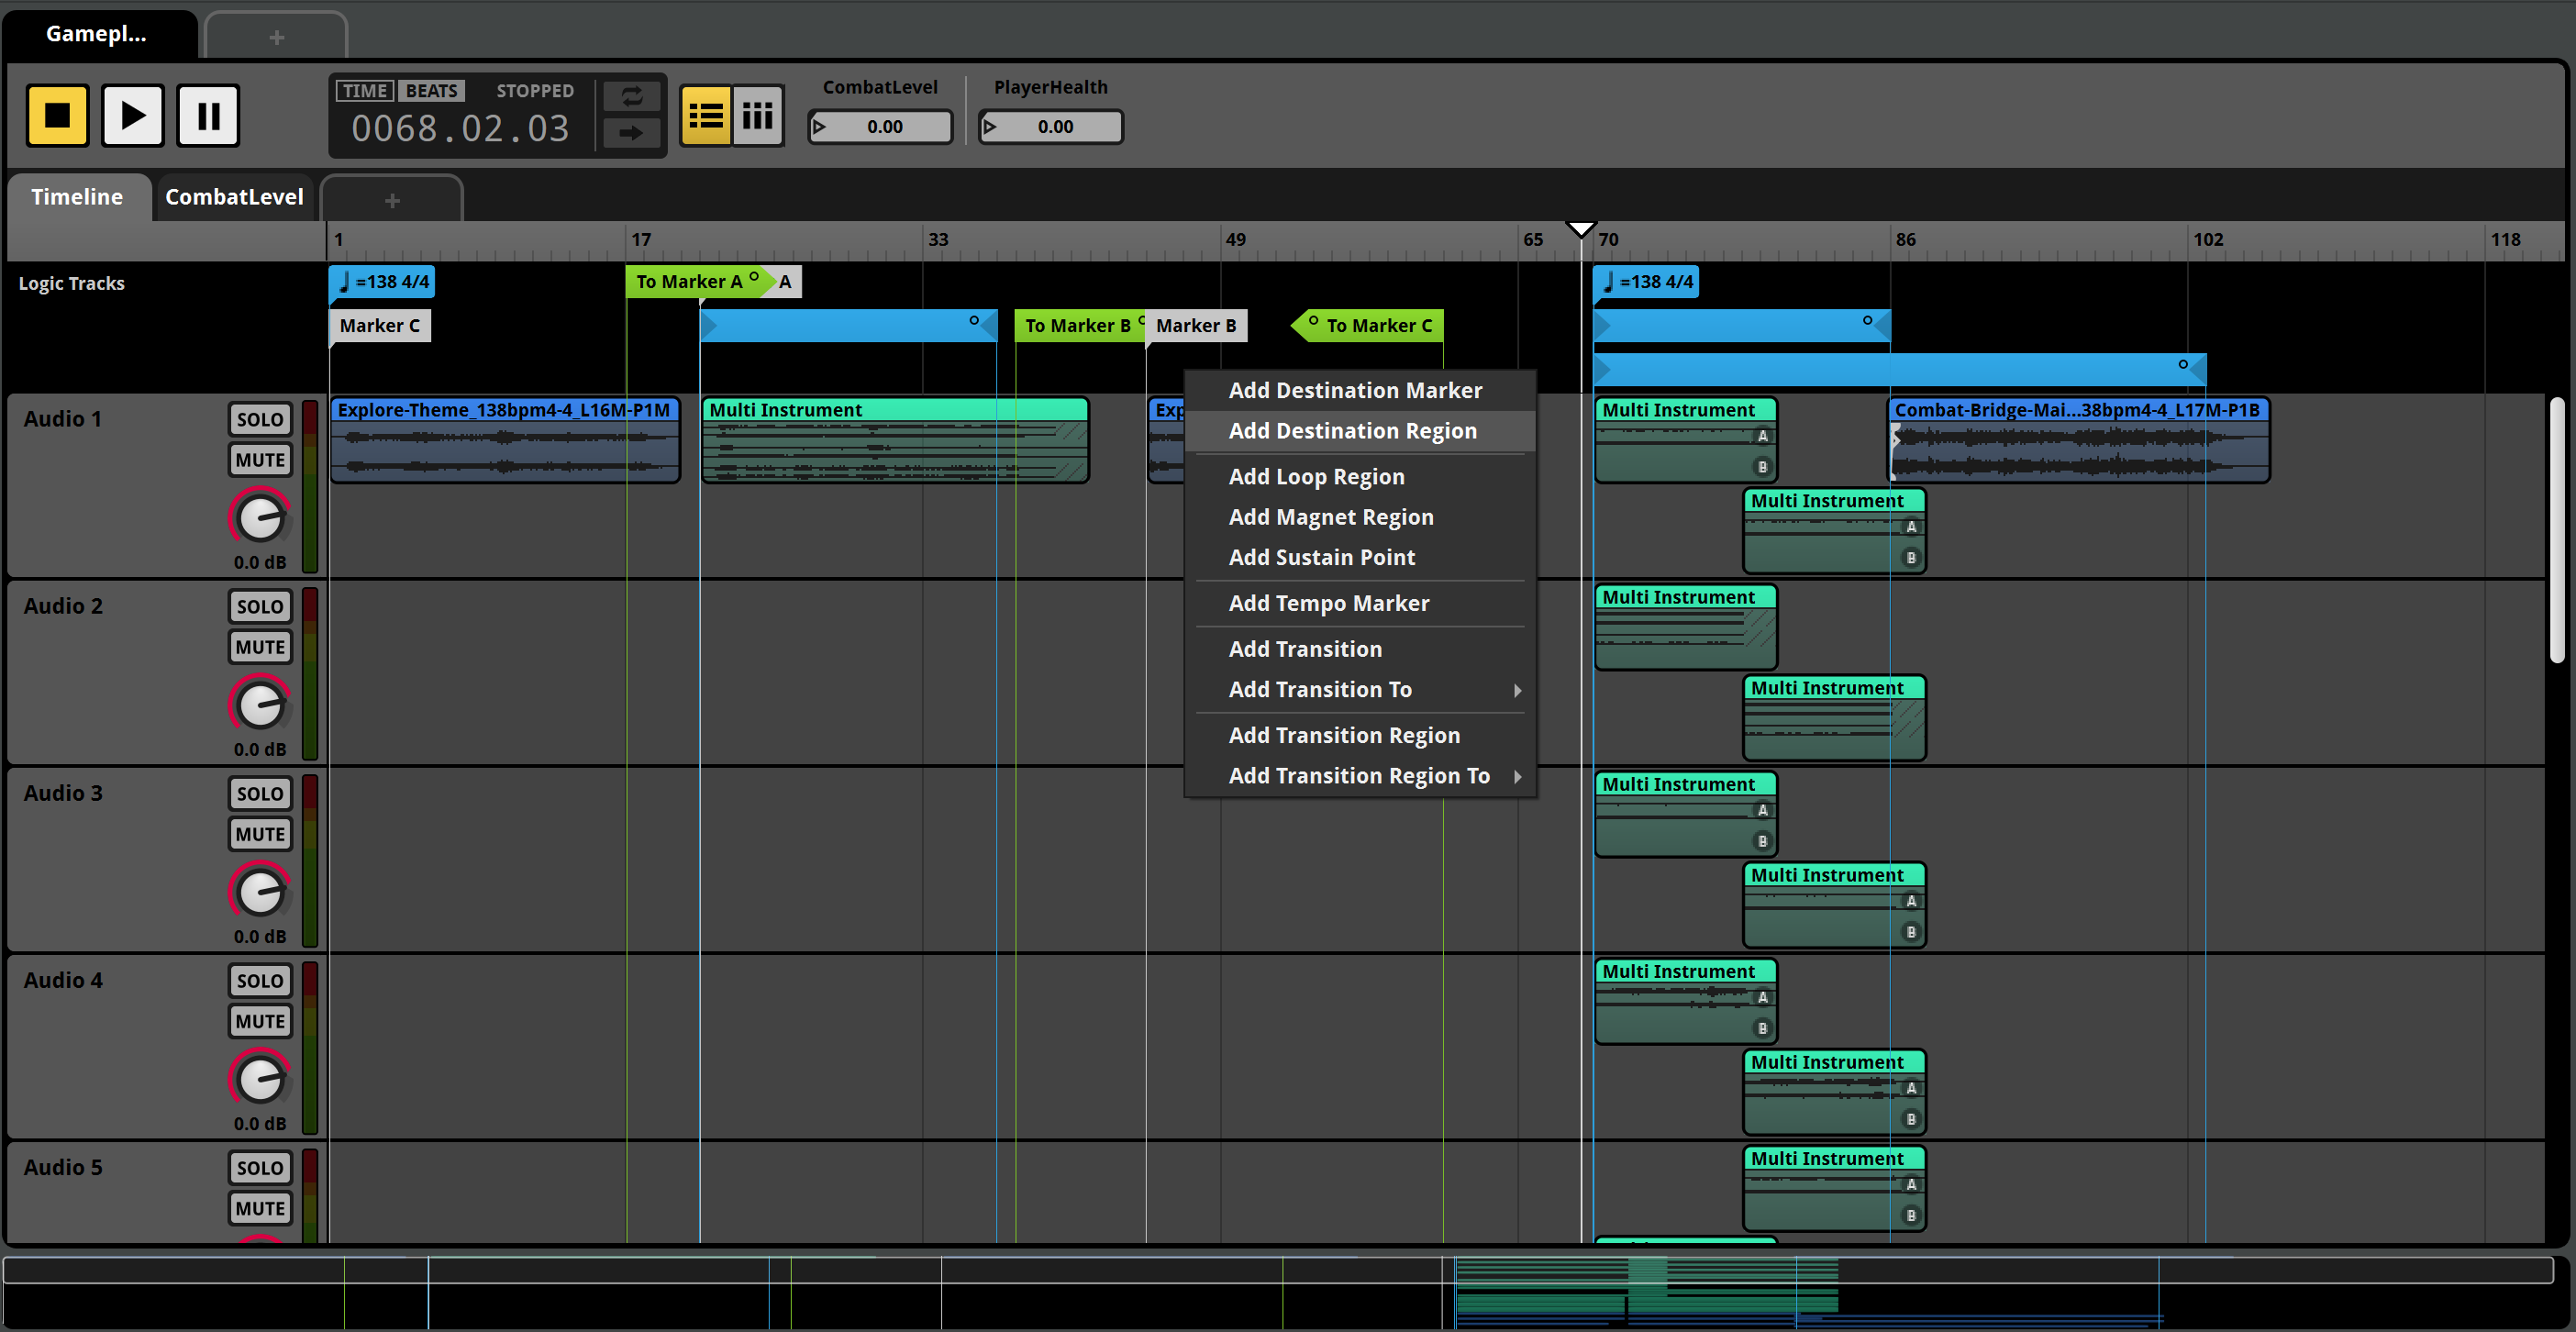
- Move it under the Combat music loop regions and adjust its duration to 16 measures so it matches the loop. Now we can rename it so we can identify it easier. Right-click on the Destination Region and choose Rename.

- We'll name it Combat Main.
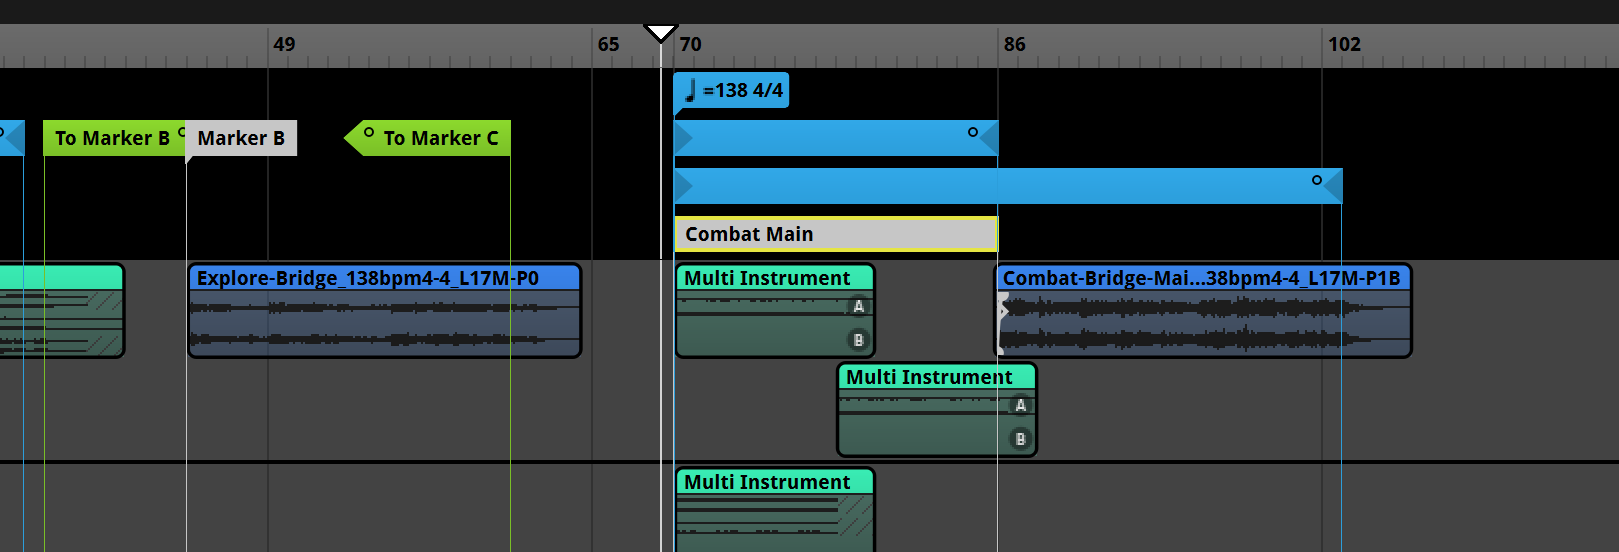
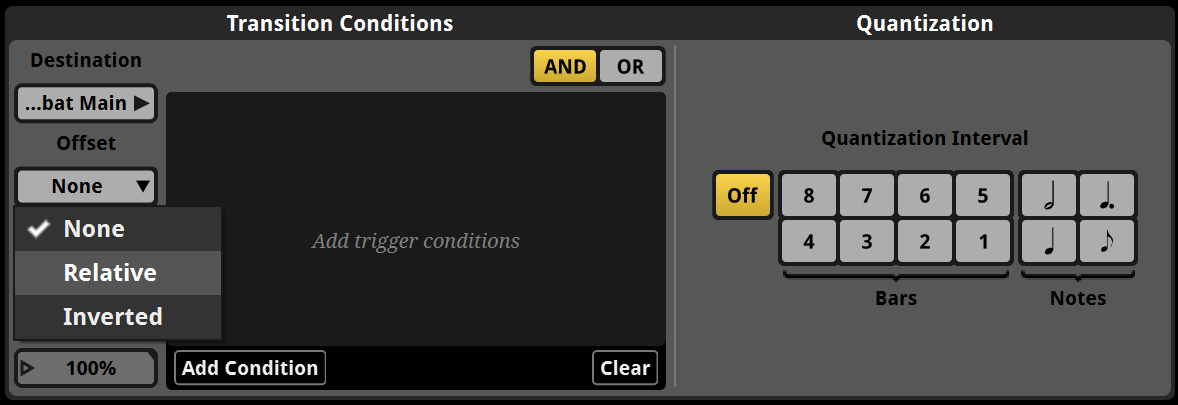
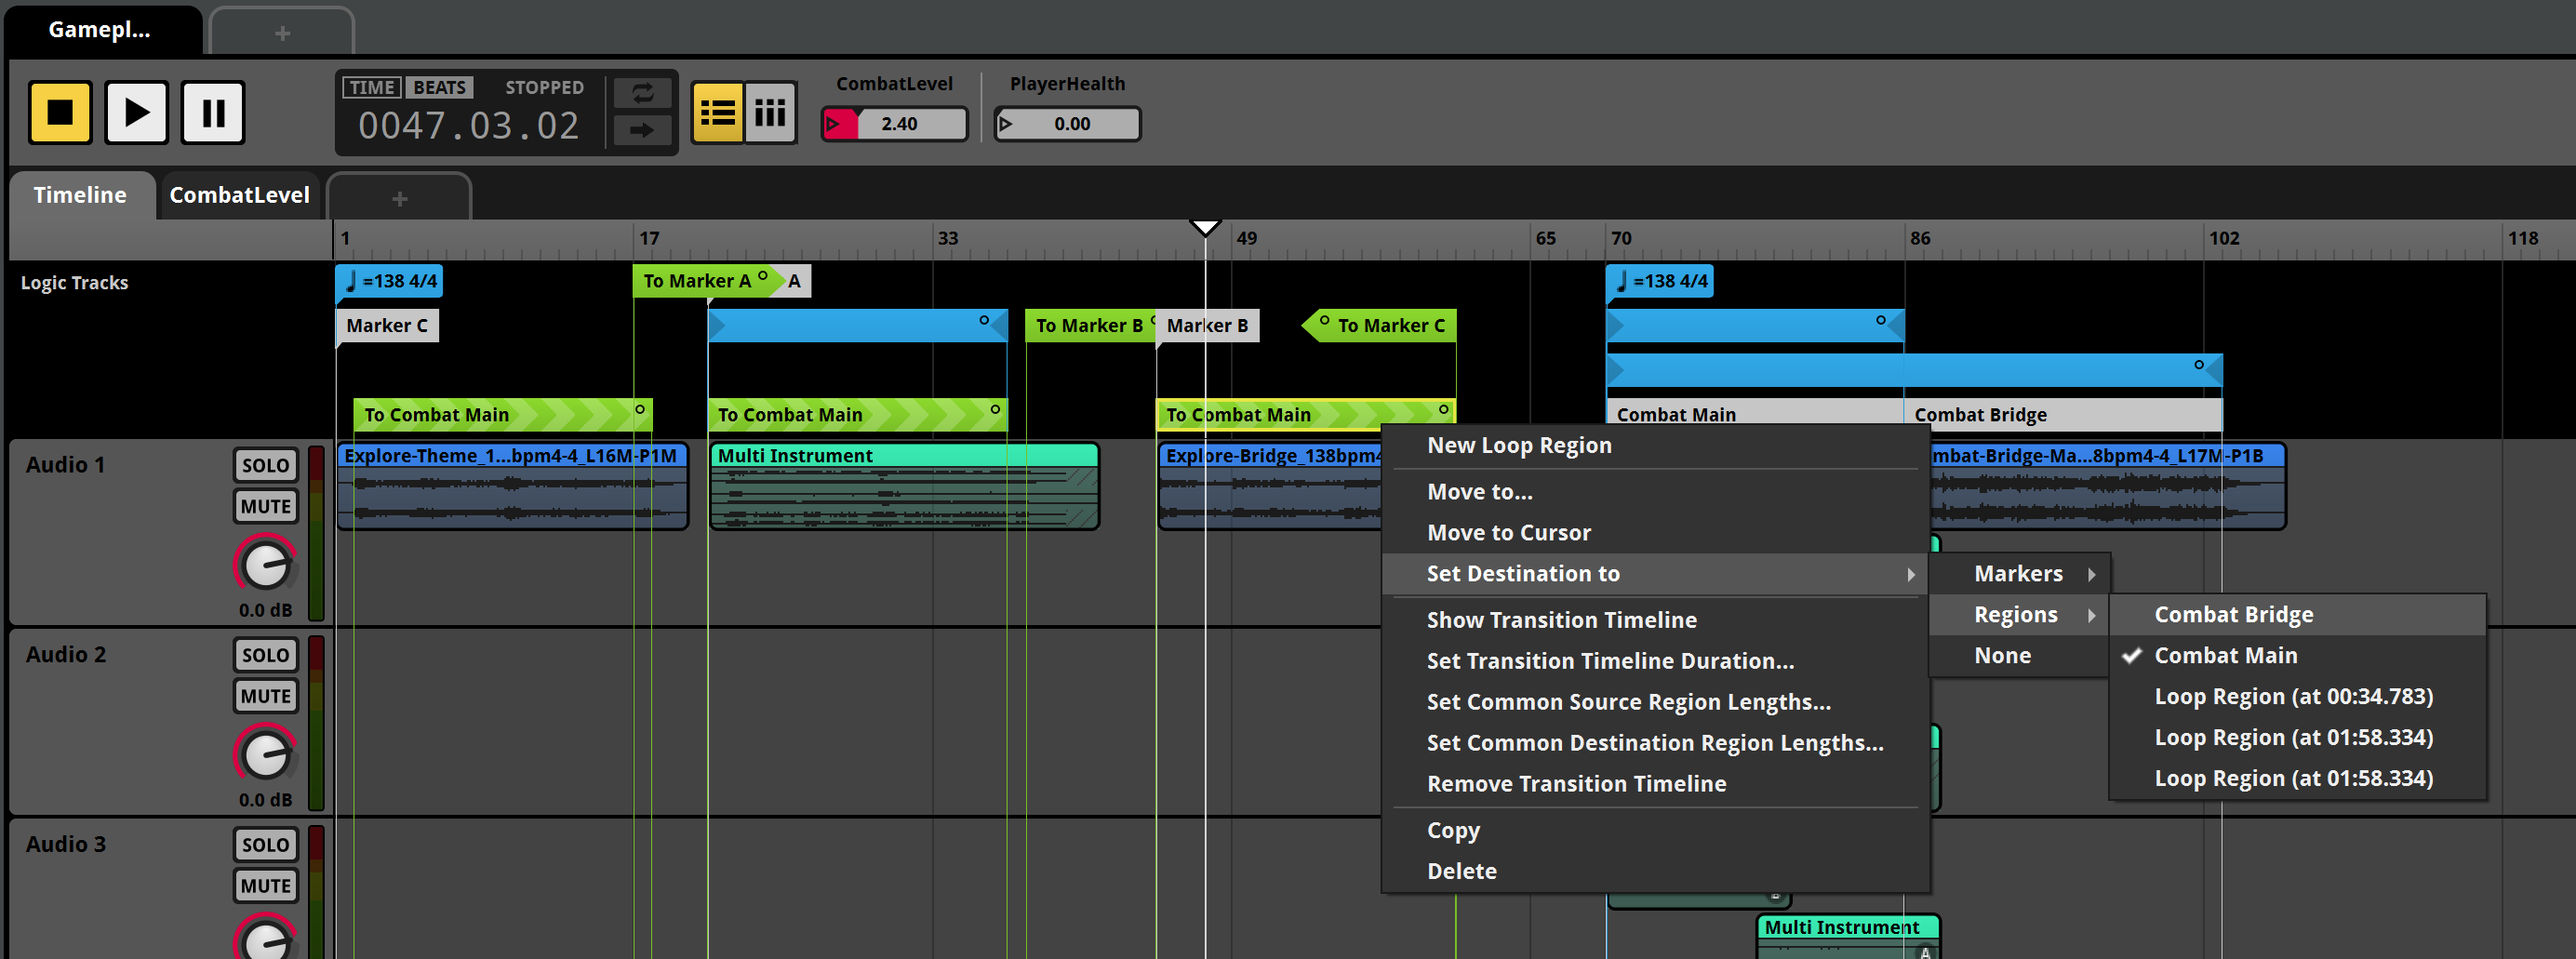
- Now we'll create a Transition Region to that Destination Region by right-clicking the Logic Tracks empty space and choosing Add Transition Region To > Regions > Combat Main

- Adjust it to the beginning of the 2nd measure, so it matches the actual Explore music start point and adjust it's length to 16 measures.
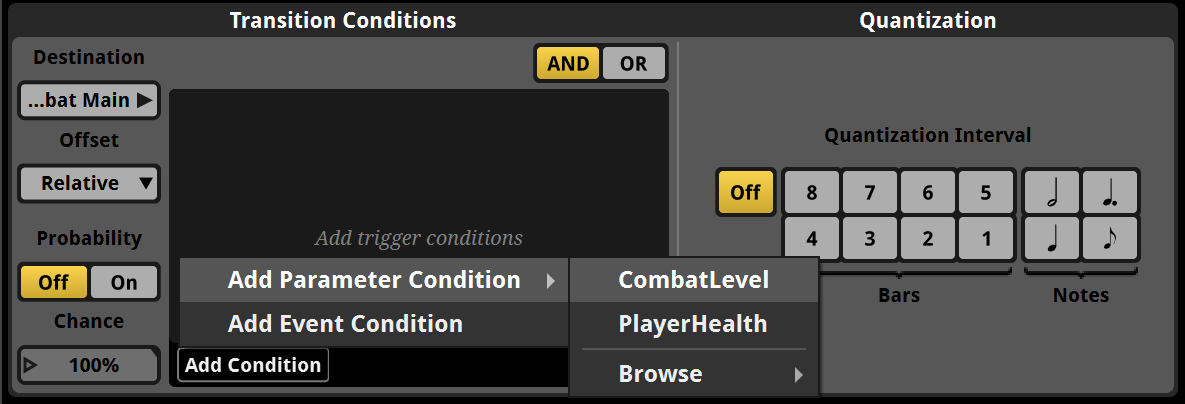
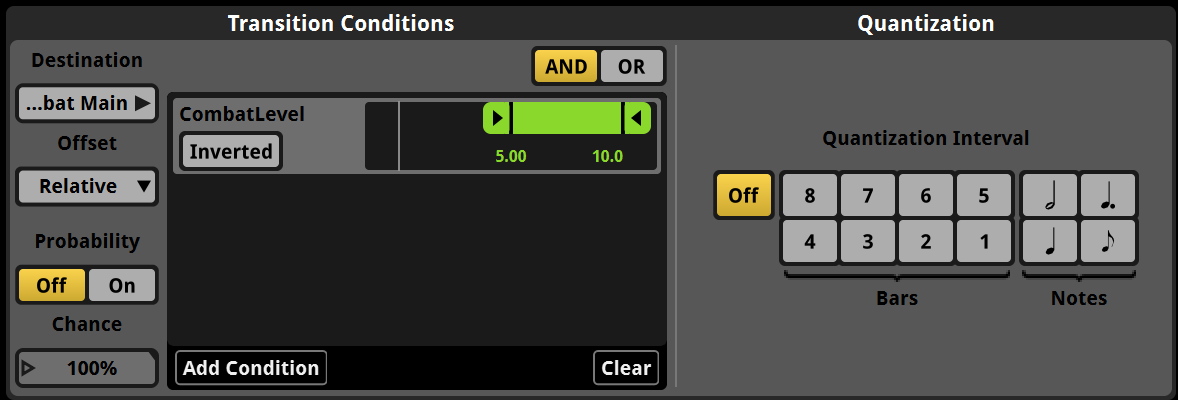
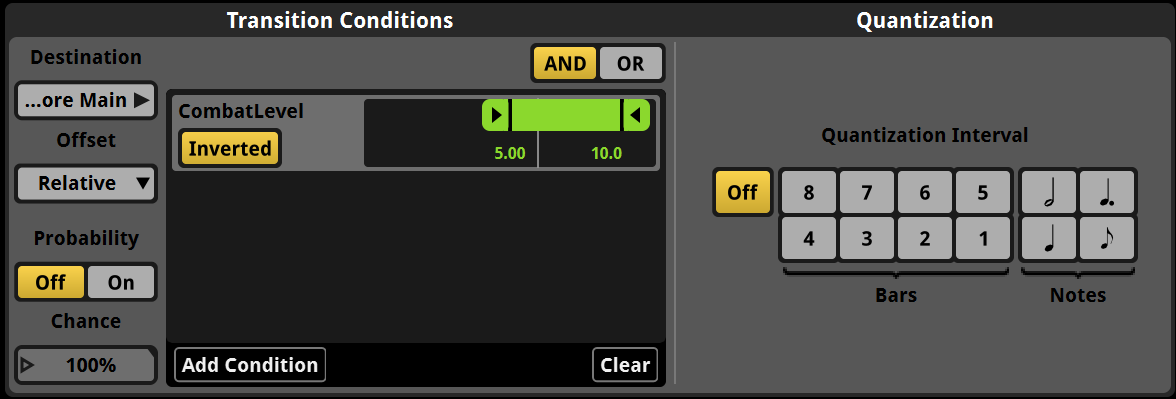
- Now we'll configure this transition. First thing, the Explore and Combat music are structured in a way they have the same chords with the same length so we can crossfade between them at any point. In order to transition to the same point we were in Explore to the corresponding offste in the Combat music, we'll set the Offset to Relative.
- Then we need to define the condition for the transition. Click Add Condition and then Add Parameter Condiciton > Combat Level.
- Drag the Combat Level bar from the left edge to the right to set a range from 5.00 to 10.0. This means that we'll transition from Explore to Combat when CombatLevel is higher than 5.
- Set the Combat Level to 0 in the Parameters panel on the right, then play the music and raise it while you're in the Explore music. The jump is immediate, which isn't quite seamless. We'll fix this with a Transition Timeline.

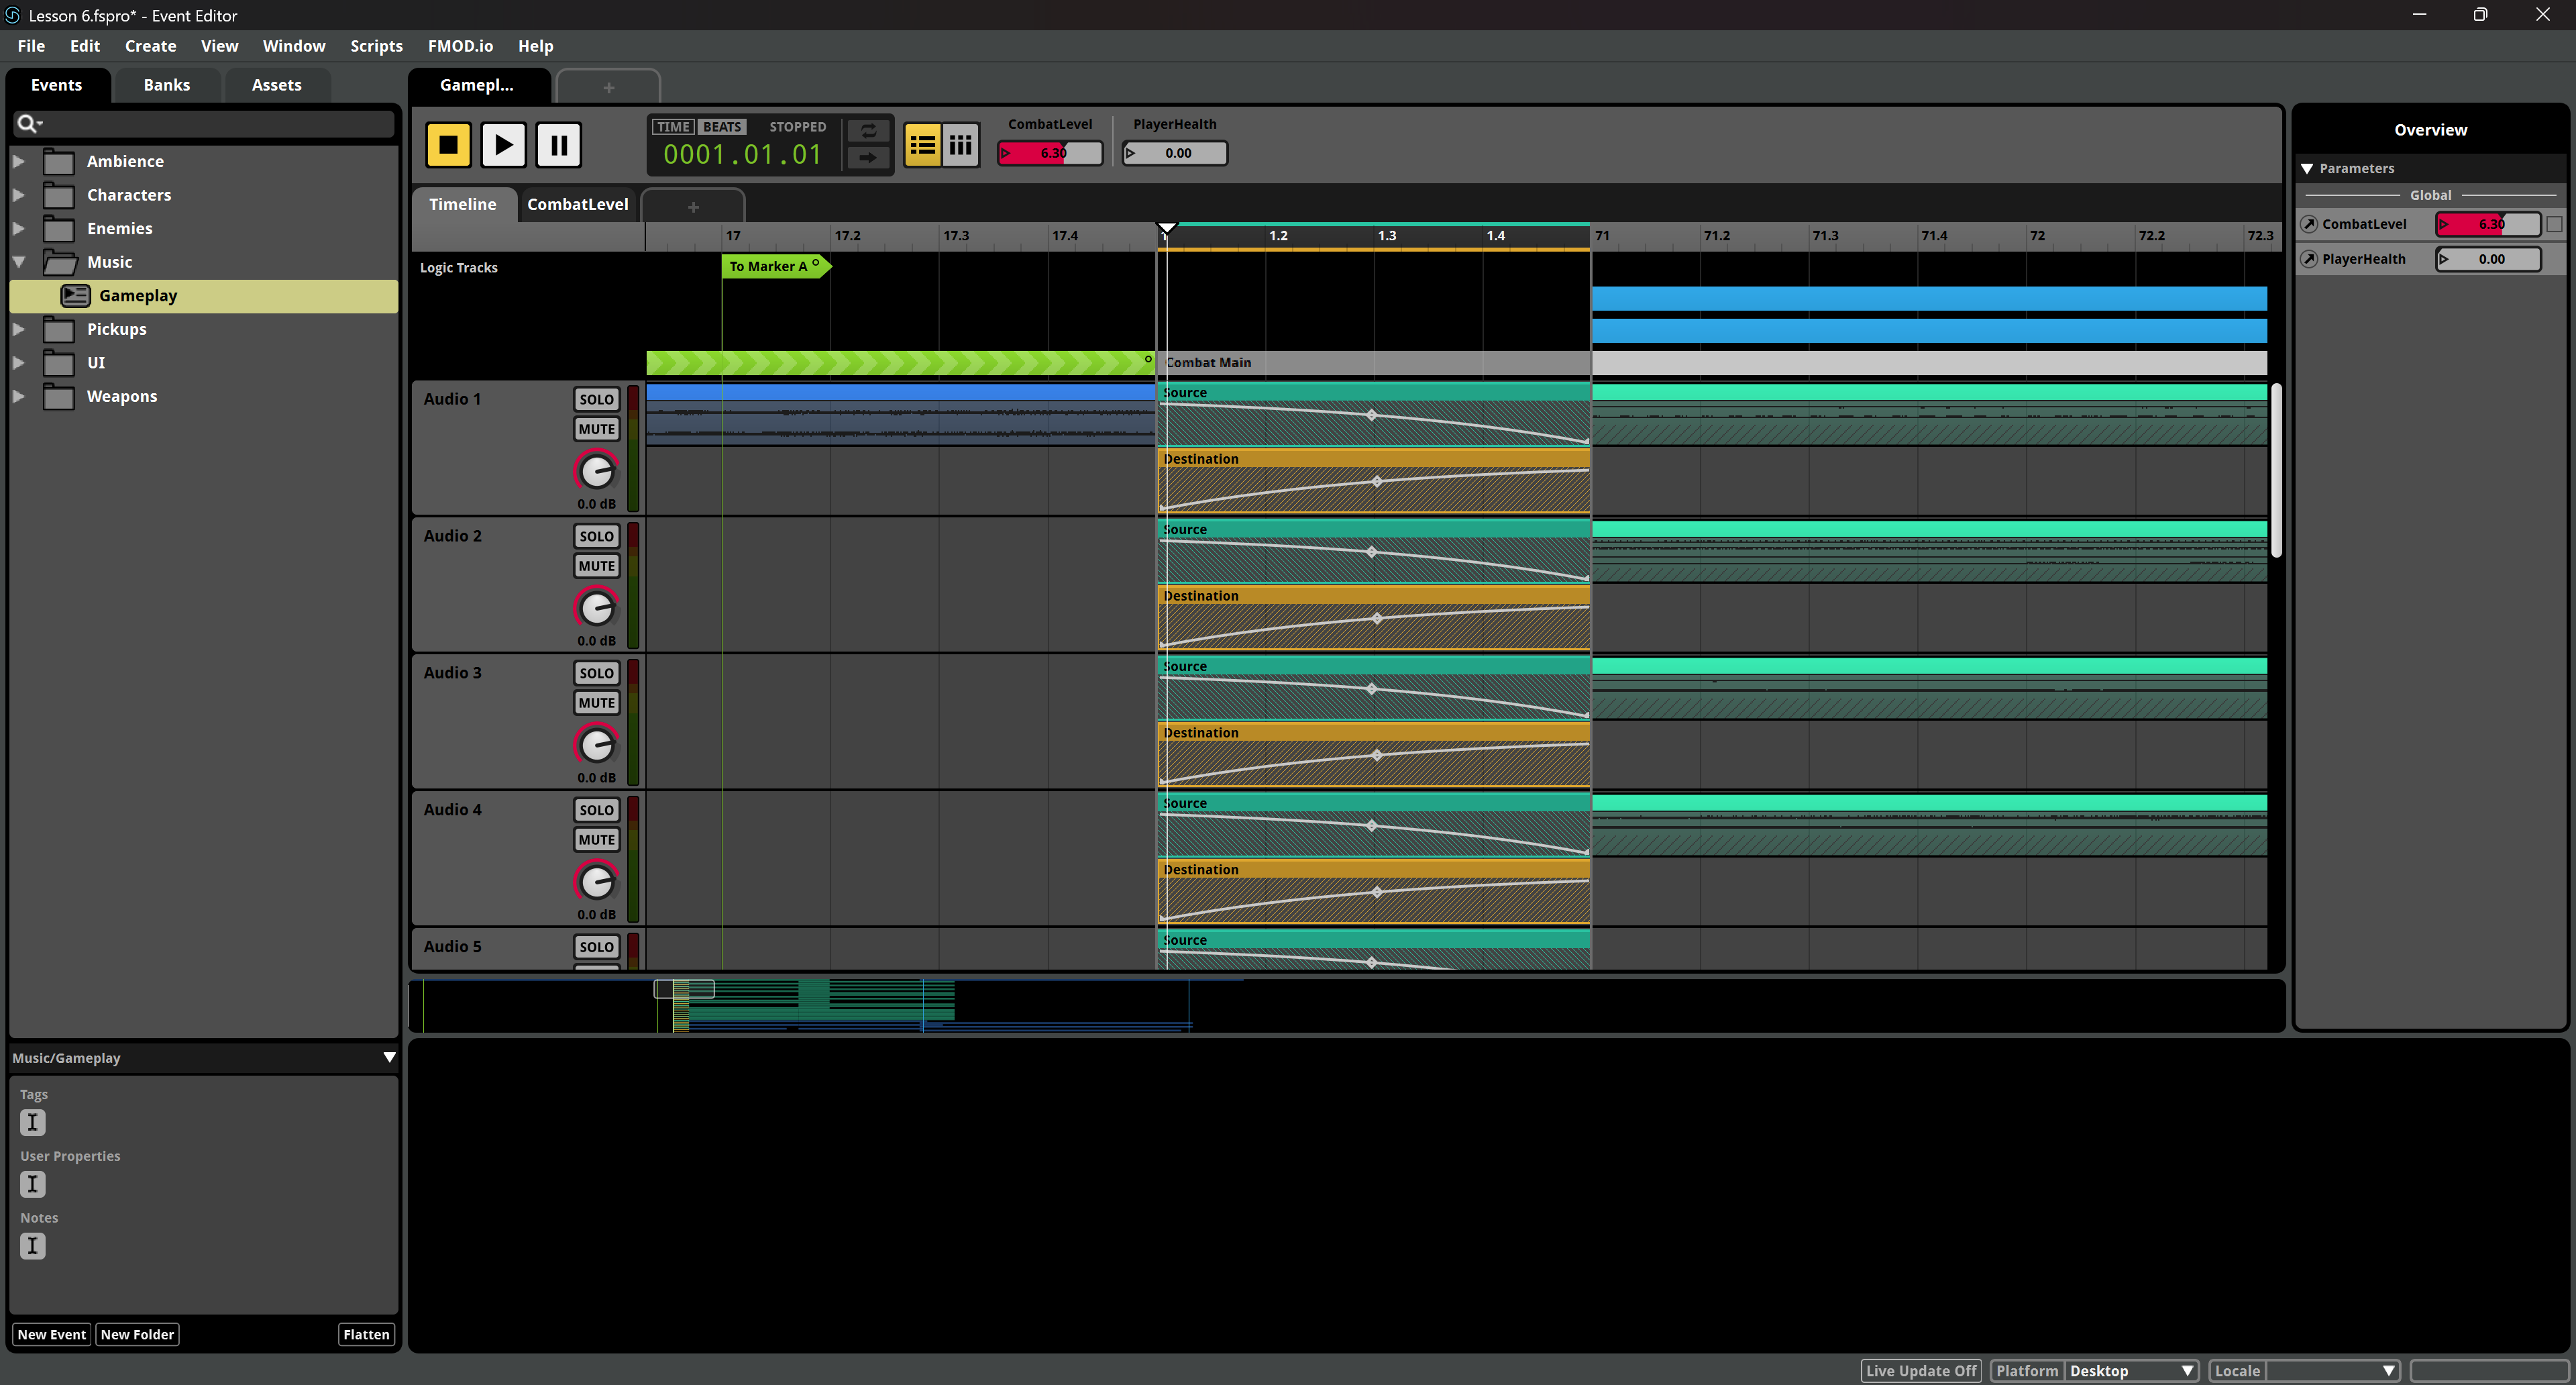
- Add a Transition Timeline to the Transition Region by right-clicking over it and selecting Add Transition Timeline.
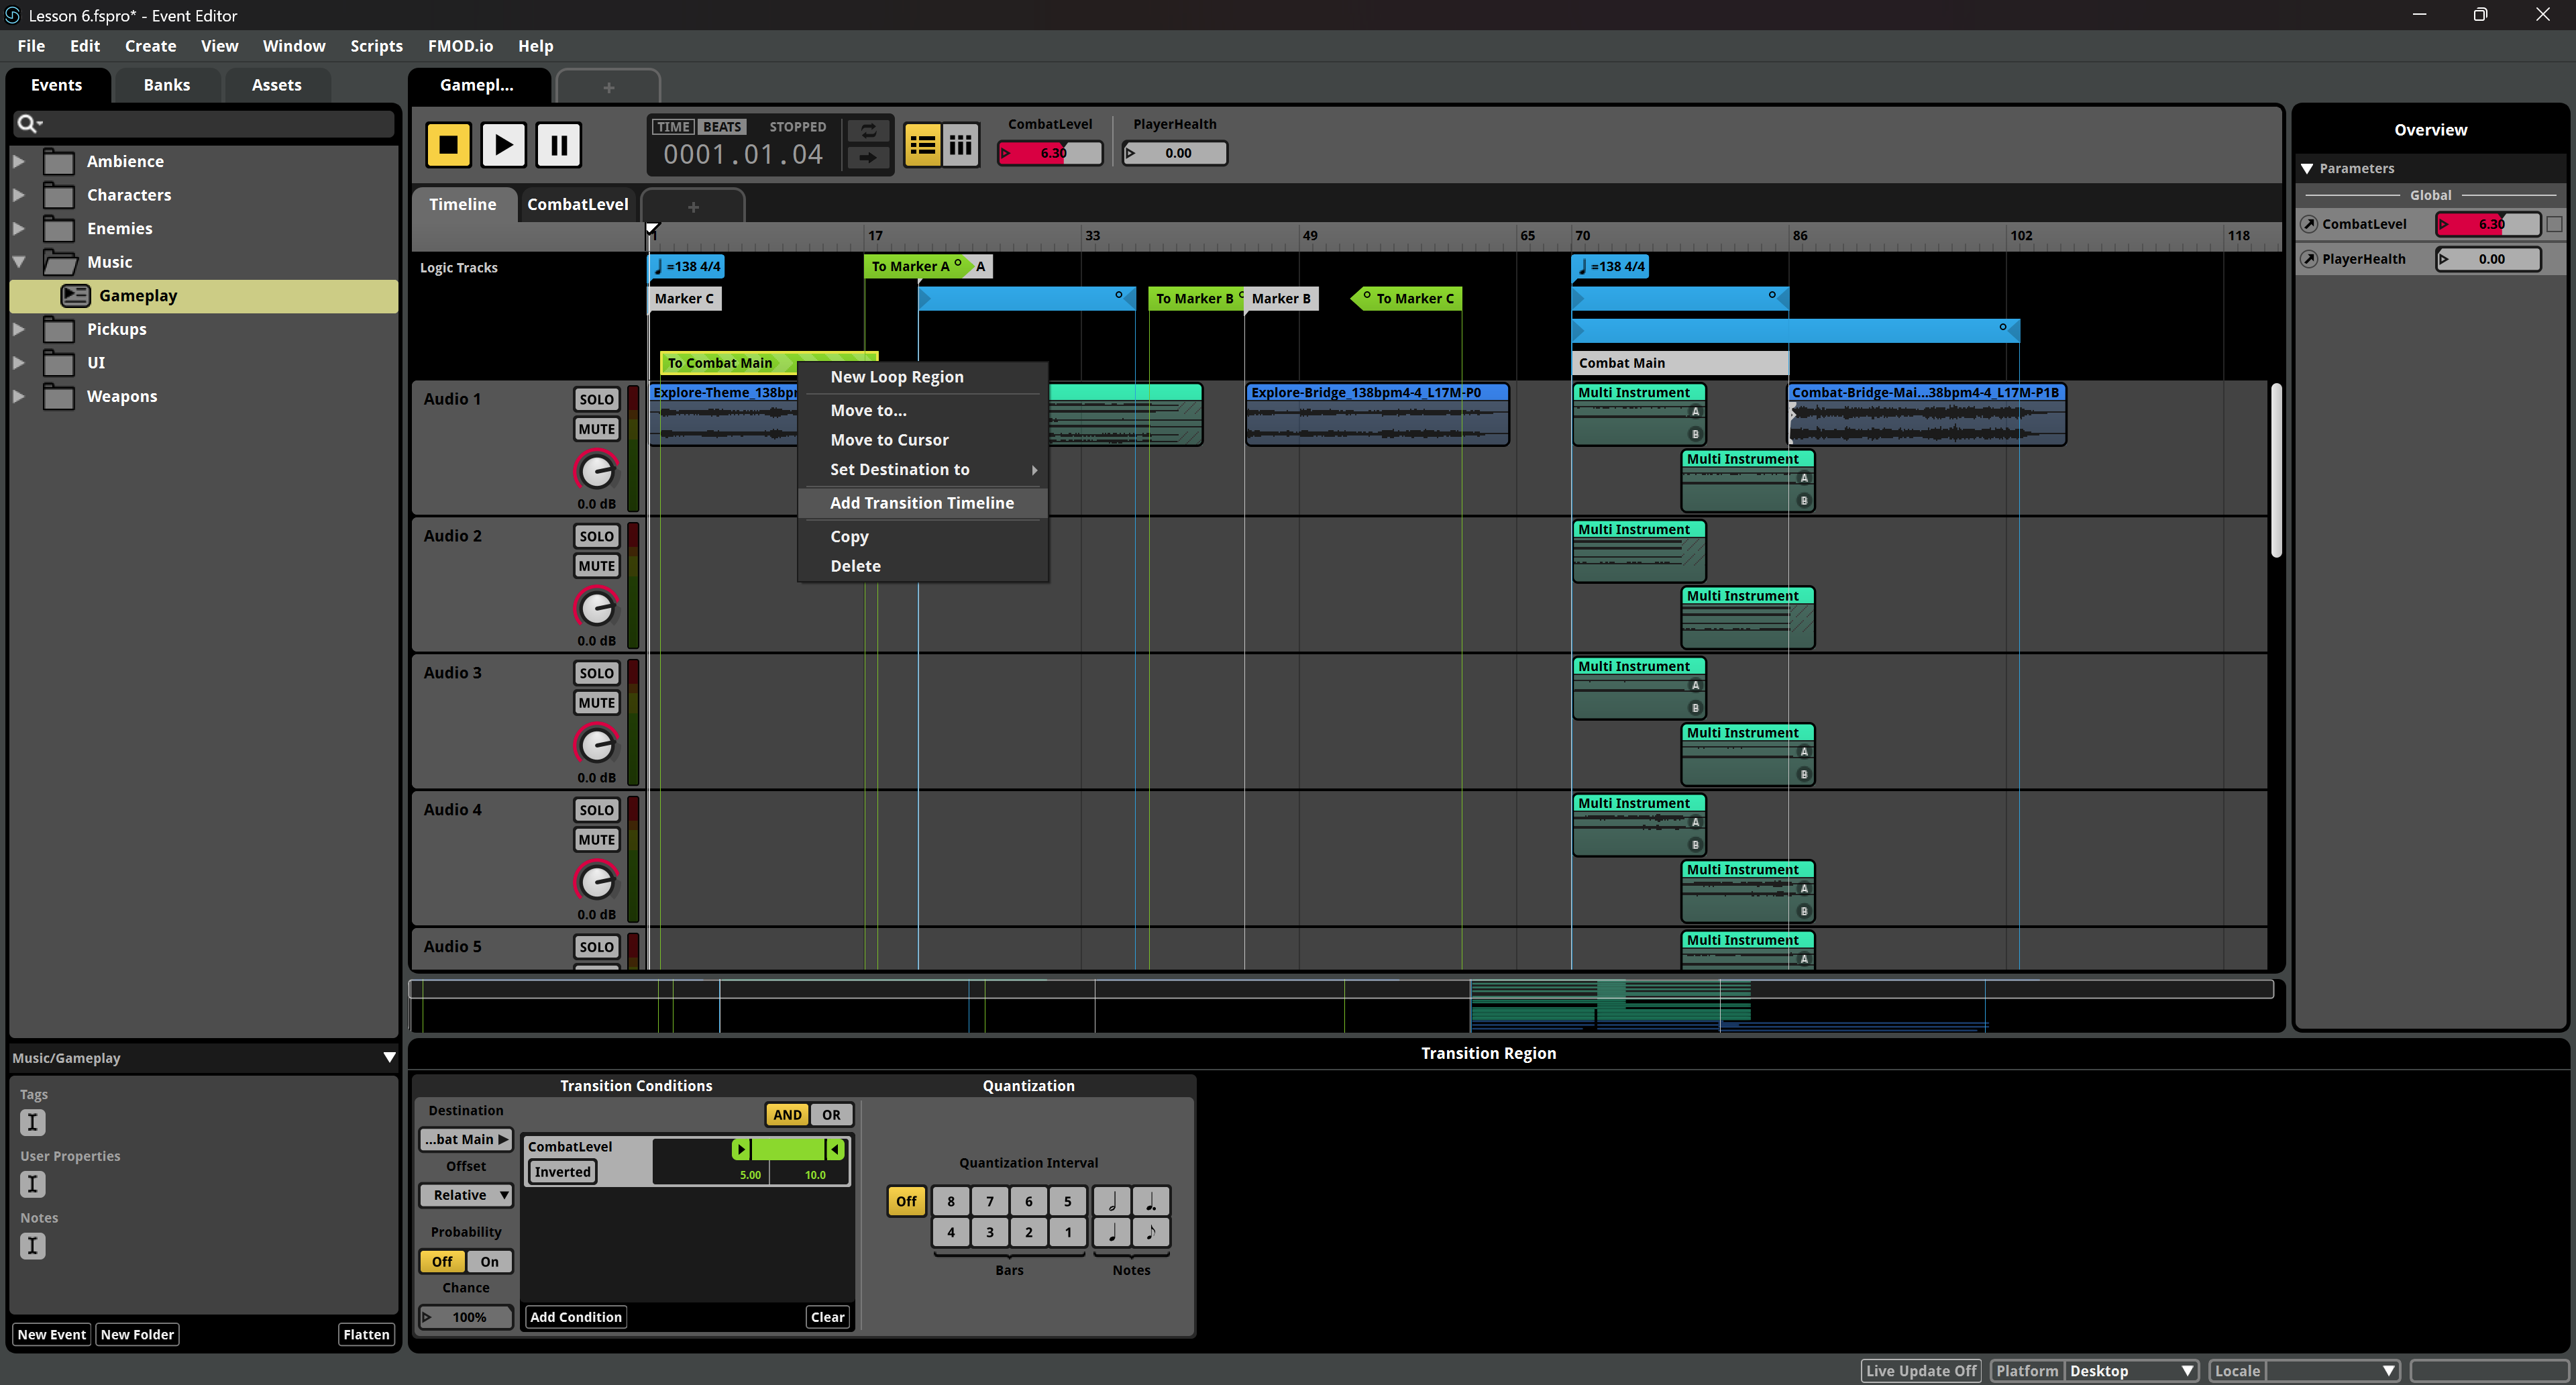
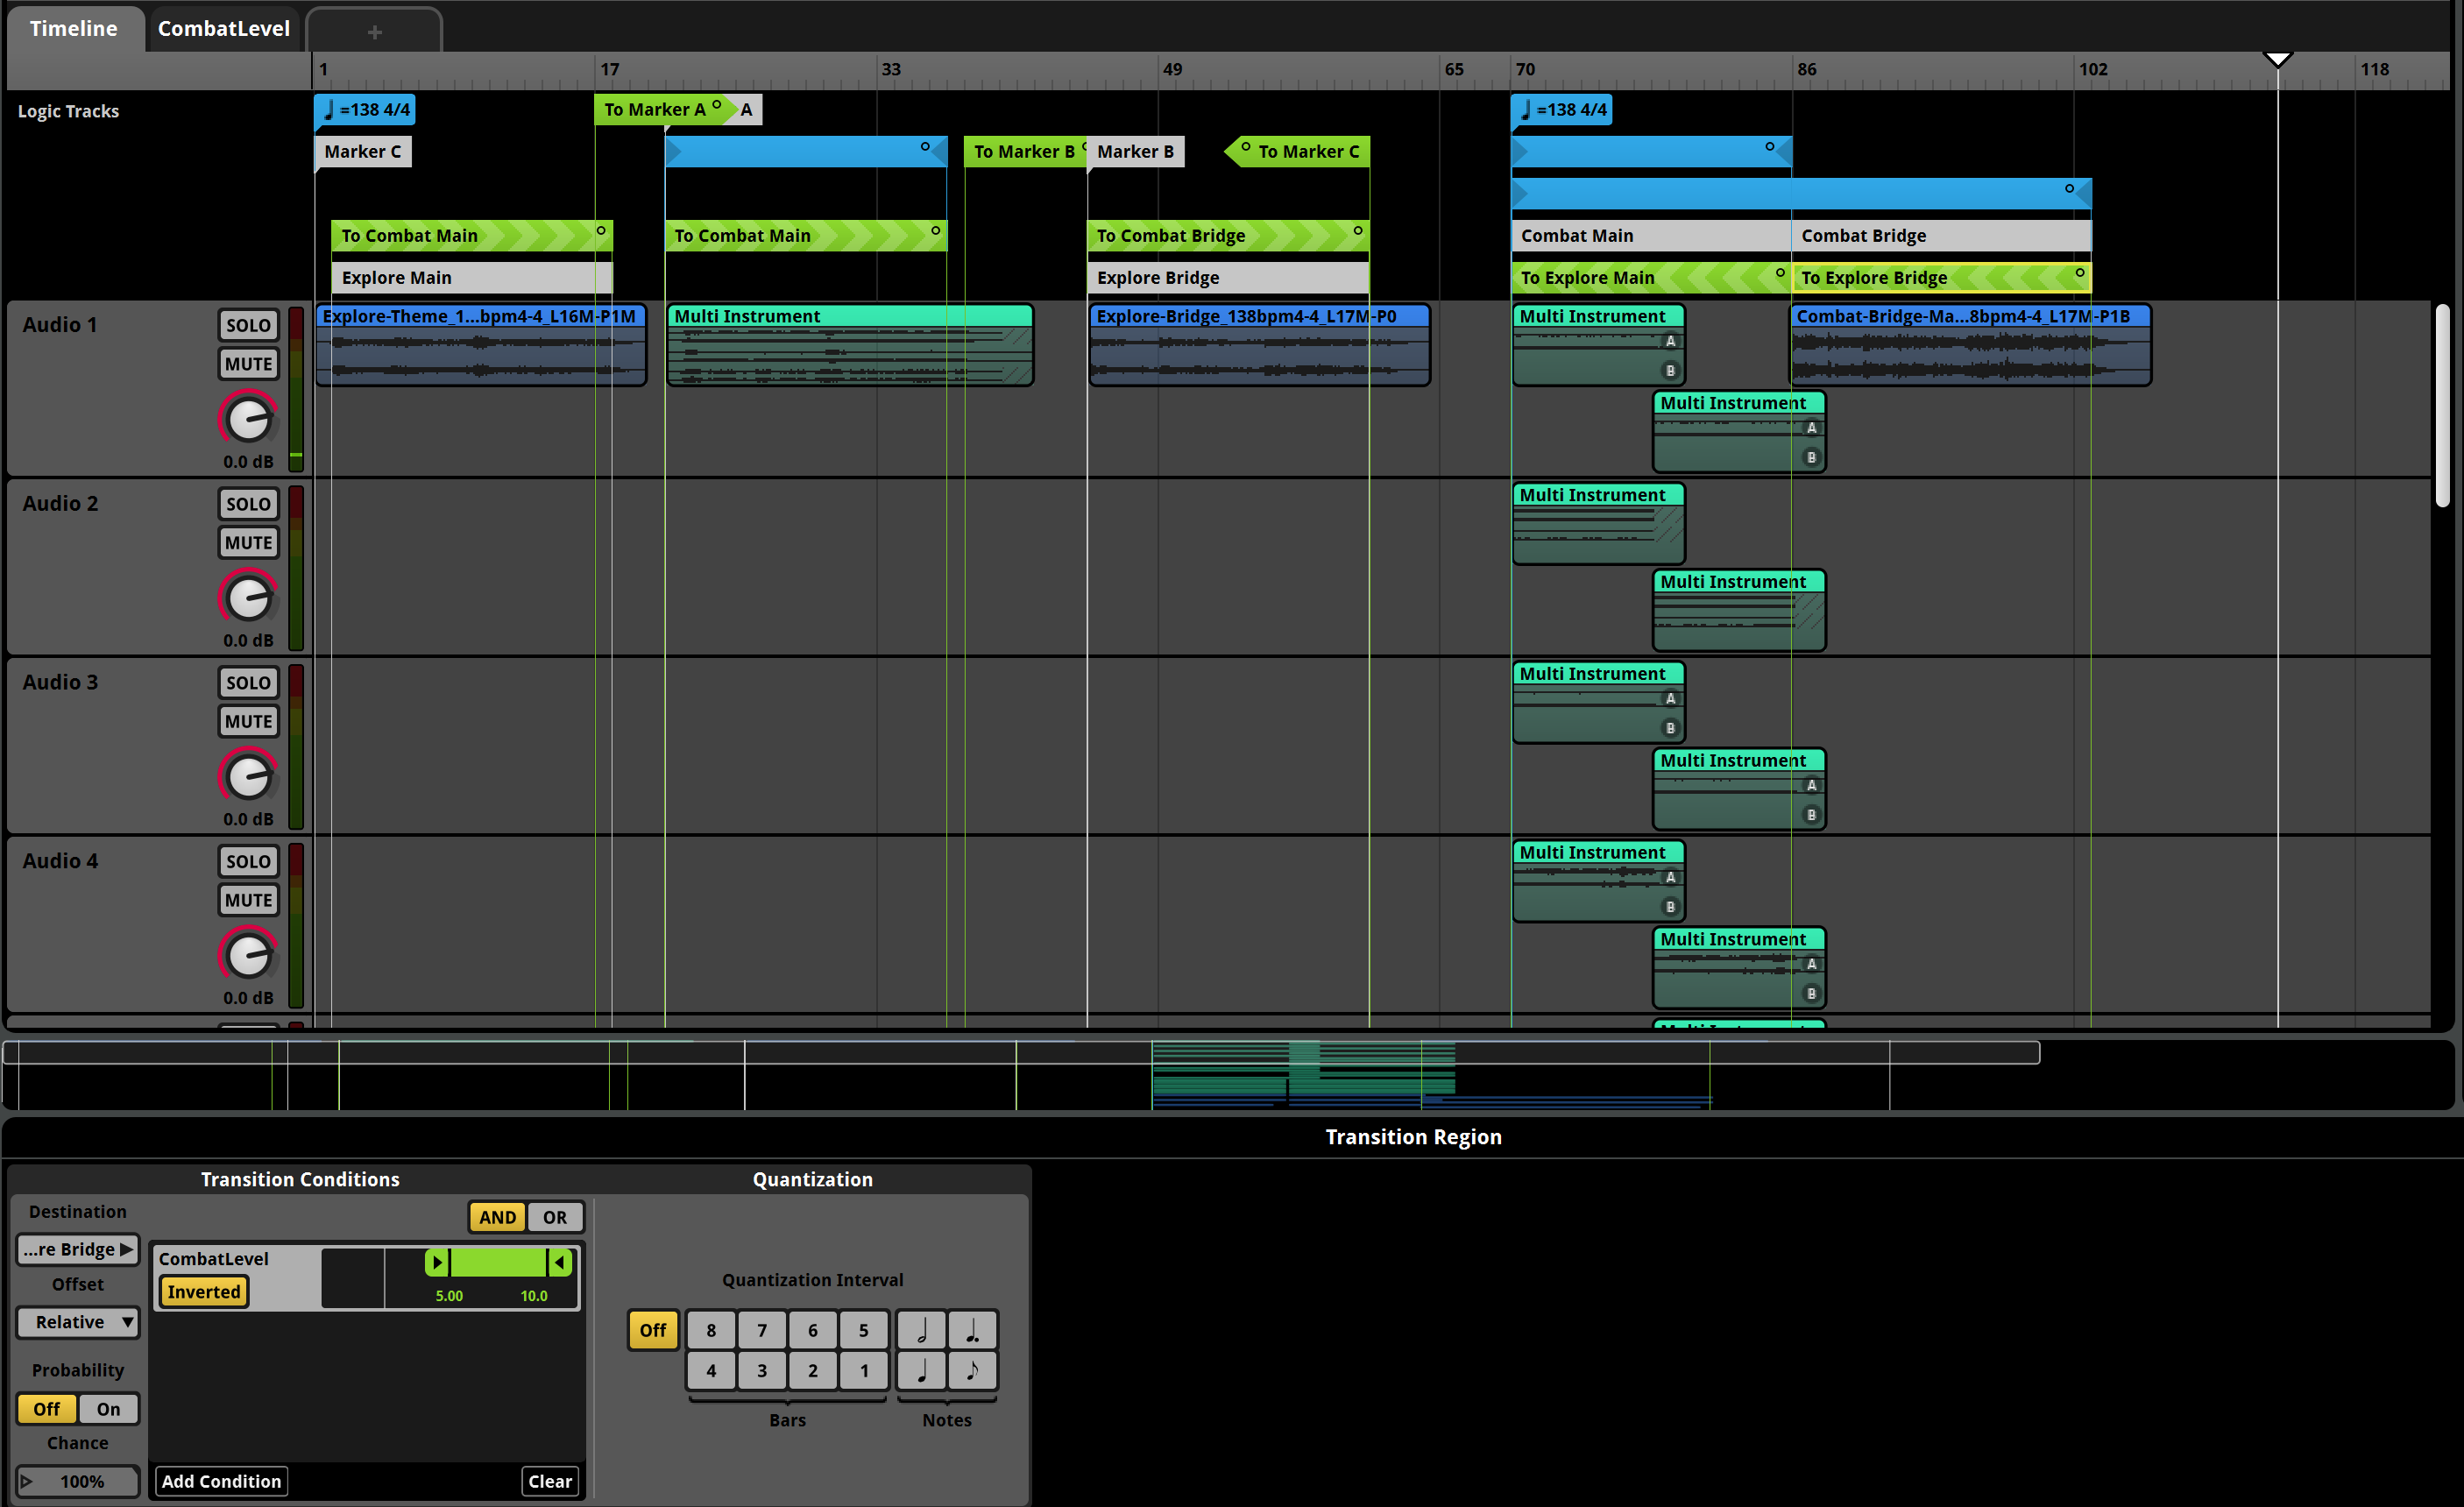
- Adjust the length of the Transition Timeline to something short, like 1 measure, then overlap all left and right tracks to create a crossfade between them. This time we want the crossfade to smooth the transition.
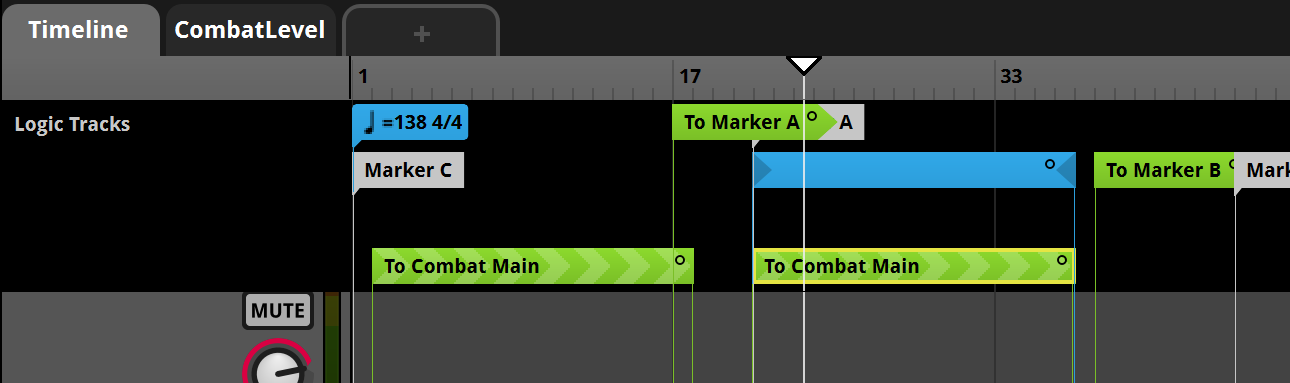
- We'll also want to transition from the alternate versions of Explore, so just copy & paste the Transition Region to Combat Main on their loop. This way you're also copying the crossfade setup, the transition conditions and offset so you don't need to redo that.
- Now we'll have to do the same to transition from the Explore-Bridge clip to the Combat-Bridge one. Create a destination region fitting the Combat-Bridge clip and name it Combat Bridge.
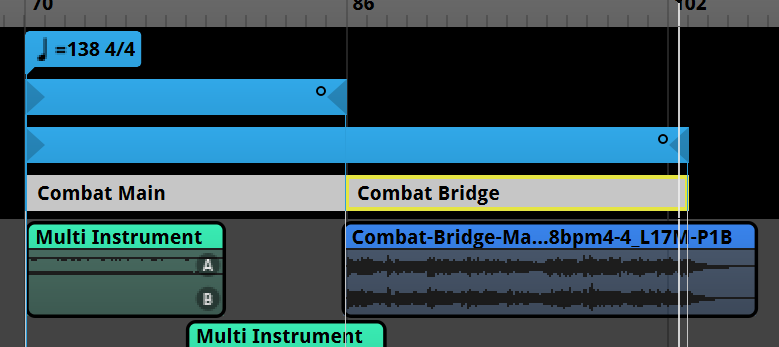
- We can copy & paste the Transition Region to Combat Main, adjust it to the Explore-Bridge clip and set its destination to Combat-Bridge.
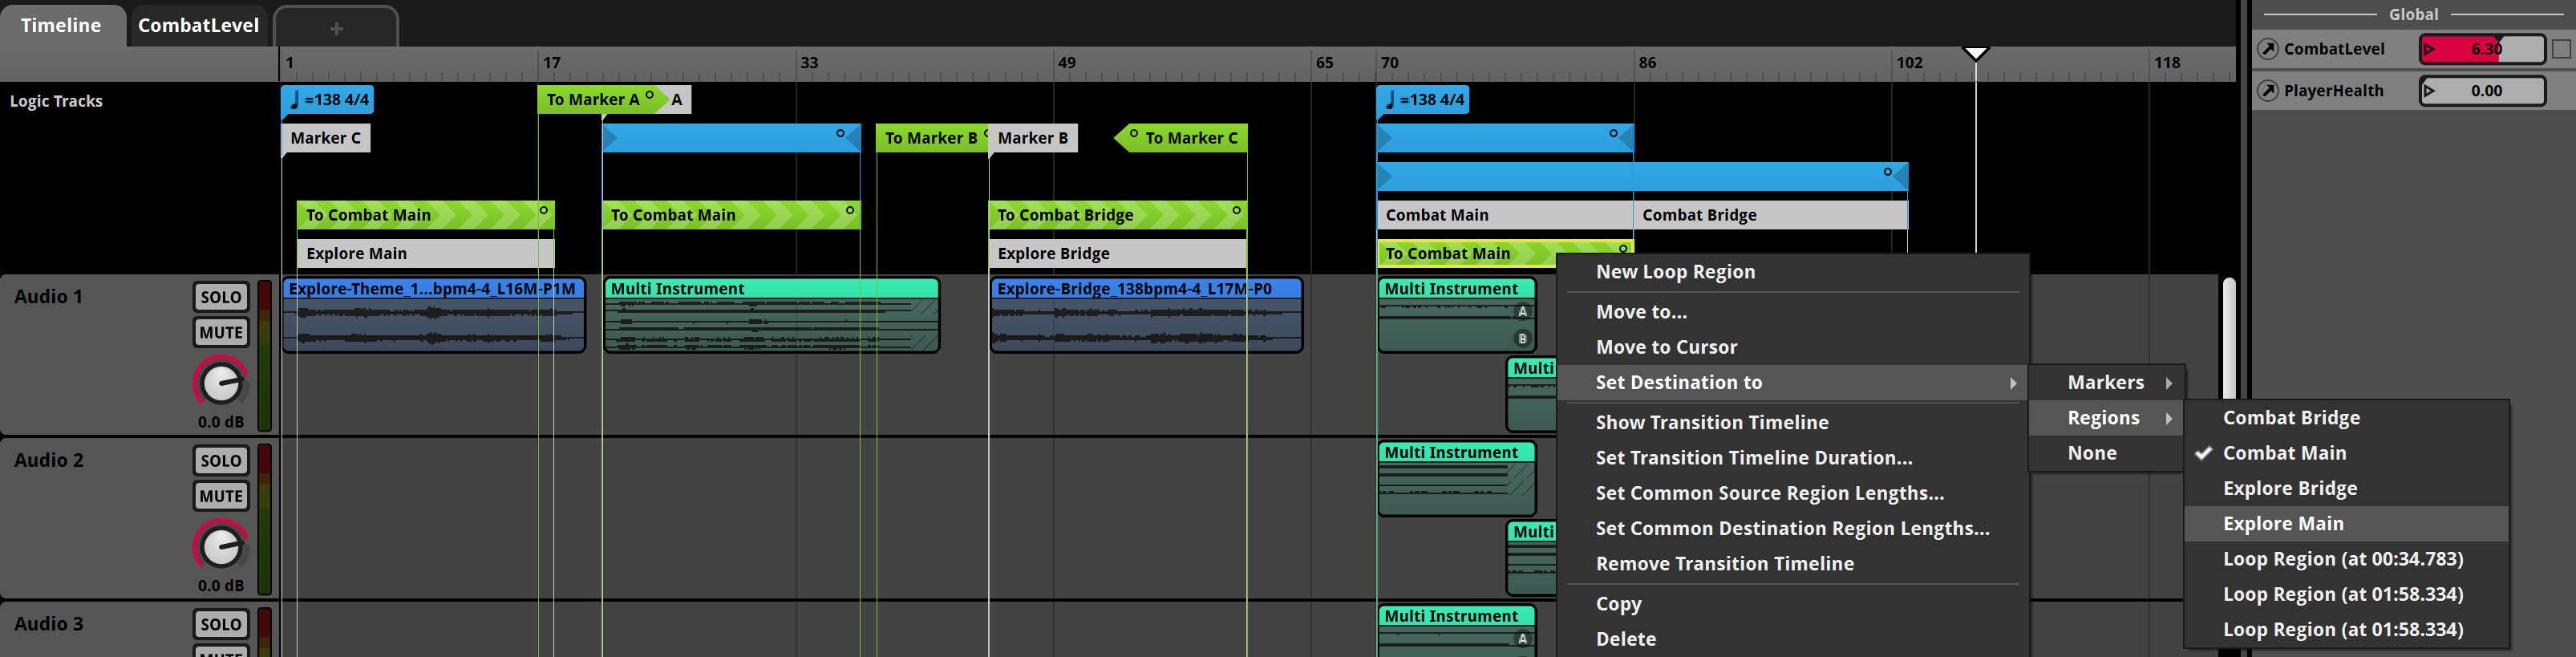
- We can now transition from Explore to Combat but we can't go back to the explore music when the danger is over. Create 2 Destination Regions for the Explore tracks, Explore Main and Explore Bridge and adjust them so they match the Transition Regions to Combat.

- We'll copy one of the Transition Regions to Combat so we can modify them to transition to Explore. Copy & paste the first one to the right of the current Logic Tracks.

- Now drag it below the Combat Main destination region and set its destination to Explore Main.
- Now you can use the Invert button in the Transition Condition so the transition will happen when the Combat Level is outside the specified range.
- Repeat the last 3 steps to transition to the Explore Bridge. Set the destination to Explore Bridge and use the inverted range in the condition.
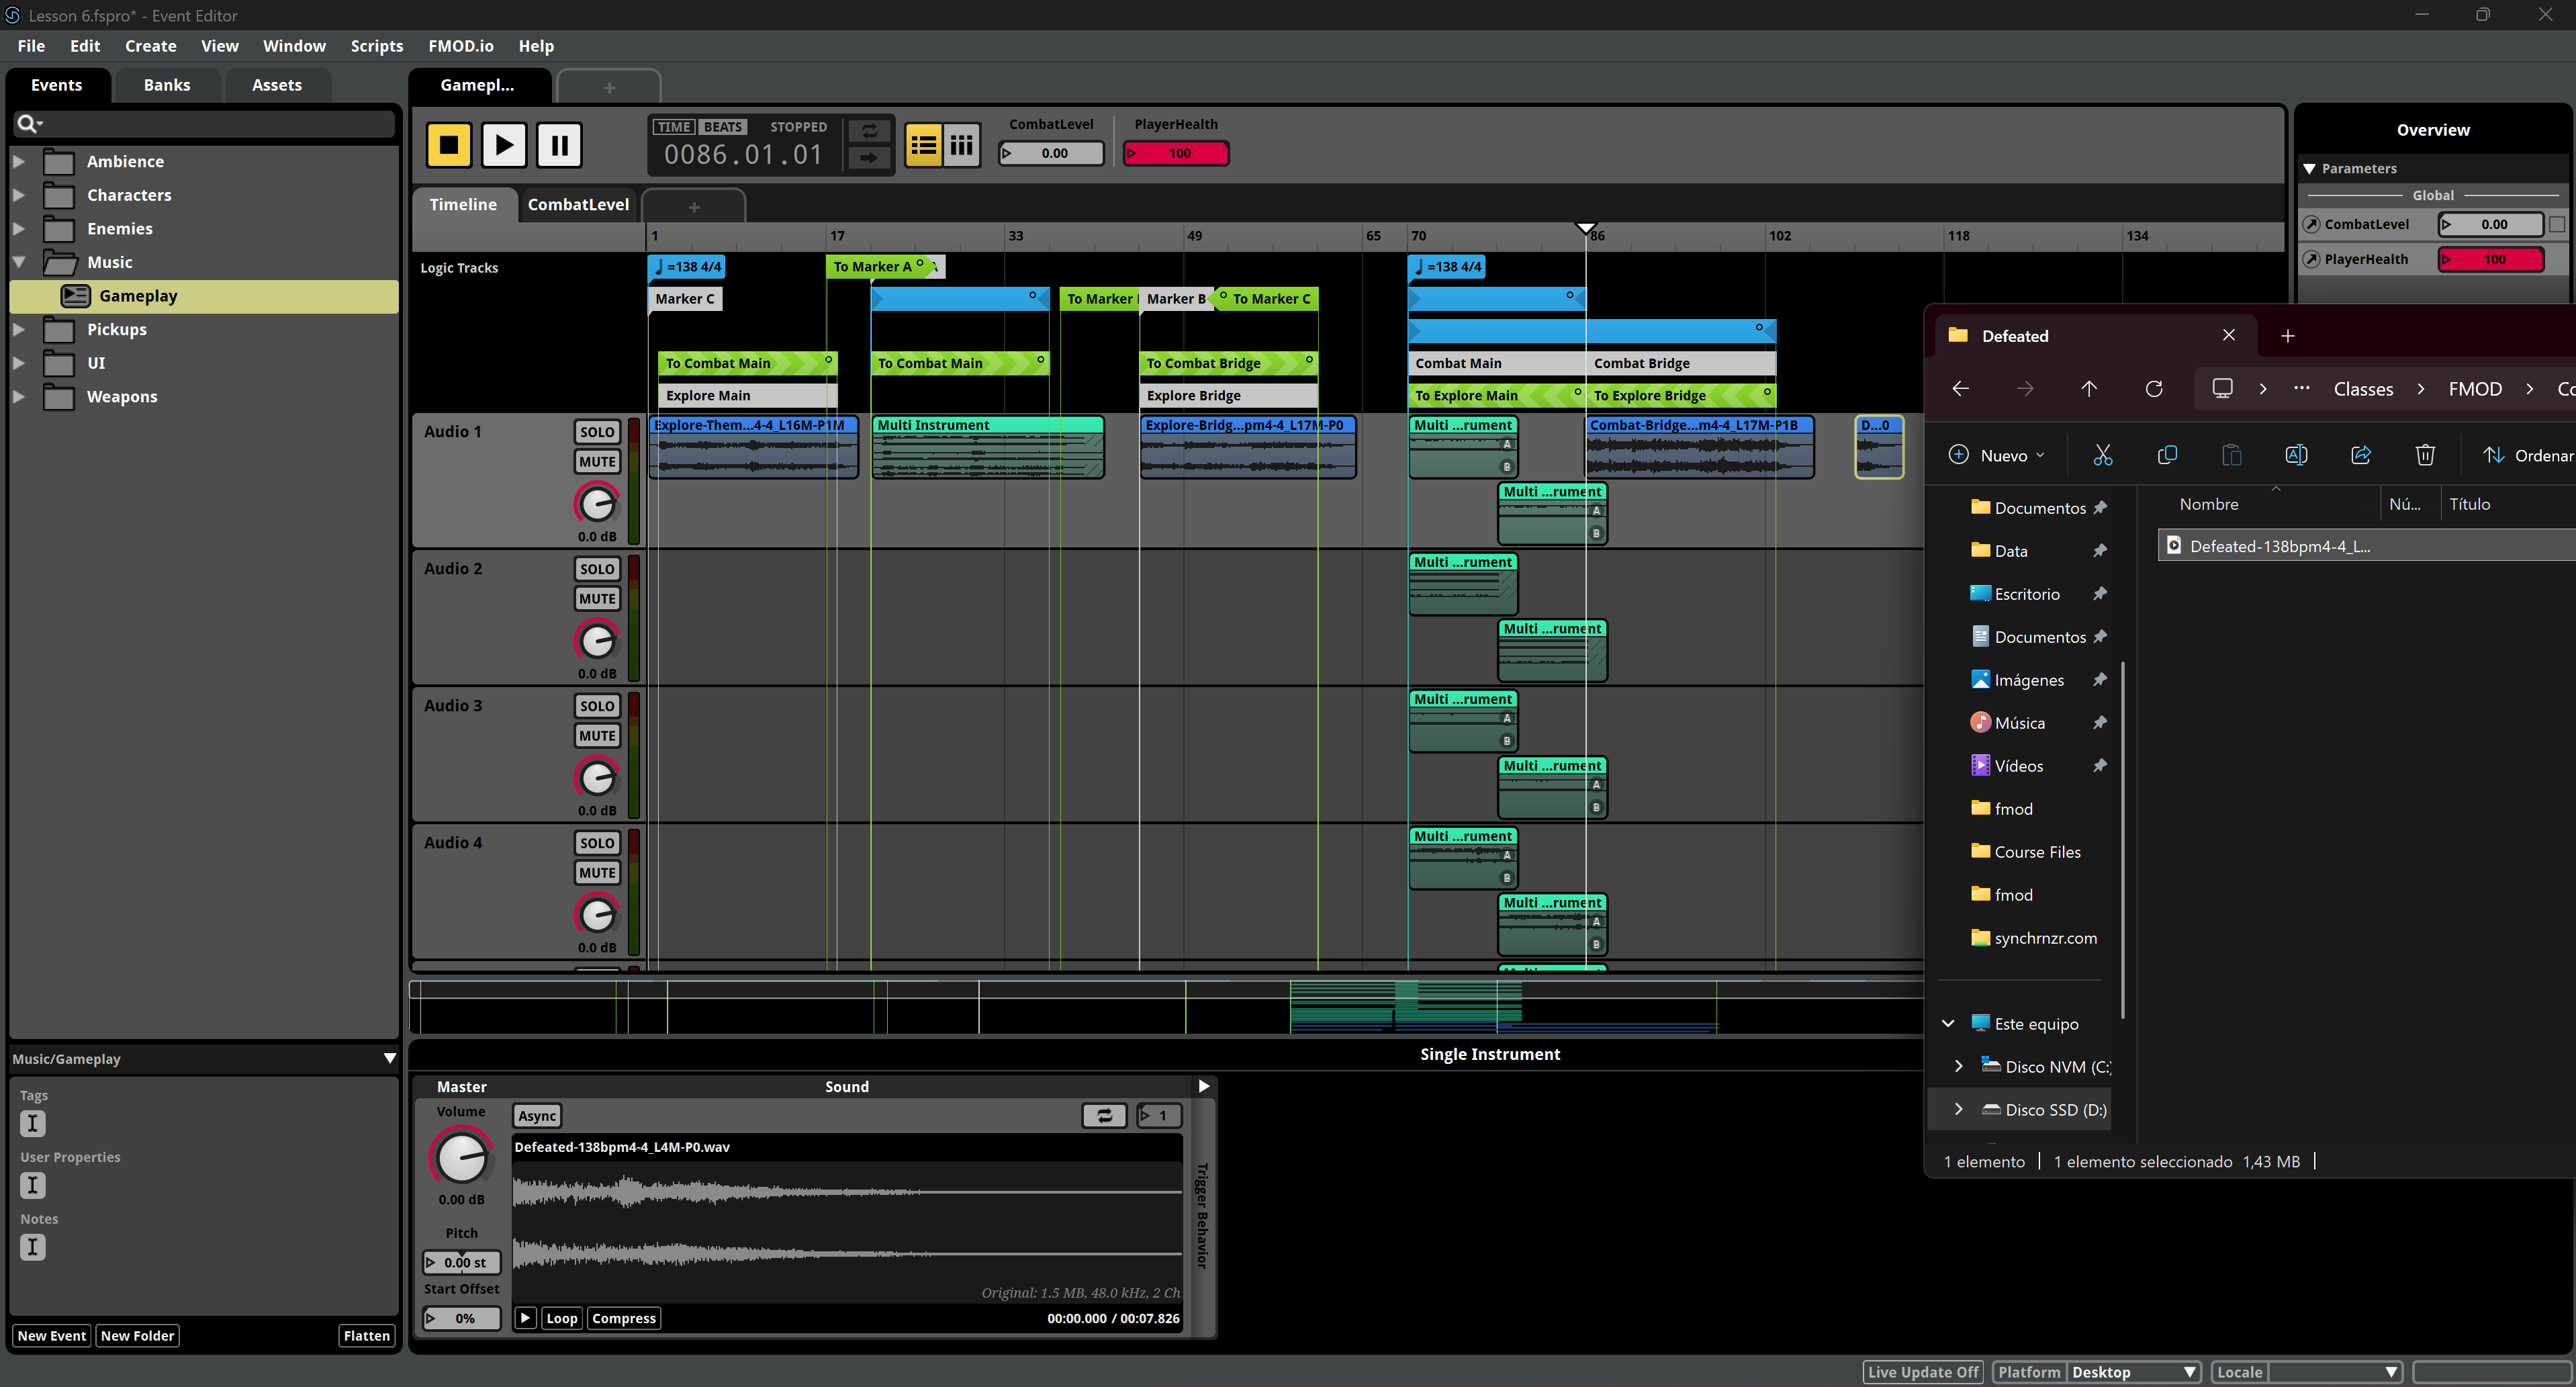
- Finally we'll add the Defeated track from the music folder on the right of the first track so we can play this stinger when we're completely out of health.
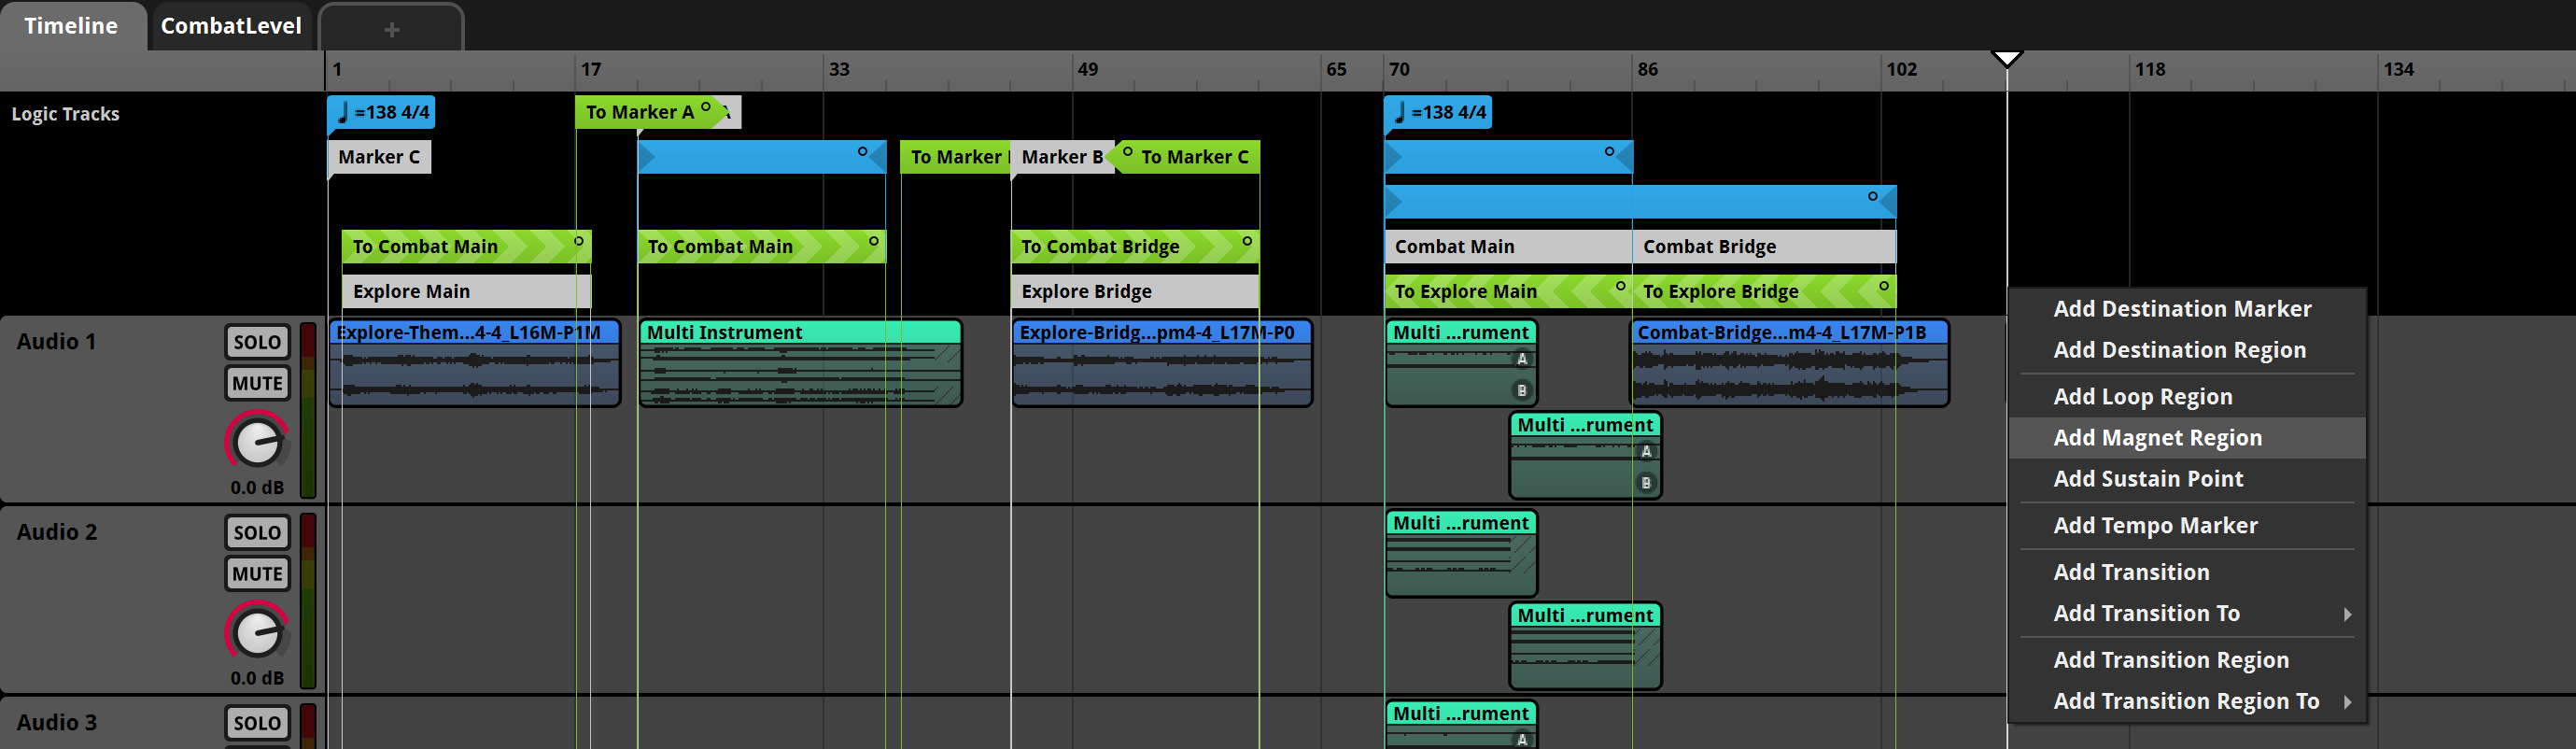
- Right-click in the Logic Tracks zone at the beginning of the Defeated clip (in the image coverd by the menu) and choose Add Magnet Region. Adjust it to the length of the clip. A Magnet region is similar to the Transition Region but it works the opposite way; when the conditions are met, the play cursor will jump into the Magnet region. You can achieve the same result with a big Transition Region and a Destination Region or Marker, but for this case, using a Magnet region is smarter and cleaner.
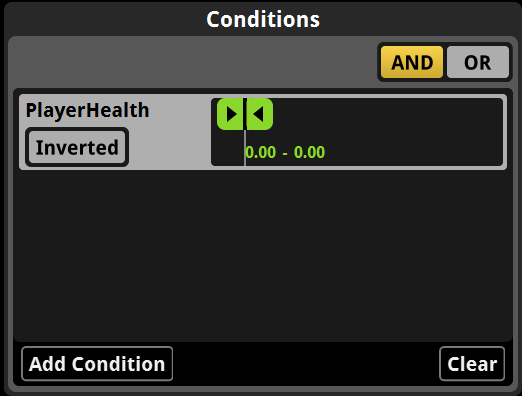
- Now we'll add the condition. Click Add Condition the Add Parameter Condition > Player Health.
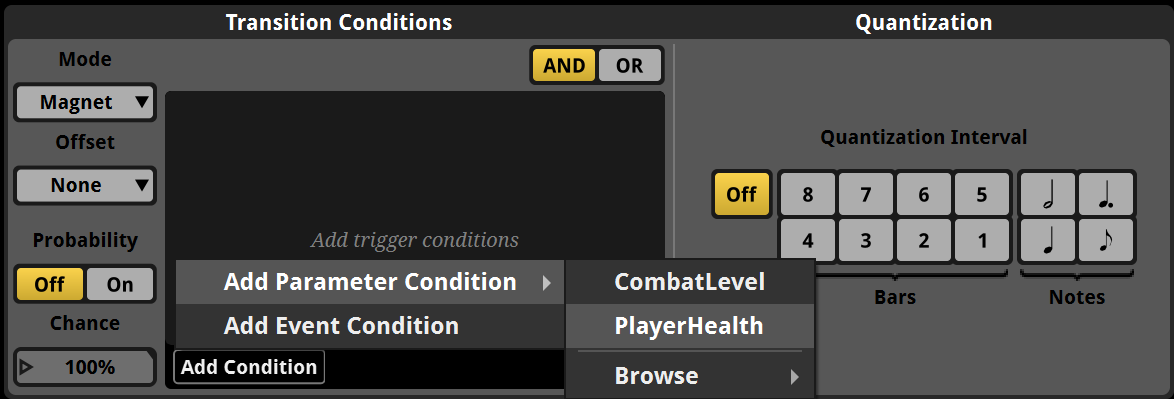
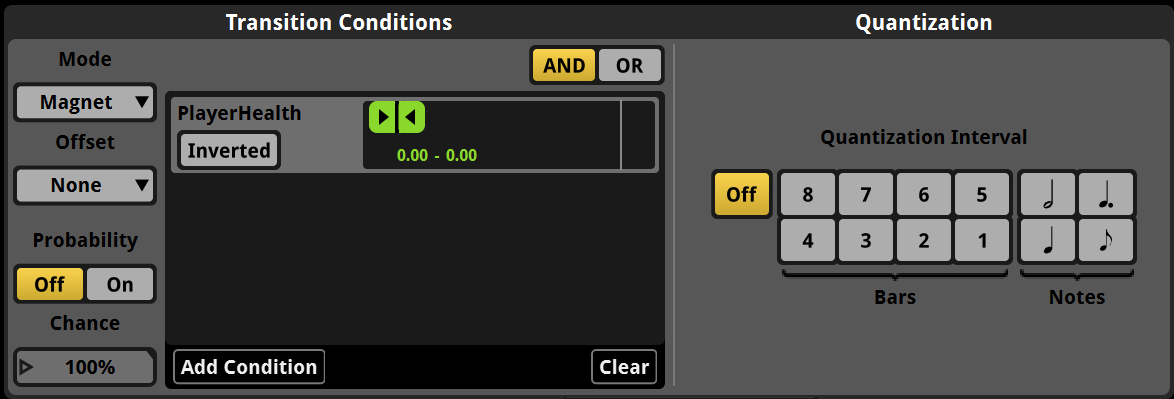
- Set the range to 0.00 - 0.00; we'll jump into this region when the PlayerHealth is 0.
- You can try the behavior but you'll notice that Magnet Regions loop their content. To prevent that we'll use a Sustain Point at the end. A Sustain Point stops the Timeline when specified conditions are met.
- Add the same condition than the Magnet Loop, PlayerHealth = 0.
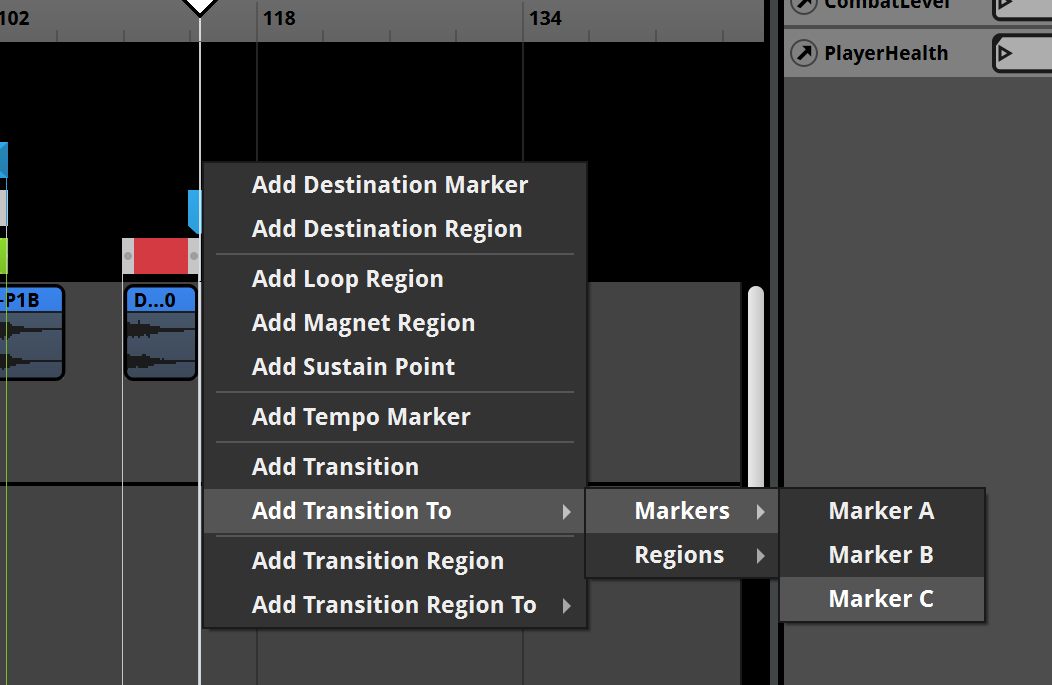
- Finally, we'll want to get out of the Magnet Region when the player is respawned, so we'll add a simple Transition to the Marker C we've got at the beginning of the Timeline so music will restart. We need to add right after the Sustain Point.
- You can try now the behavior of the music by playing it and adjusting the parameters on the right panel. If everything looks good we're ready to go!

The music is complete. Always generate soundbanks and test what you do in the game. This way you can spot possible bugs due to incorrect names for events, parameters, etc... or with bank names (not quite possible in these examples using the default Master bank). Hope you enjoyed the process and got some practice working with FMOD!