Last update: 2025-08-03
101: Sound Design
Lesson 4: Spatialization
So far we've been working with 2D sounds. However, designing a 3D soundcape is very important if we want to achieve a good immersion degree. We need to spawn different 3D emitters throughout our map so we can hear all their sounds coming from the right direction. And it's also very important for feedback: we really want ot hear where our eneimes are coming from! In FMOD, the 3D Timeline event presets features a Spatializer effect that allow us setting up the 3D attenuation properties for our sounds. This Spatializer component can be added and set at any time to any track. Let's see a simple example, we'll add the movement sound to the Hoverbot enemies in the game, so now we'll be able to tell where they come from!
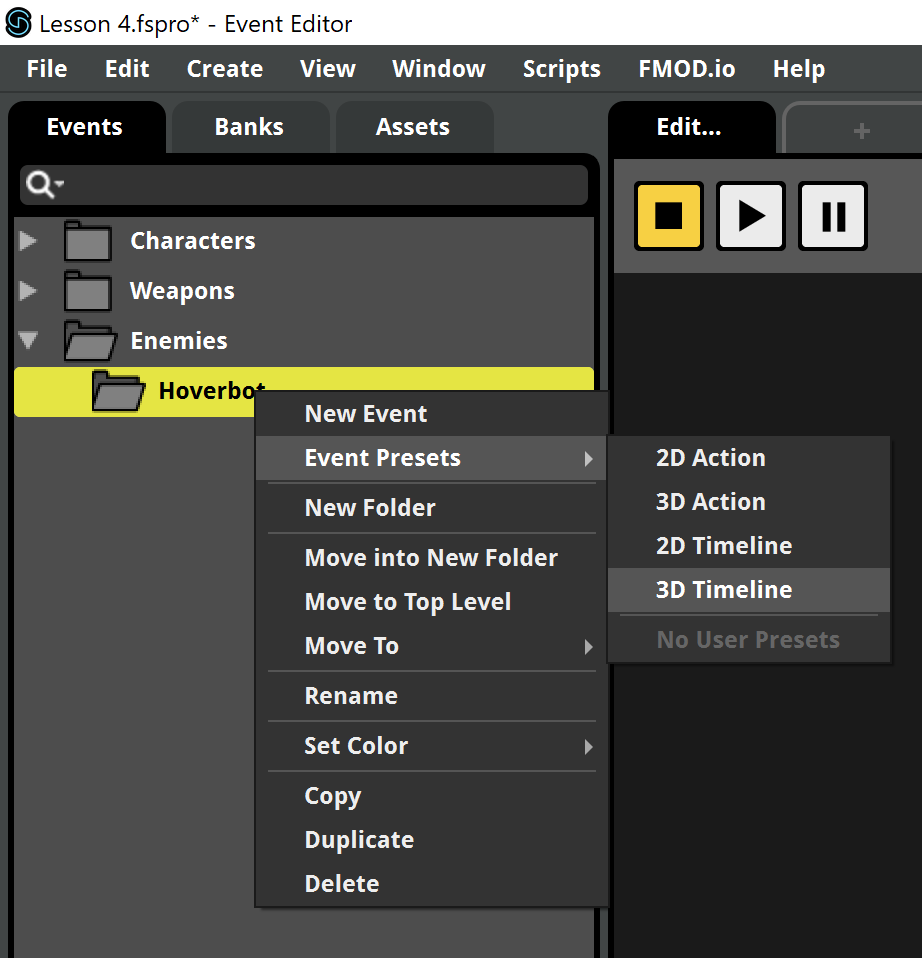
- First we create the path for our event Enemies/Hoverbot using the New folder option as we've done before. Then we add the 3D Timeline event by right-clicking the Hoverbot folder and choose Event Presets > 3D Timeline.
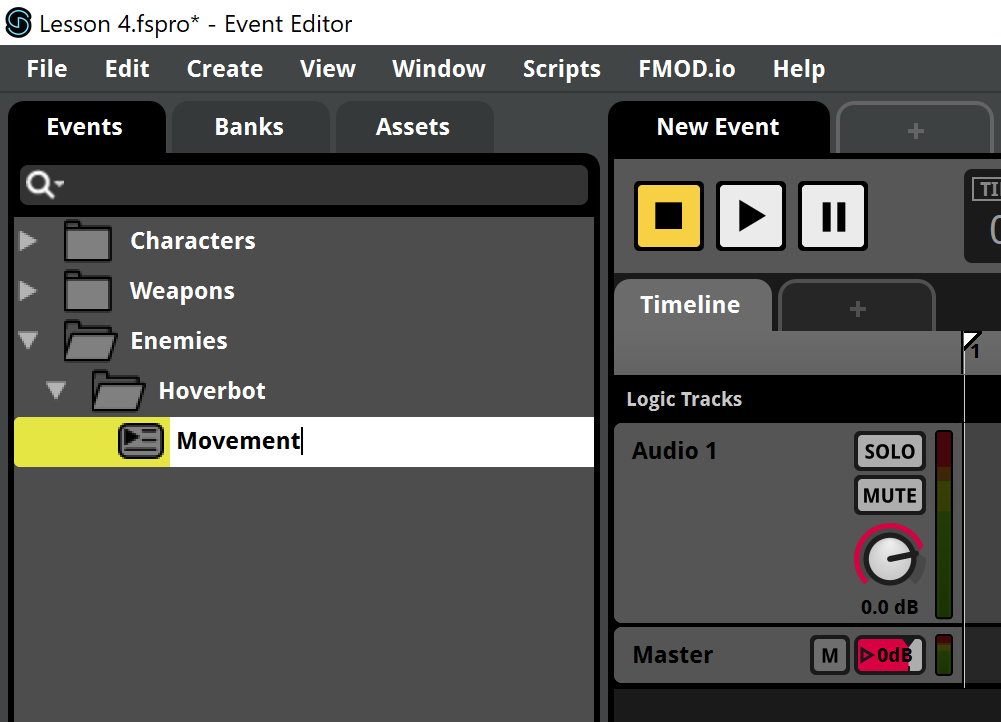
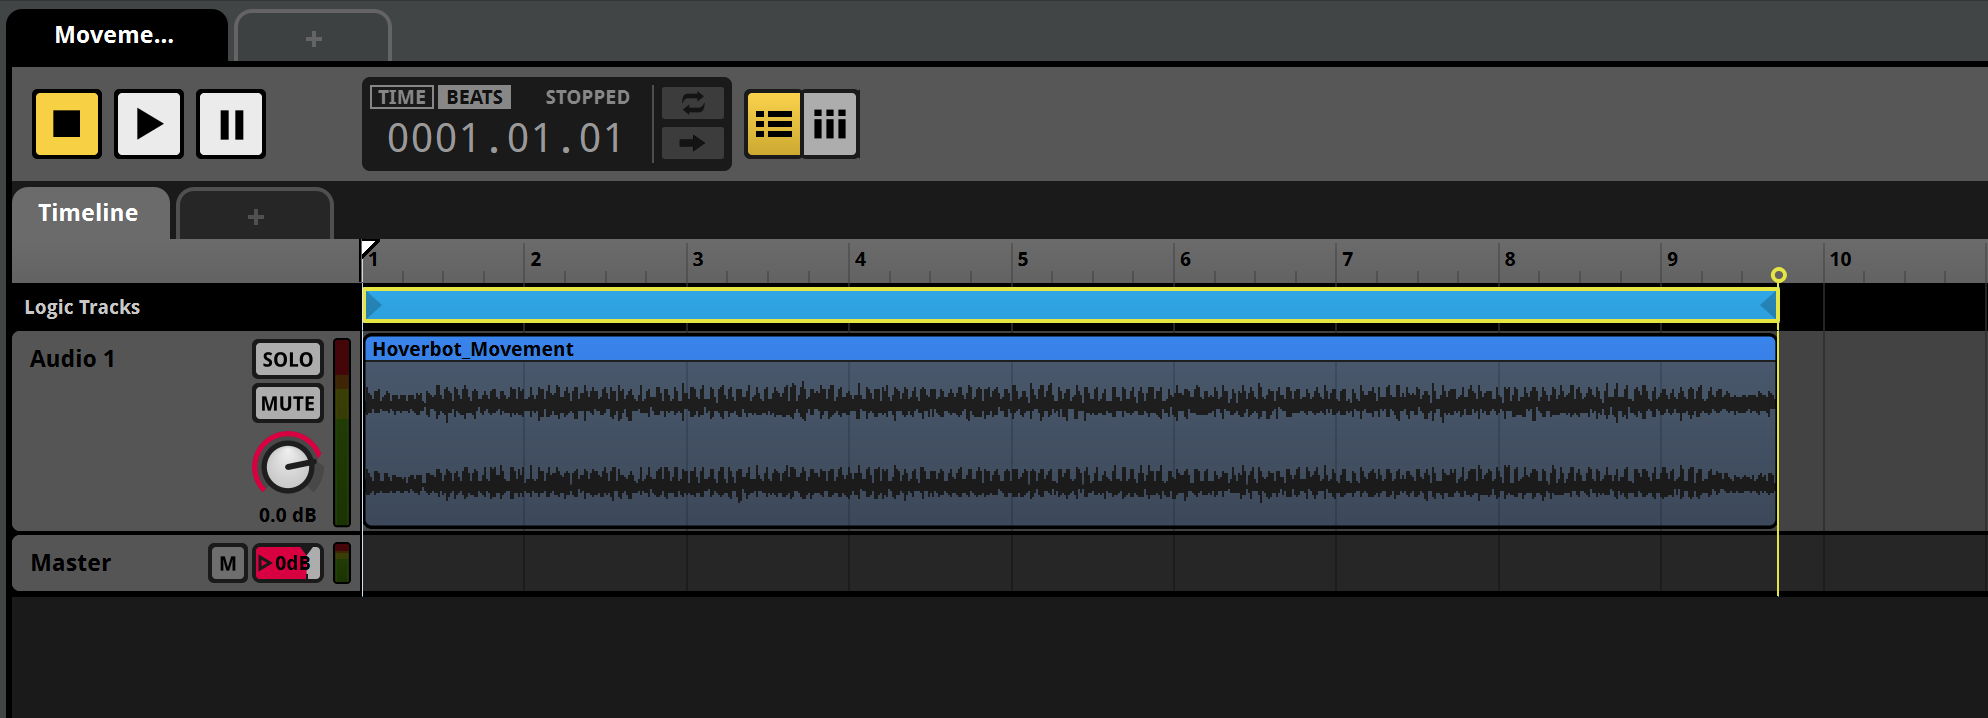
- It's name is Movement.
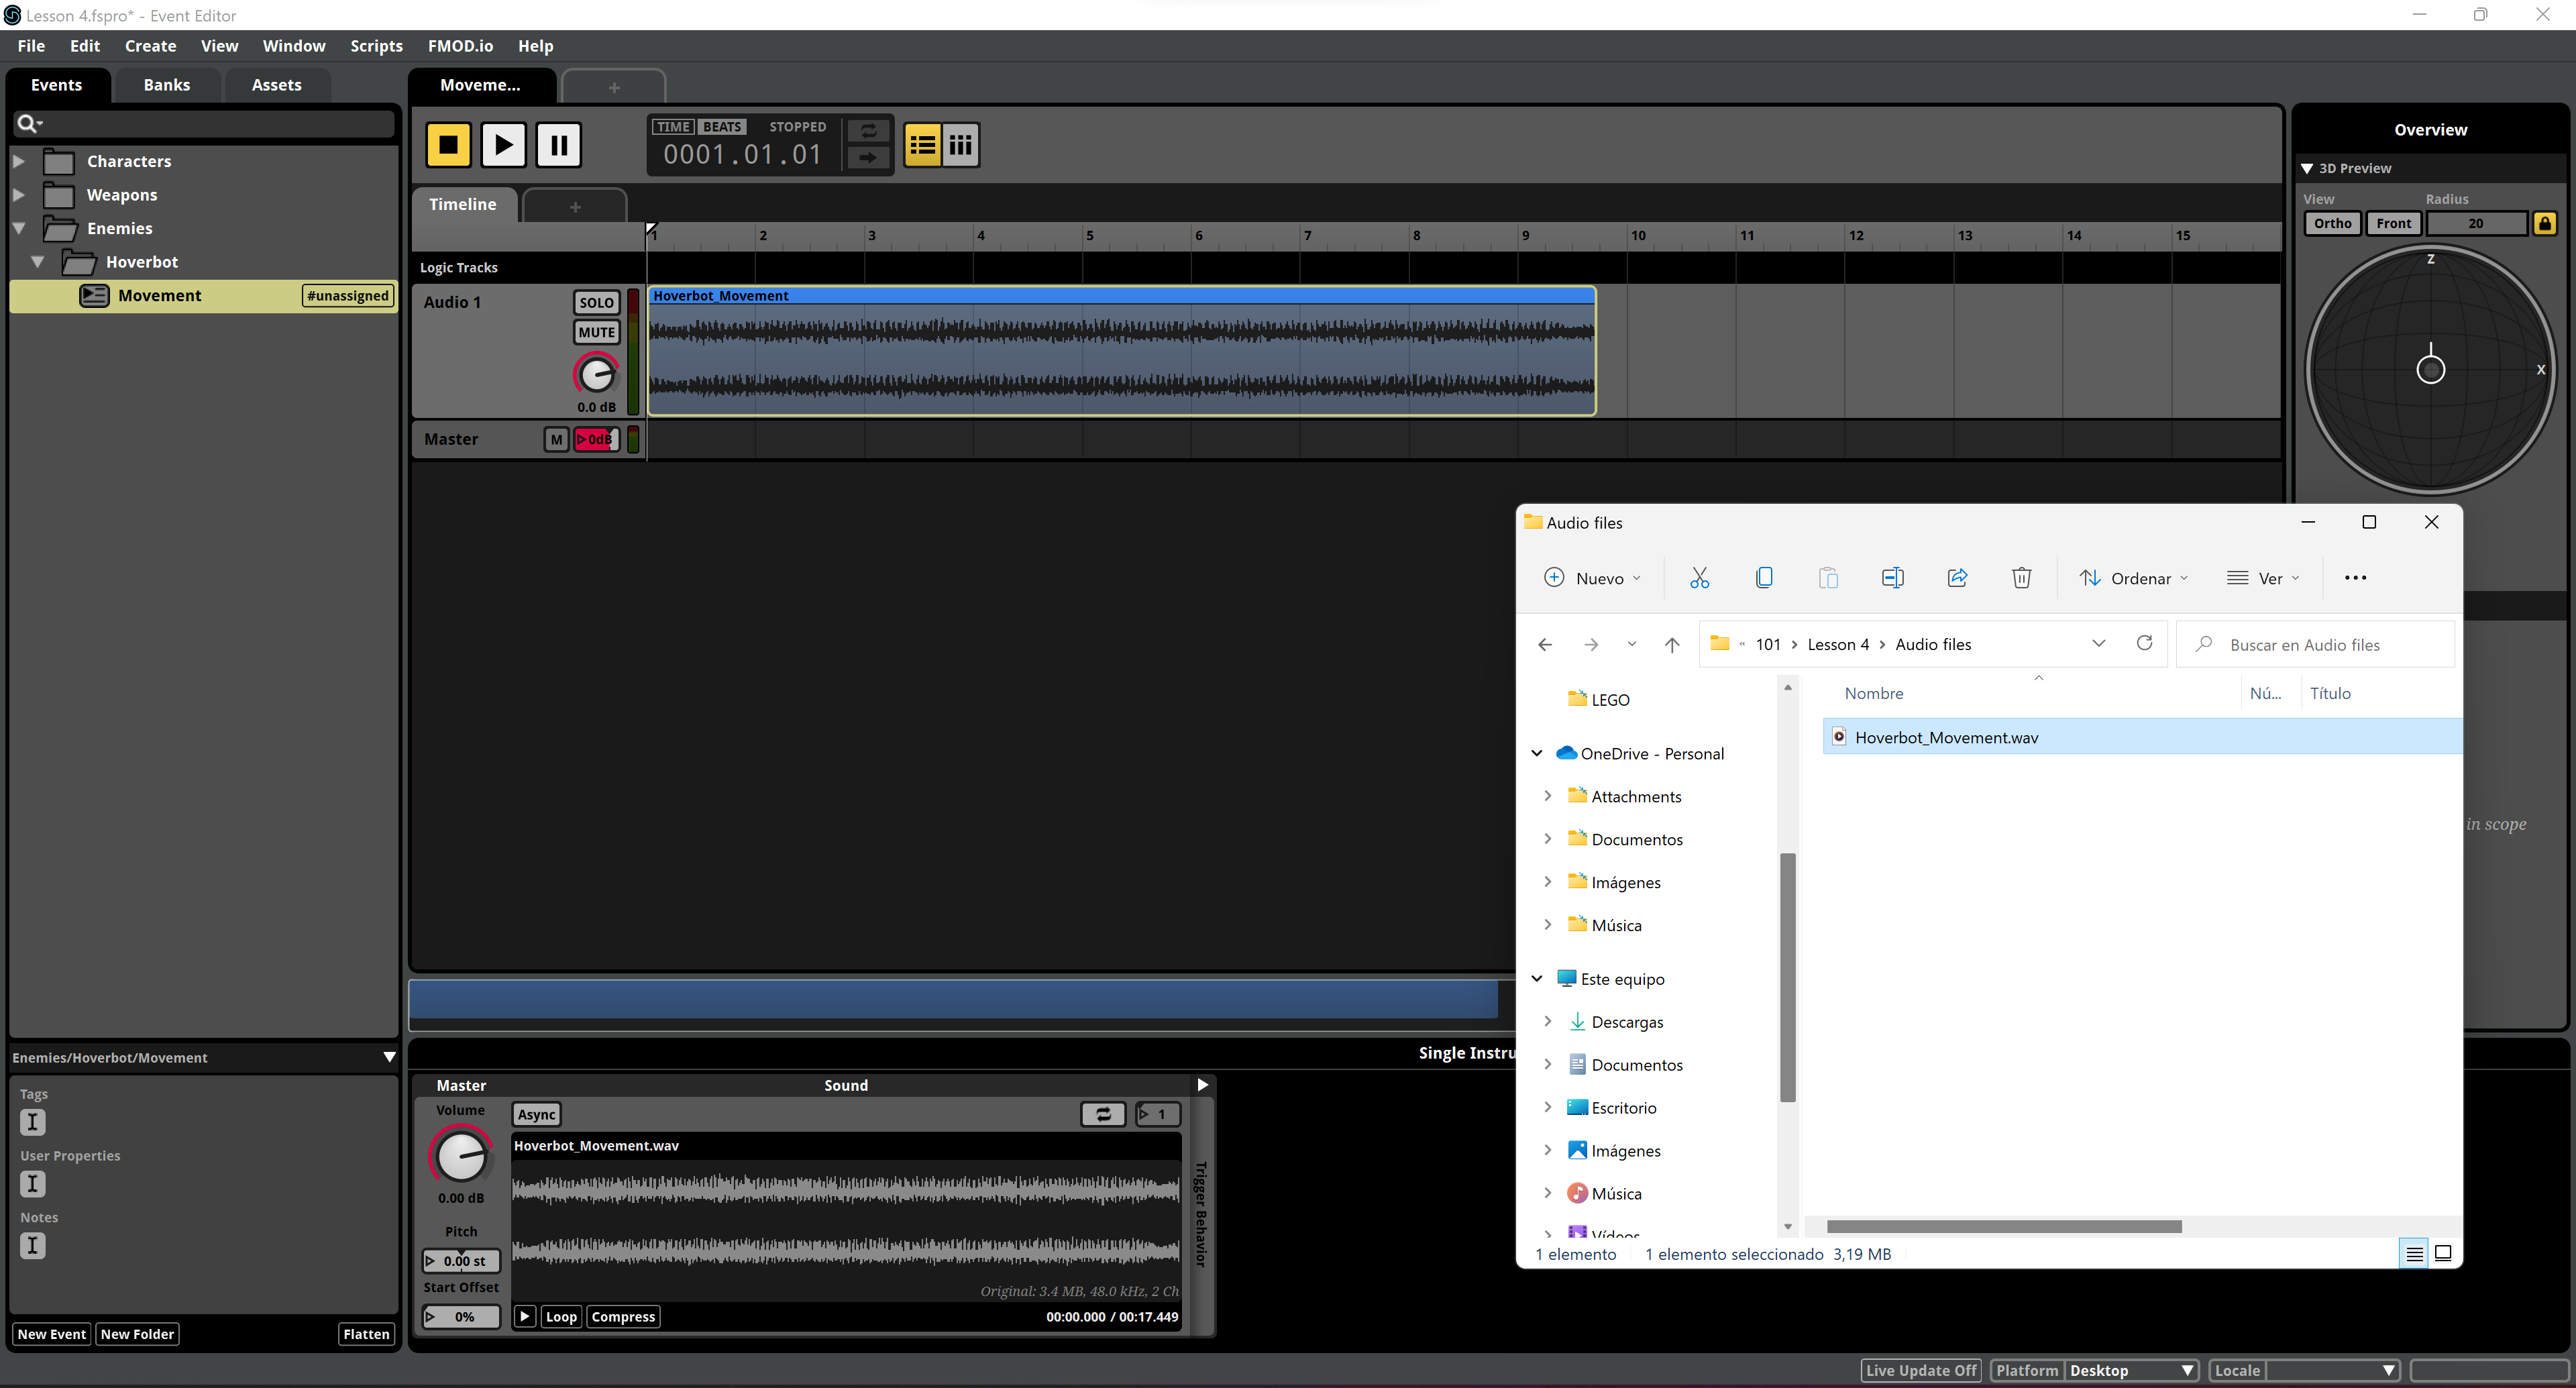
- Now drag the Hoverbot_Movement.wav file in the Audio Files folder of the lesson to the Audio 1 track to create a Single Instrument.
- We need this sound to loop. The sound is edited to loop seamlessly, so we only have to enable that feature in FMOD. We can do that using the Logic Tracks, which is a black zone on top of the tracks and below the time ruler. Right-click over it and choose Add Loop Region.
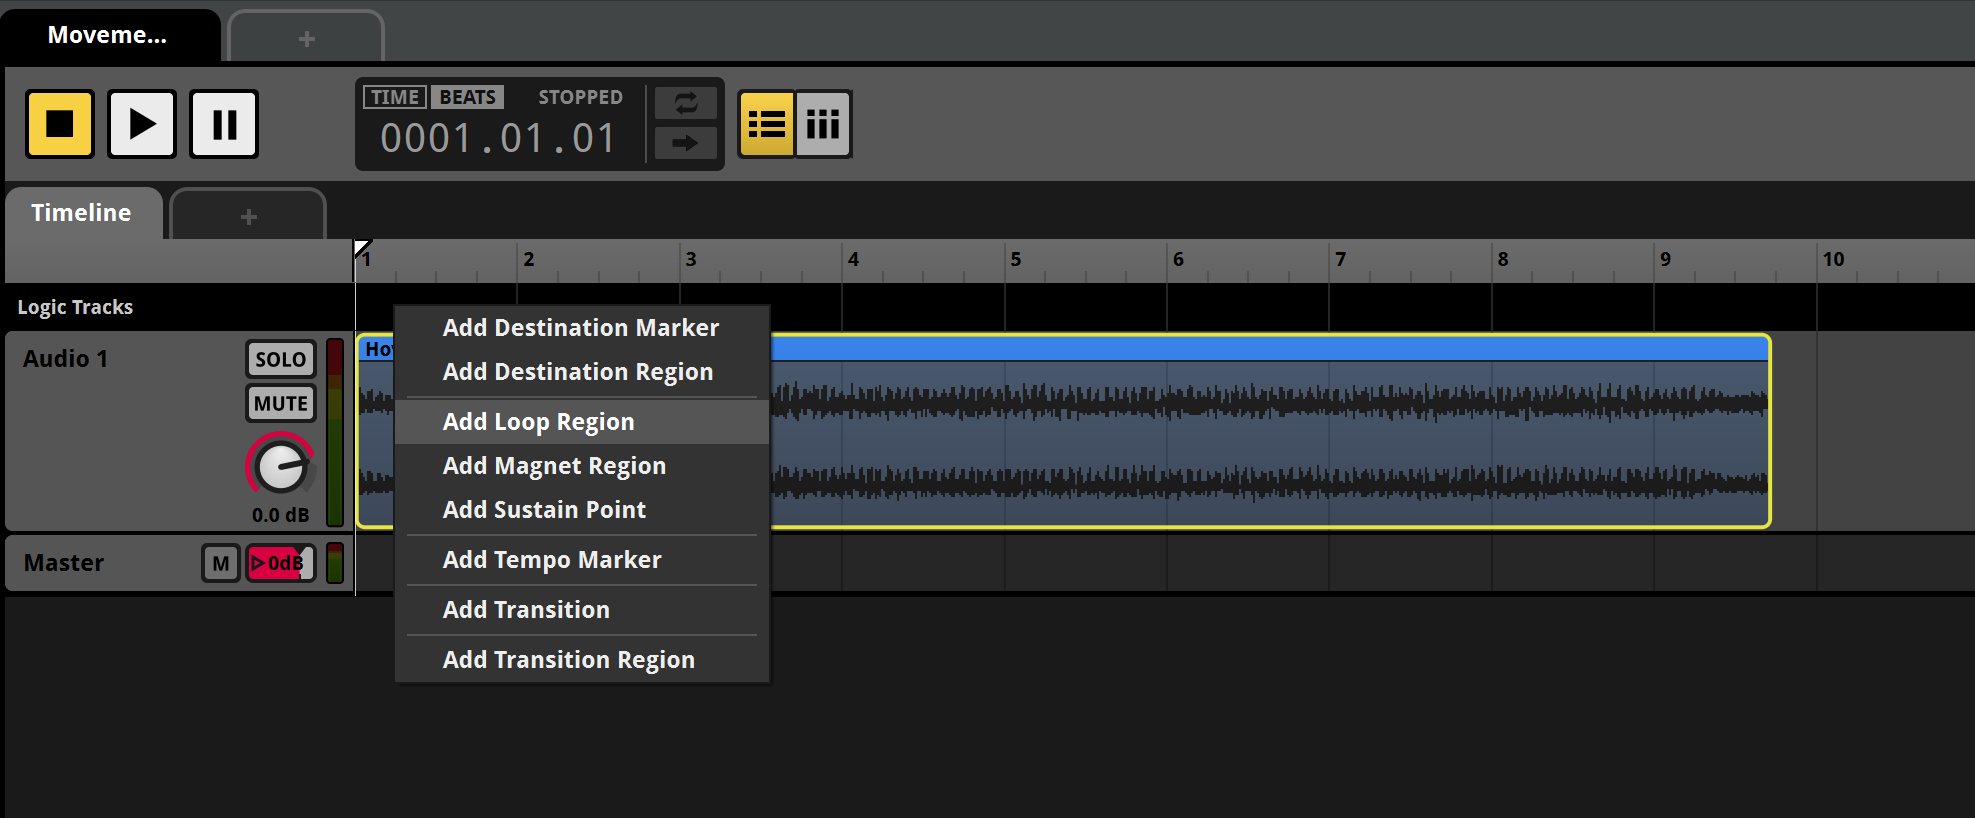
- The Loop Region appears as a blue rectangle into the Logic Tracks zone. Drag its extremes to make them match the beginning and the end of the audio clip. You'll notice a yellow circle on top of the cursor when your position is right at the extremes of the clip. Wrap all the clip with the Loop Region.
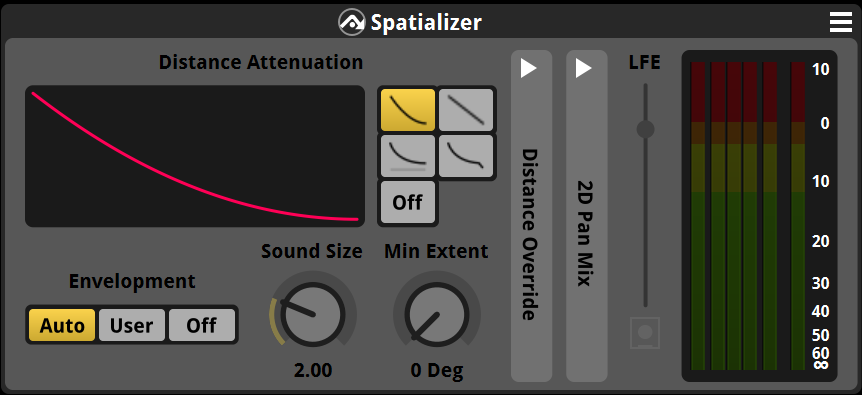
- Now click the Master track and take a look at the Spatializer component, at the right side of the Master track volume knob. It features different predefined attenuation curves. Here we can any of them or also disable the attenuation. Disabling the attenuation also allows the user to create custom attenuation curves using the Built-in Parameters if we need something specific. The positioning will be still applied anyway. We can also use the LFE fader to adjust the send level to the LFE channel, which is supposed to be reserved for certain sounds only. The default settings are probably ok for our Hoverbot sound, so we'll just use them as they are.
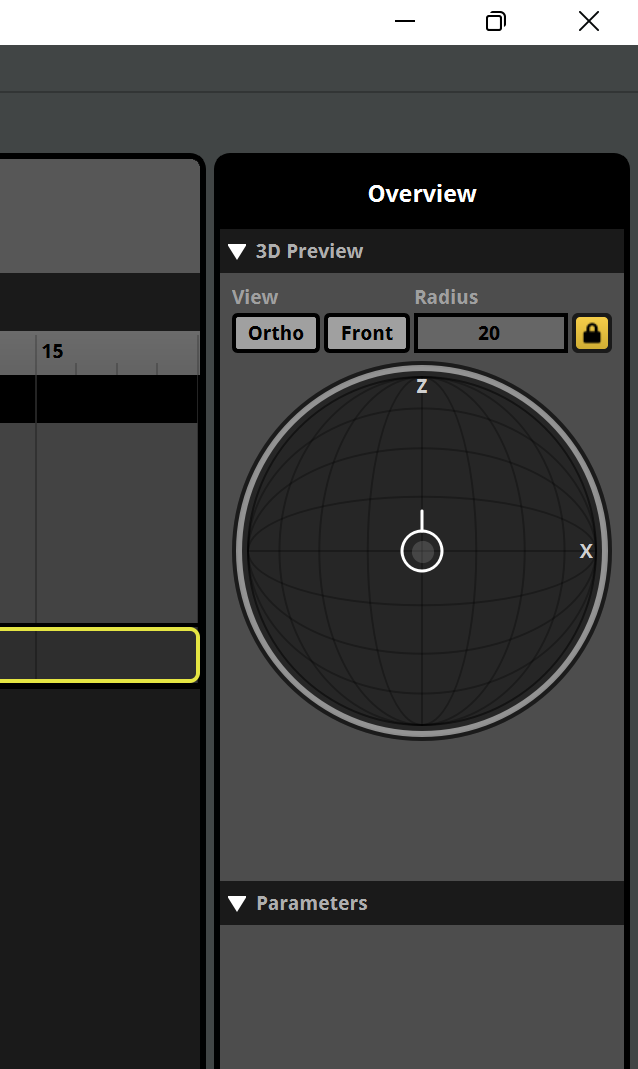
- We probably want to preview the spatialization settings. We can use the 3D Preview panel on the top right of the interface. The emitter is the circle with the upward line. You can drag it all over the circle/sphere to listen how it sounds when played at different locations. By default, the maximum attenuation distance is used for the Radius, however you can unlock that value using the lock icon and set it to whatever better suits your needs. Also you can switch between Orthogonal/Spheric preview and between Front/Top views using the buttons on the left.
- About the typical maximum and minimum distances of all sound engines, you can adjust them for this specific sound, by unfolding the Distance Override column in the Spatializer.
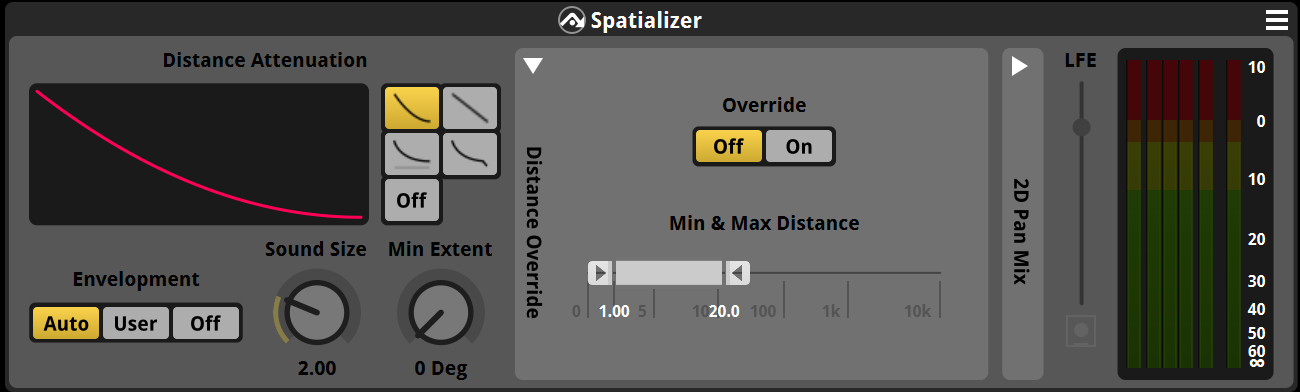
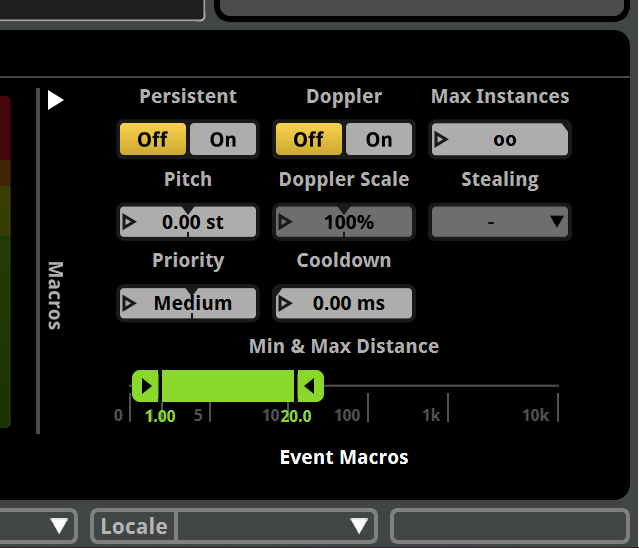
- The default values come from a section on the bottom right of the interface called Event Macros. Those are the default values for all events unless they're overriden, like in the case of the Min & Max Distance.
That's it! We can now assign the Movement event to the Master Bank, adjust folders, build and listen to the changes in the game. Now we should be able to hear where our enemies come from even if we can't see them!