Last update: 2025-08-03
101: Sound Design
Lesson 2: Using FMOD Sound Tools
Now we're going to add some additional sounds and introduce some FMOD tools for making sound richer.
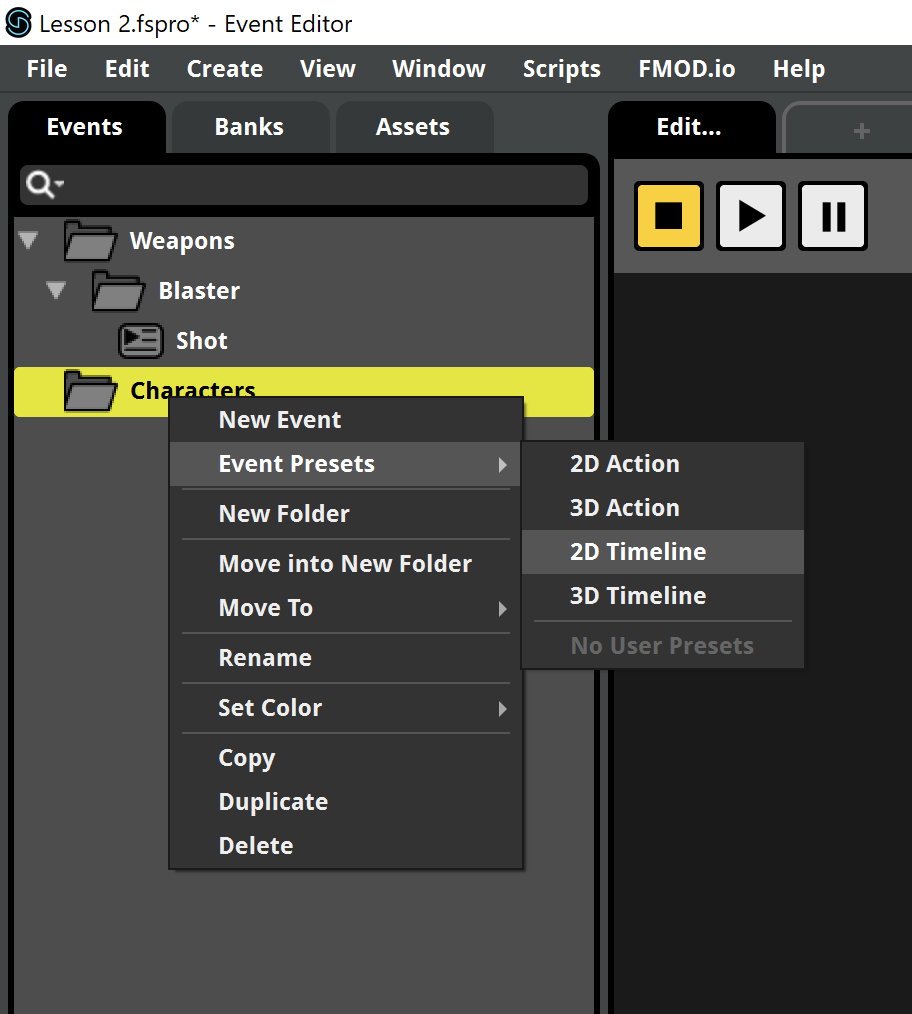
- Open the project from the lessons folder or continue from the project you created in the previous lesson. We're going to create a sound for the player jump action triggered with the Space Bar. Create a new Characters folder at the Events tab and choose Event Preset > New 2D Timeline like we've done before.
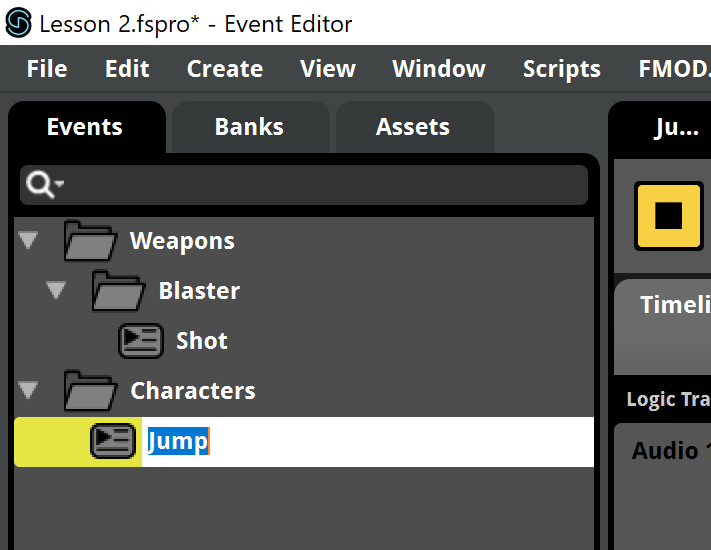
- Jump is the name for this event.
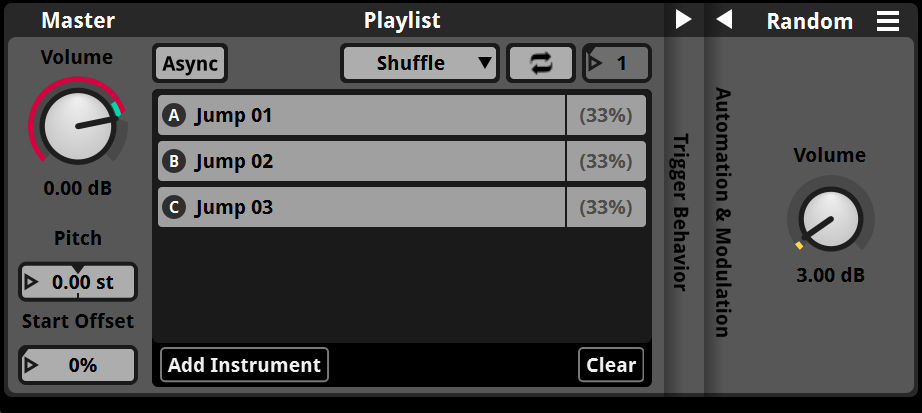
- Find the Jump samples within the Lesson 2 > Audio files folder and drag all them to the Audio 1 track of the Timeline. This will create a Multi Instrument.
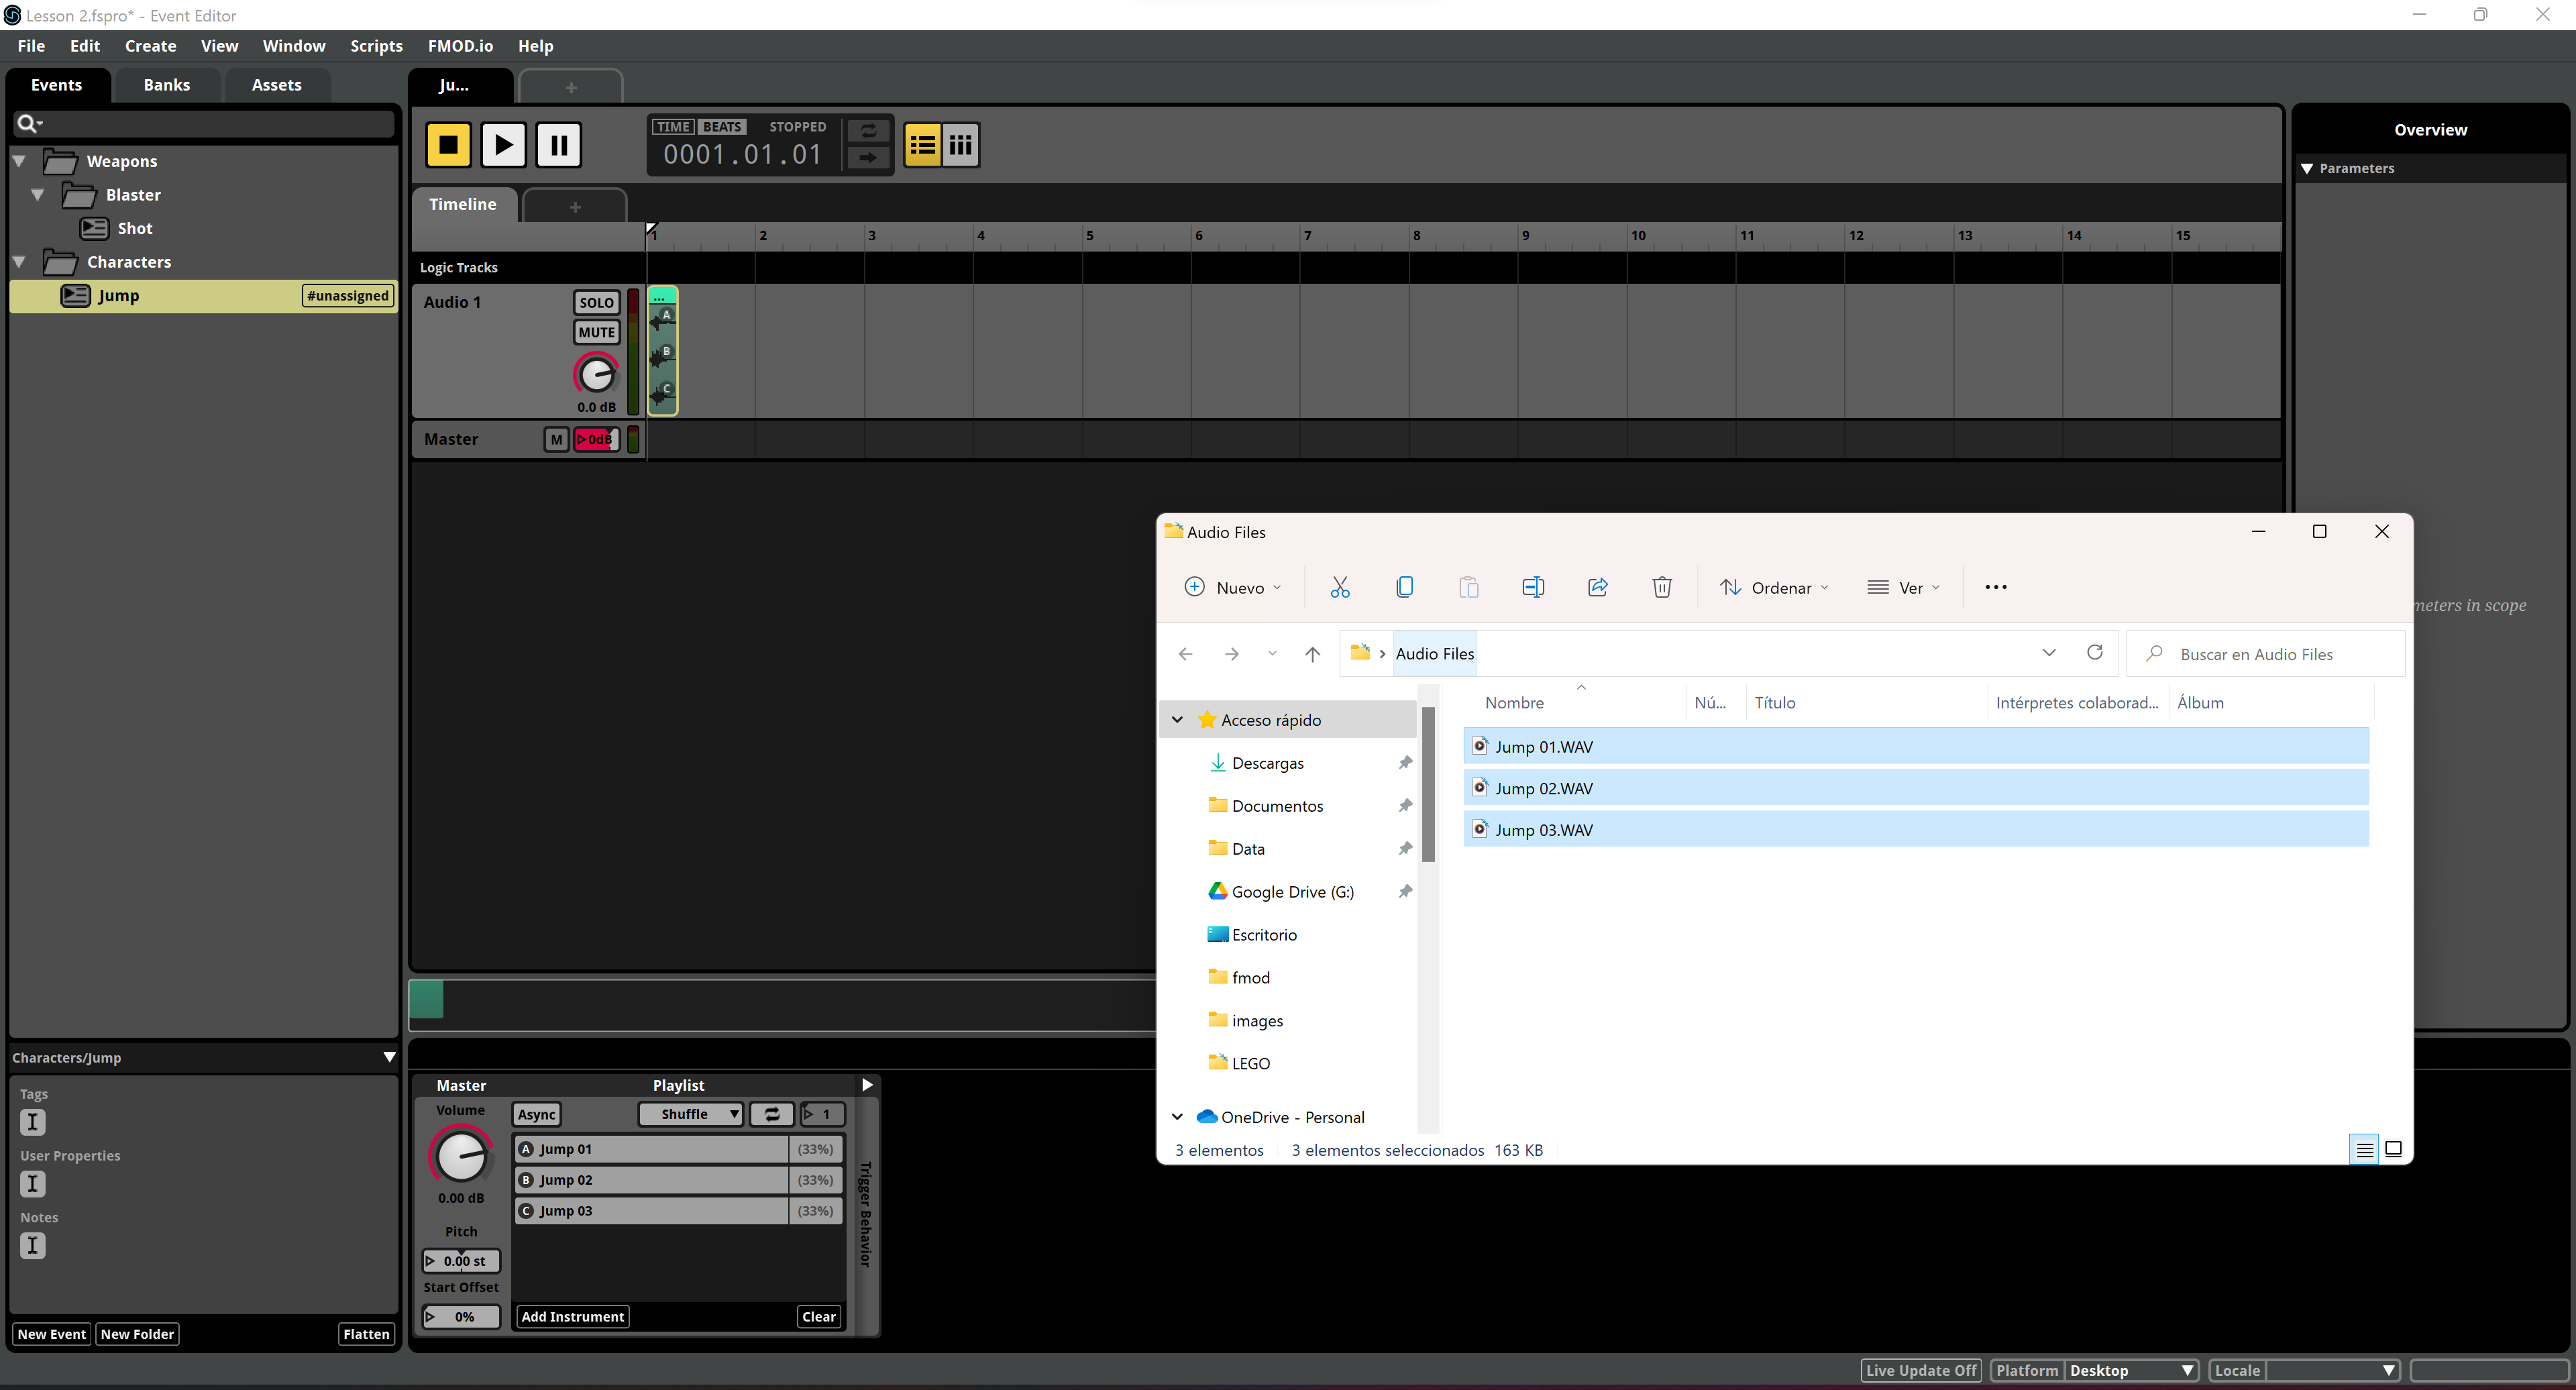
- Multi Instruments are essentially Playlists. You can take a look at the Playlist and the options in the Multi Instrument panel right at the bottom. We can choose diferent play modes: Shuffle, Randomize, Sequential - Local Scope and Sequential - Global Scope. Play the event and try the different modes. We'll finally one of the random modes (Shuffler or Randomize). HINT: For small sample sets is better to use Randomize, while Shuffle is more suitable for larger playlists.

- Notice that for random modes we can also modify the probability for each sample by setting their Play Percentage value. To do that, you can right-click any of the tracks and you'll see the Set Play Percentage option in the contextual menu.

- We can also see the clips clearer by zooming the audio track in. Hold the Alt key while moving the Mouse Wheel to change the time scale and ajust the view.

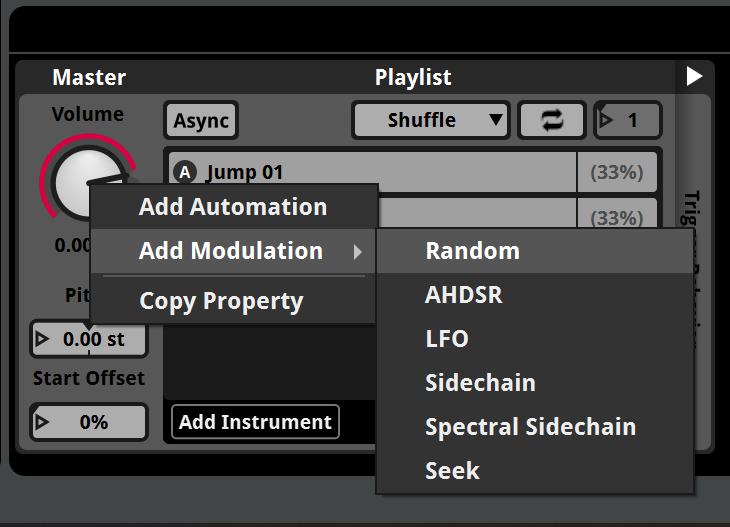
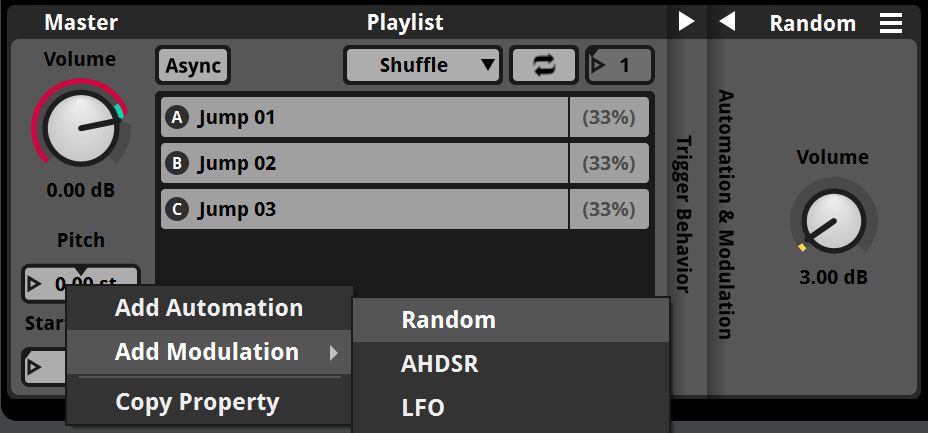
- Another powerful tool we can find in FMOD is the modulation. In order to use it, right-click over the Multi Instrument volume knob and choose Add Modulation > Random. You can see there are other available options. Also, notice you can add modulations to any volume: for the instrument, the track or even the Timeline's Master volume!
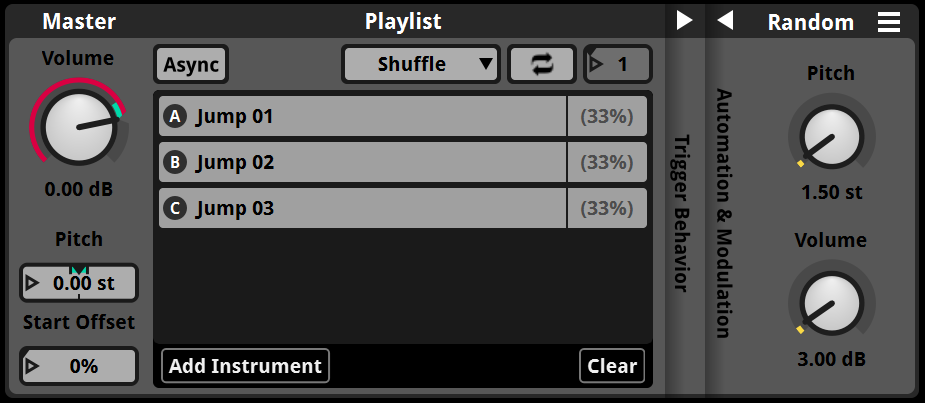
- A Random section will appear on the right. You can now set the randomization range in dB so each time the Multi Instrument is played, it will play with a slightly different volume within the specified range. Notice that we have a visual feedback of that range in the original Volume knob on the right, shown as gray circle sector line!
- We can do the same with the Pitch property, which is also desirable in many cases. Right-click over the Pitch slider and choose Add Modulation > Random again.
- This will add another knob to the existing Random section on the right. There you can specify a pitch variation range in semitones, so when the Multi Instrument is played, it will play with a slightly different pitch within the specified range. Also notice there feedback on the left side Pitch slider, with 2 short lines on the sides of the center triangle, showing the range.
If you want to test the new sound in the game, assign it to the Master bank as done in Lesson 1, step 9 and follow the next steps on Lesson 1 to setup the Banks folder and rebuild the Master Bank. Notice that we have to do that since we opened a new project to do this lesson. While developing a game, we usually set all that up at the beginning of the project and then we only need to rebuild the Banks each time we want to test a new integration.